Category Archives: Technology

Posts related to technology in general.

Repro, Cause & Fix: Using Kerika to Fix Bugs

Interested in using Kerika for software development? Here’s a practical example, taken from one of our own boards, that highlights best practices for tracking, investigating and fixing bugs.

First, a look at our Workflow

Every software development team will want to set up its own workflow, of course, reflecting its internal dynamics and available resources.  Here’s the Scrum Board workflow we use in our team:

Scrum Workflow
Scrum Workflow

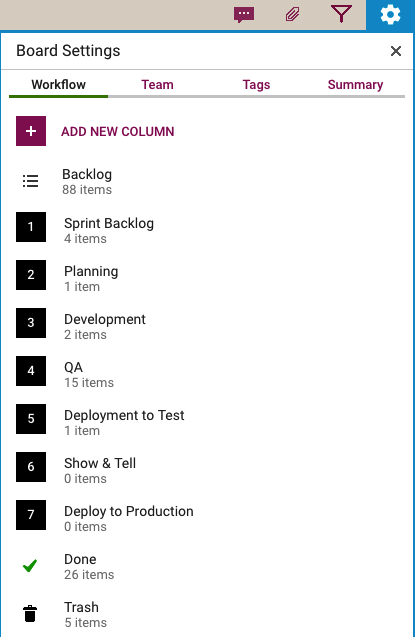
Our Scrum Boards are organized with these columns:

The Backlog contains all the ideas, large and small, that we have on our product road map: in Scrum terminology, it’s our Product Backlog.

The Sprint Backlog is the set of cards that we pulled from the Backlog at the start of this Sprint: right now, only 4 items are left as we are close to the end of our 2-week Sprint Cycle.

Within each Sprint, cards are picked up developers and first moved into the Planning column, where detailed analysis of the work to be done is completed.

Depending upon the complexity of a particular work item, a developer may request a design review before moving the card further into the Development column.

Developers do their own unit testing as part of the Development phase, but then the work item moves further down to the the QA column which frequently includes formal code review.  (More on that below…)

After a bug has been fixed, had its code reviewed and passed unit testing, it gets Deployed to the Test environment.

We usually wait until the 2-week Sprint is over before asking the entire team to present the entire Sprint’s output to the Product Owner for the Show & Tell; this avoids distracting the team midway through the Sprint.

Once the output of a Sprint has passed the Show & Tell, it can then be Deployed to Production.

The Done column shows all the work that got done in this Sprint.  That’s where all cards are supposed to go, but sometimes a work item is abandoned and moved to the Trash.

(Side note: we sometimes use WIP Limits to make sure that people are not over-committed to work, but this is not a consistent practice within our team.)

Logging the bug

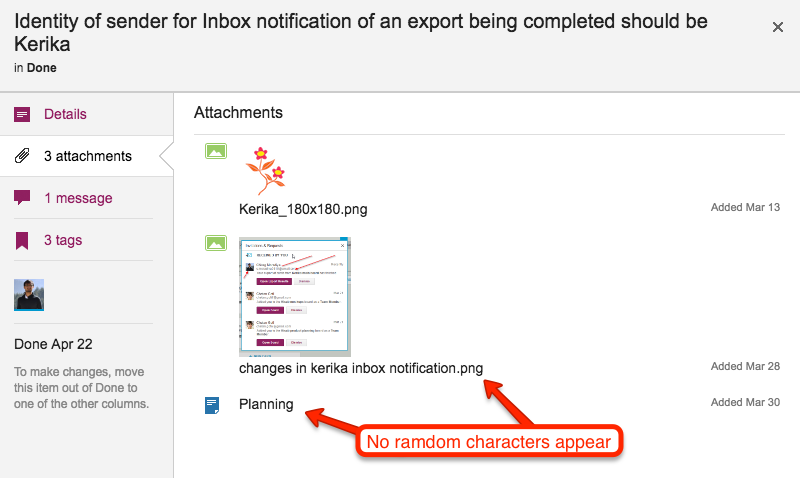
Now, let’s take a look at an example of an actual bug card that was worked on by our team:

Example of a bug tracked as a Kerika card

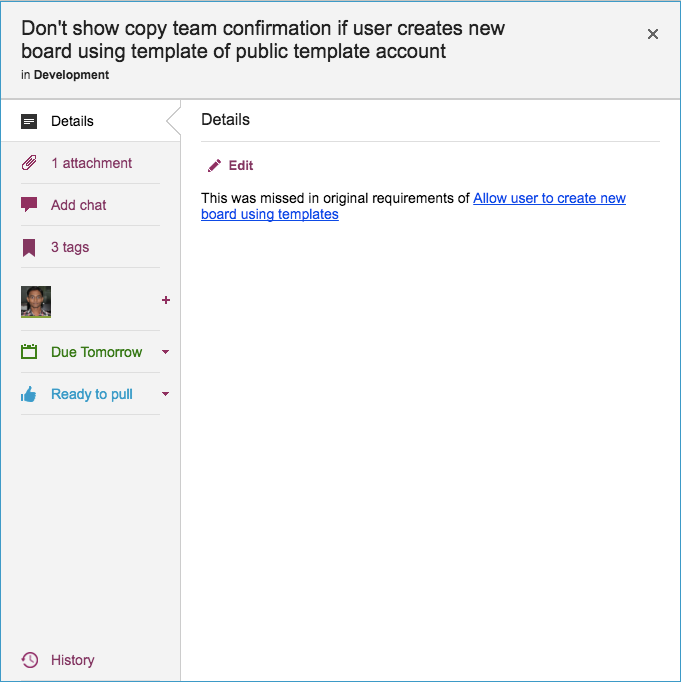
(This particular bug doesn’t have a lot in the details, because it is related to another task that is currently underway, and Kerika makes it easy to link cards, canvases or boards.)

Some bugs go into the Product Backlog, if they are not considered especially urgent, but others go straight into the Sprint Backlog if they represent serious production problems that might affect user’s access or the reliability of their data.

Adding bugs to the Product Backlog lets us process bugs along with other development, e.g. of new features, in the same way: everything can be prioritized by the Product Owner and handled through a consistent workflow.

Documenting the bug

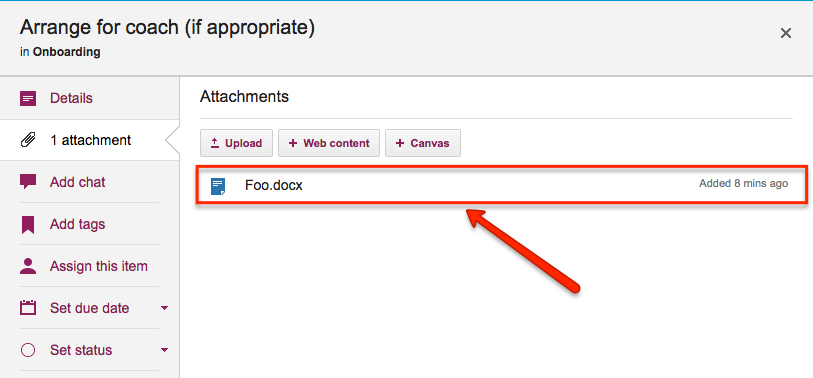
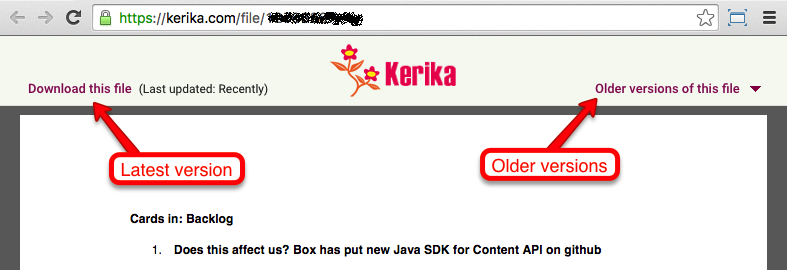
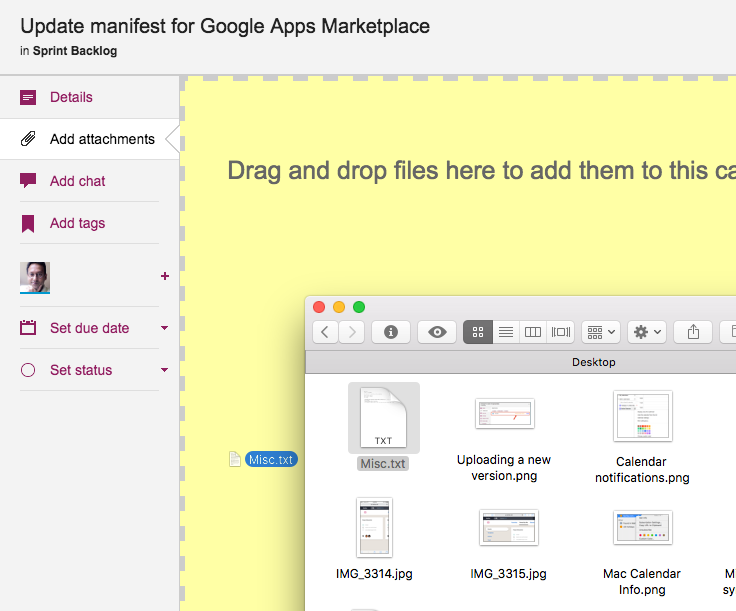
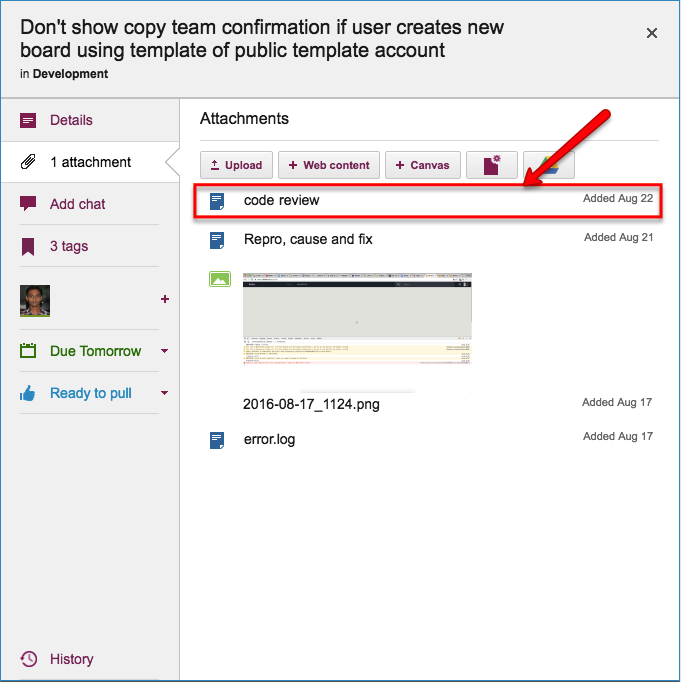
Our bug reports typically come with two attachments; at least one of these should always be included so that the developer has a clear starting point for her work:

  • A screenshot showing the user experience (if the bug can be observed directly by the user.)
  • An excerpt from the error log, if the server reported any errors around the time the bug was observed.
Original bug report documents

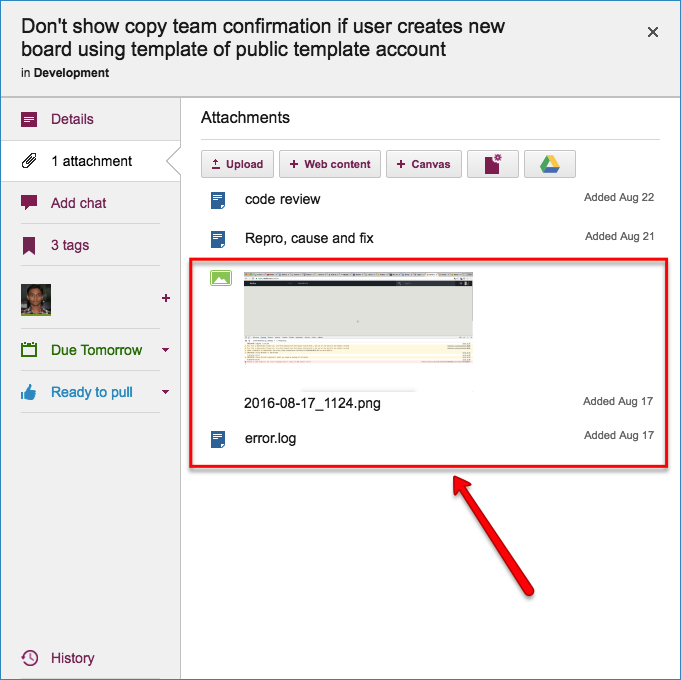
Kerika makes it easy to attach any kind of content to any card, canvas or board: for bug fixing, particularly in the analysis phase, this is very useful if the user needs to include URLs, material from Sourceforge or similar sites, links to Github, etc.

Repro, Cause & Fix

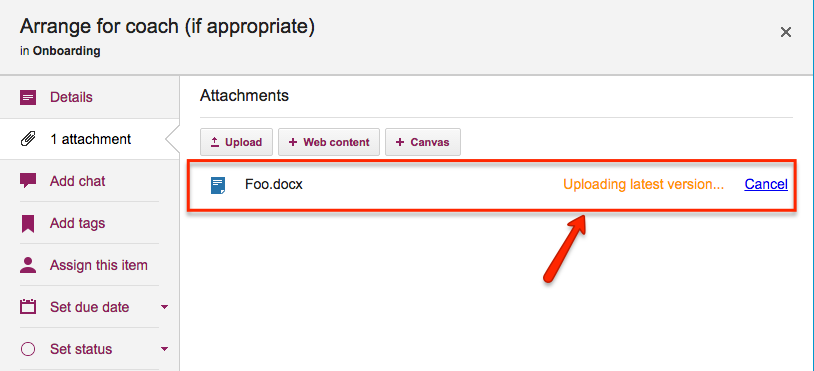
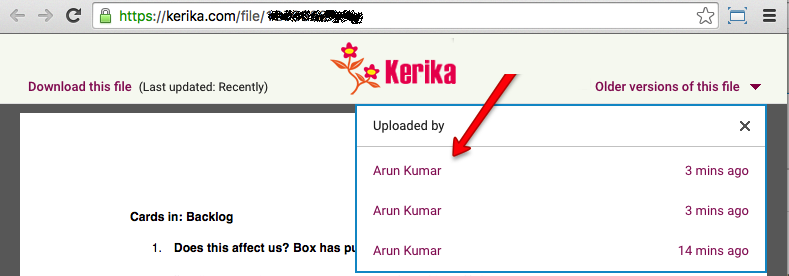
Before any bug is fixed, our developers always add a standard document we call Repro, Cause and Fix as an attachment to the card:

Repro, Cause and Fix

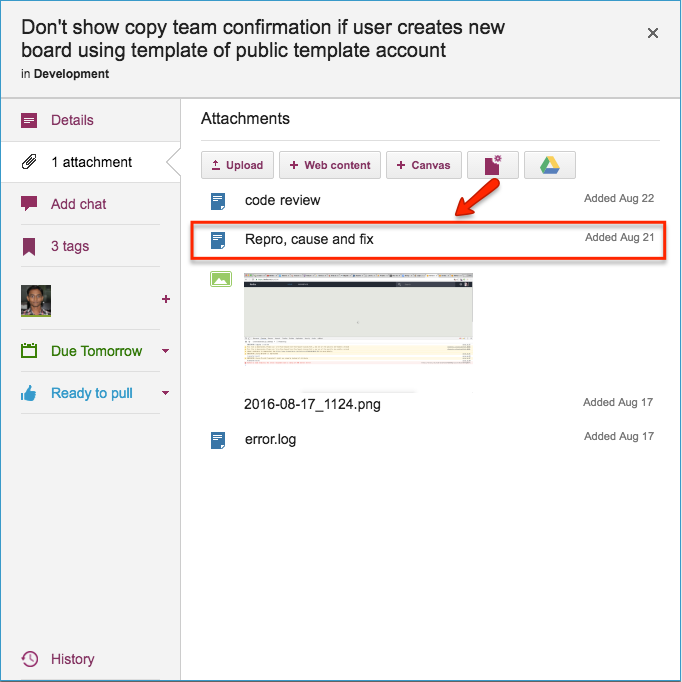
This document is added no matter how trivial the bug.

Why? Because, on average our team goes through about 30-40 cards a week, and has been doing so for years now.  If we don’t document our analysis now, we will never recall our logic in the future.

Repro, Cause and Fix

Repro, Cause and Fix

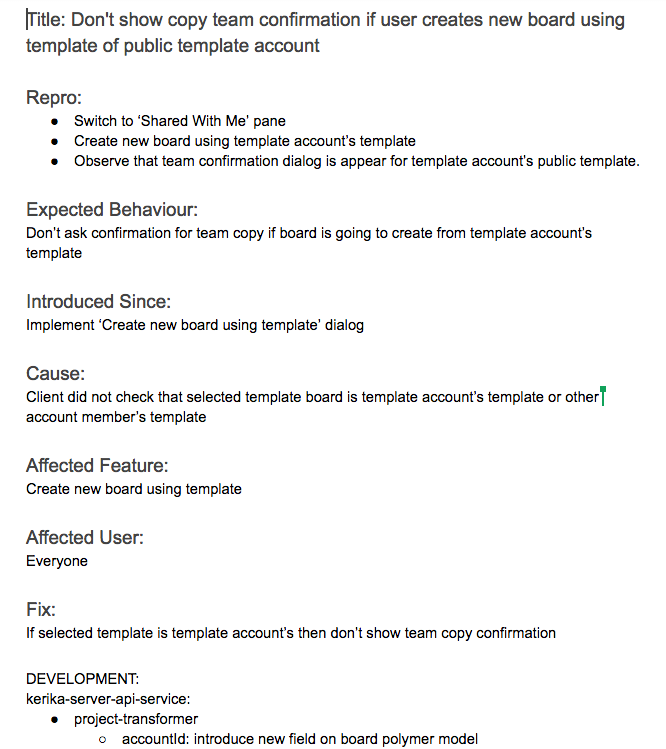
Our team adopts a consistent layout of the Repro, Cause & Fix document, which we adhere to even for trivial bugs:

The Repro Steps are the steps needed to trigger the bug: usually they consist of a specific sequence of actions taken by a user that cause the bug to appear, but they can also consist of a sequence of events in the background, like specific server activity or memory/CPU utilization conditions, or overall network traffic, that trigger the bug.

The Expected Behavior helps clarify the developer’s understanding of the how the software should behave in this situation.  It’s not uncommon for a developer who is new to the team to misunderstand how a particular feature is expected to behave, which could lead to more bugs being introduced.  Clarifying Expected Behavior in this document provides an easy way for the Product Owner and the Team Lead to confirm that the developer is not going to go down the wrong track.

Introduced Since: our developers try to pinpoint the specific point in the software’s life where the bug was introduced.  This helps the developers reflect upon how errors are created in the first place: the blind spots lie in their analytical patterns that need to be strengthened.

(In this particular example, the developer has been able to point back to some of her own work on an earlier feature implementation that caused this bug to appear.)

Root Cause is not the same as the Repro Steps.  While a specific sequence of actions or events may reliably display the effects of a particular bug,  they only provide the starting point for the analysis; the Root Cause itself is discovered only when the developer examines the code in detail and determines exactly what is breaking.

Affected Feature: all of our code goes through code review, which we view as one of the most effective QA processes we could adopt, but it can be very challenging when you are processing 30 cards each week, each affecting a different part of the software.

Identifying the Affected Feature helps with the code review process, since the reviewer can consider the bug fix in the larger context of the feature that’s being modified.  Without this, it is doubtful that we could review so many changes each week.

Affected User: in most cases, this is “everyone” we offer the same Kerika  to all our users, whether they are on free trials or have paid for professional subscriptions.

Identifying Affected Users is useful, nonetheless, when dealing with bugs that are browser-specific, or service-specific: for example, determining that a particular bug affects only Kerika+Google users, or only Internet Explorer users.

The Fix: OK, this might seem obvious, but this section really refers to identifying the specific modules in the software that will be changed as a result of the bug fix being applied.

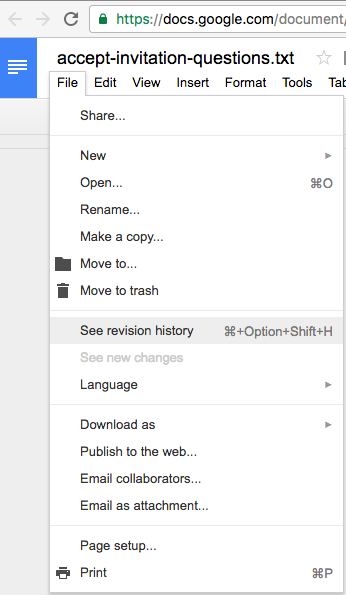
Like many others, we use Git for managing our source code — along with Maven for builds — since our server environment is all Java-based.

Fix
The Fix

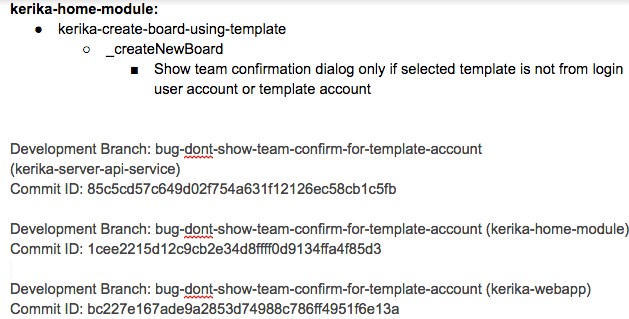
The Fix section usually includes references to Git checkins: this helps with future bug fixes, by making it easy to traceback sources of new bugs — part of the Introduced Since section described above.

We use separate Git branches for each feature that we develop so that we can decide precisely what gets released to production, and what is held back for future work.

This helps with the Show & Tell phase of our workflow, when the developers demonstrate the output of the Sprint to the Product Owner, who has the option to accept or reject specific features (i.e. cards on the Scrum Board).
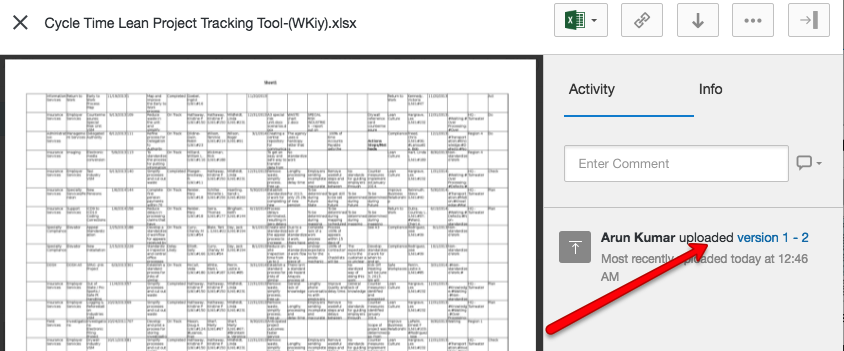
Code Review

All of our code goes through code review, no matter how trivial the change:

Code review
Code review

We really believe that code reviews are one of the most effective QA practices we could adopt: having a second pair of eyes look over code can very considerably reduce the chances of new bugs being introduced.

So…

Kerika is great for distributed software teams: our own team is spread out between Seattle and India (roughly 10,000 miles apart!), and all of our work is done using Kerika for task management, content management and team collaboration.

Of course, an added benefit of “eating our own dogfood” is that we are highly motivated to make sure Kerika is the best tool there is for distributed teams 🙂


How we manage your document versions

Kerika helps you (and your team) manage multiple versions of a document, and it does this so smoothly that you might not even have noticed…

Here’s how it works: when you add a file to a Kerika card or canvas, it shows up in the list of attachments, like this:

File attached to a card

If you then attach another file to the same card or canvas that has the same name and file type, Kerika automatically treats it as a new version of the same file, rather than a completely different file:

Uploading a new version

In the example above, when a Team Member adds another document called Foo.docx to a card that already has a file attached to it with the same name and file type, Kerika treats the new document as a new version of the old Foo.docx rather than as two documents called Foo.docx.

How you access all these old versions depends upon how you set up your Kerika account:

If you are using Kerika+Google, these files are being stored in your Google Drive, and Google will manage the versions for you: you can find this under the File menu in Google Docs

Google Docs versions

And pretty much the same thing is true if you are using Kerika+Box: Box will take care of the older versions automatically, although their user interface is slightly different

Box version history
Box version history

And what if you signed up directly with Kerika, without using a Google or Box ID?

We provide an easy way to get to older versions of a file for users who signed up directly: when you are previewing a file, click on the Older versions of this file link on the top-right.

File preview
File preview

Kerika will show you a list of all the old versions that are available for that file, along with details on who uploaded those versions, and when:

Older versions
Older versions


Why the files in your Kerika+Box folder have random characters appended to their names

If you are using Kerika+Box, we store your Kerika files in your Box account: you can always go to Box.com, login using your Box ID, and see for yourself.

(But, please, don’t move them around!)

What you might notice is that the filenames in Box have some random characters appended to them. For example, a file that you might see listed inside Kerika as “Alternative Home Page” actually shows up with some random characters appended, like this:

URL appended to file names

The reason we do this with files we store in Box — and not for files we store in Google Drive, for our Kerika+Google users, is that Box doesn’t allow for several files within a single folder to have the same name.

(Google does, which is why we don’t need to append any random characters to the files we store in Google Drive.)

It’s very common for our users to have several files within the same board that have the same name: for example, our developers always attach an analysis document to each card that describes exactly what they are doing. (Yes, we are fairly fanatical about documenting our software!)

These documents are often the same for many cards: Analysis.docx or Results.xlsx or Mockup.png might show up hundreds of times within a single board.

Since all the files related to a single Kerika board are stored in the same folder in your Box account, this presents a problem: Box won’t allow for more than one file called Analysis.docx within a folder.

We get around this limitation by appending these random characters, so that effectively every Analysis.docx file has a unique name.

But, we also try to avoid confusing our users, so when we show a list of files attached to a card, we strip out the random characters:

Displaying files as attachments

And the same goes for downloading files: we strip out the random characters and give you a clean-looking file.

Why this blog uses HTTPS

It’s not that we have sensitive stuff on the blog: quite the contrary. It’s just that we have implemented HTTP Strict Transport Security (HSTS) across the entire kerika.com domain.

HSTS s a security mechanism which helps to protect websites against protocol downgrade attacks and cookie hijacking.

It allows web servers to declare that web browsers should only interact with it using secure HTTPS connections, and never via the insecure HTTP protocol.

Since our blog is on a sub-domain of kerika (blog.kerika.com, to be precise), we needed to implement SSL and HTTPS for the blog as well.

Don’t use snapshots of evolving libraries

Some advice to fellow developers: don’t be tempted to use a local snapshot of a rapidly evolving library, like Polymer.

One of our team members was doing this because he thought it would hasten his compilation when he needed to do new builds of Kerika (he is located in an area with somewhat slow Internet connections).

This might, sort of, work with a very stable library, but with something that is evolving fairly rapidly (like Polymer), you run the far greater risk that you snapshot’ed a somewhat buggy version.

That’s what happened to us, leading to a perplexing day of debugging: we had a version of Polymer that didn’t work well with Internet Explorer 11.

Just our luck that our developer took a snapshot of that particular build and then kept it on his local machine…

Bug, fixed: handling situations where drag-and-drop of content won’t work

The easiest way to attach files to a Kerika card, canvas or board is to simply drag and drop it onto Kerika, like this:

Dragging and dropping files onto cards

This works with nearly all kinds of files, but we sometimes hit a limitation, like we discovered when a user tried dragging and dropping an email directly from his Outlook onto Kerika.

This operation used to fail, but in a confusing way: Kerika made it look like it was possible to drop the email onto a card, but the email never showed up.

We have fixed this by checking the kind of content that someone is trying to drop onto Kerika, and if the content isn’t something that can be directly dropped, we don’t show the “drop zone”: the yellow area in the image above that encourages you to drop something onto a card.

And, by the way, if you need to attach an email to a Kerika file, here’s a good workaround: first drag and drop the file onto your computer’s desktop.  That will create a regular file out of the email, which you can then drop onto Kerika.

Tracking Kerika users

If you use Ghostery (which is a pretty cool browser plug-in, by the way), it’s easy to see which “trackers” are being used by a website.

The only tracker that Kerika uses is Google Analytics:

Trackers on kerika.com

Google Analytics is a free service from Google that we use to get a general understanding of who visits Kerika.com, from where, and using which kinds of browsers.

For example, Google Analytics tells us that an amazing 98.27% of all visitors to Kerika.com use the Chrome browser: this is way above the general market share for Chrome, which is about 29.15%!

And that’s the only tracker you will find on Kerika.

Here, by way of contrast, are what news sites like the New York Times and CNN use in terms of trackers:

Trackers on nytimes.com
Trackers on nytimes.com: 11 in total
Trackers on cnn.com
Trackers on cnn.com: 18 in total

Snacking on our cookies

Ever wonder how many cookies Kerika sets when you are logged in, and why?

Here’s the answer:

Kerika's cookies
Kerika’s cookies

The first cookie, called “BAYEUX_BROWSER”, relates to our use of the CometD communications protocol for ensuring that you always get real-time updates whenever you are looking at any Kerika board, no matter which browser you are using.

CometD leverages WebSocket when it can (because it’s the most efficient web messaging protocol), and makes use of an Ajax push technology pattern known as Comet when using HTTP.  Most modern browsers support WebSocket, but we still have some older versions of Internet Explorer out there that don’t support WebSocket.  This cookie helps us track whether your browser supports WebSocket or not.

The next couple of cookies are used simply to keep track of your Kerika session.

The fourth cookie, “i18next”, is really not used much right now, but we hope to make greater use of it in the future.

Right now Kerika is available only in English, but the code was always written to make it easy for us to create versions in other languages, e.g. Spanish, Chinese, etc.  This process is called “internationalization”, and is usually abbreviated as “i18n” by us nerds.

The last two cookies, “last-selected-auth-service” and “tabs”, are used to remember what you were last doing when you were logged into Kerika on that computer: when you log back in, after having logged out, these two cookies help us restore your view of Kerika to exactly where you left off.

As it says on our website, we are committed to transparency, so now you know everything about our cookies.

Want to learn more? Check out our privacy policy.

Kerika+Google users can decide whether to use Google Docs, or stay with Microsoft Office

If you are a Kerika+Google user — you signed up for Kerika using your Google ID (like a Gmail address) — your Kerika files will be stored in your own Google Drive.

Most Kerika+Google users prefer to have their files converted to the Google Docs format when they upload them their Kerika cards, canvases or boards: this makes it easy for them to edit these files from inside a browser.

A small minority of our Kerika+Google users, however, prefer to keep their files in their original Microsoft Office format.

(The most common reason for this is if you are working with complex spreadsheets: Microsoft Excel is still far better than Google’s Spreadsheets!)

If you are a Kerika+Google user, you have a choice of using Google Docs or not: just go https://kerika.com/preferences and select this option:

Google Docs format
Google Docs format

Either way your files will still be stored in your Google Drive; the only difference is whether they are stored in the Google Docs format or kept in their original Microsoft Office format.