“Kerika just got better…” is a message you are seeing almost daily, and that’s thanks to the massive 2-year effort that overhauled our old backend and made it much easier to push out changes.
We are now rolling out bug fixes and feature improvements on a daily basis, using our modern architecture. Previously we had to batch these up and do large upgrades; now we can push out the smallest changes, when we feel they are ready to go.
Under the old architecture taking the servers down for maintenance was a painful necessity; now changes can be deployed without any downtime.
All changes still go through extensive internal testing, and new features go through a lot of usability testing in particular, before anything gets pushed out.
When you include a URL in a task’s details tab or chat, Kerika will look up the URL and then display the title of the page. This is really useful because the URL may be very long and generally unintelligible, and people find the name of the site to be more useful.
Here’s an example, where the URL for the New York Times website is included in a chat message:
After this chat is sent, Kerika will look up the URL and then use the site’s name when the chat is displayed in Kerika, like this:
This is useful most of the time. The original URL, from the Wall Street Journal was long and contained many characters as a suffix that most people would not find helpful.
But sometimes you want the URL itself to be clearly visible, and that’s possible in Kerika if you use the special escape character called the tilde “`” which appears on the top-left corner of English keyboards.
Here’s how you would use the tilde to “escape” the URL you are referencing:
And this is how it would look in the chat stream:
Because you used the tilde character to bracket the URL, Kerika doesn’t try to show the name; instead it shows the URL exactly as it is.
An effort that took 2 years finally completed yesterday when we updated the Kerika app.
This massive project involved rewriting everything on the back-end of Kerika in order to modernize the architecture and set up us for a more rapid development of end-user functionality, as well as making it easier to release new versions in the future using Docker container.
Our old backend was not well designed: everything ran as a single monolithic server. Over the years we moved slowly away from that, by building new features as microservices, and while that helped a little, it wasn’t enough.
We had reached a point where it was taking exponentially more time to build new features, and we were facing operational risk as well because the old backend was poorly understood and document.
A complete rewrite was necessary, and we bit the bullet on that a couple of years ago. There was significant cost and complexity but our great team powered through all the challenges, particularly when it came to transitioning our main database away from MySQL (hosted as RDS, by Amazon) to a NoSQL model using Google’s Firestore service.
Now that we are done we can start delivering more functionality, starting with support for non-English languages.
Stay tuned for our first non-English language, which will be Hindi, to be offered in a couple of weeks.
The transition to remote work has been swift, and digital tools have become the backbone of modern workplaces. However, the landscape of remote work is still fairly new and many teams are still far from their greatest potential. Still, if they polish their processes, remote teams can be as productive as they would on-site, and even more. This article will present digital tools essential to optimize digital workplace workflows and productivity.
Project Management Tools
Project management tools are the backbone of any team’s workflow. Project management tools centralize your team’s tasks and projects, enabling employees to manage tasks, deadlines, and resources.
Use a project manager to track progress and identify any bottlenecks. Likewise, logging tasks and project information adds a layer of transparency and accountability to project management tools.
In any case, your workflow can only be as good as the project management software you use allows you to. Some of the most popular project management tools available include Asana, Trello, and Basecamp. However, Kerika stands out from the rest by its own merits.
Kerika: The Ultimate Management Tool for Remote Teams
Kerika is a powerful project management tool that helps teams work efficiently and collaboratively. It offers a variety of features to meet the requirements of the most demanding users. Here are some of the features that make Kerika a must-have tool for any digital workplace:
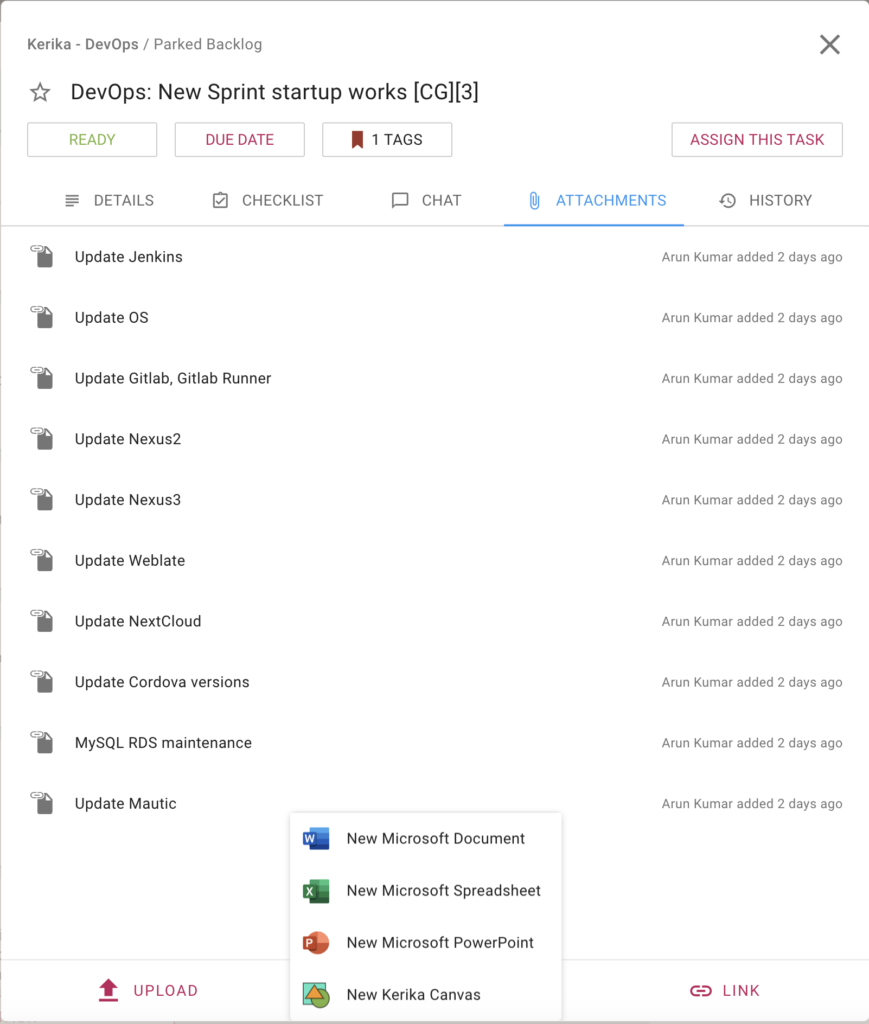
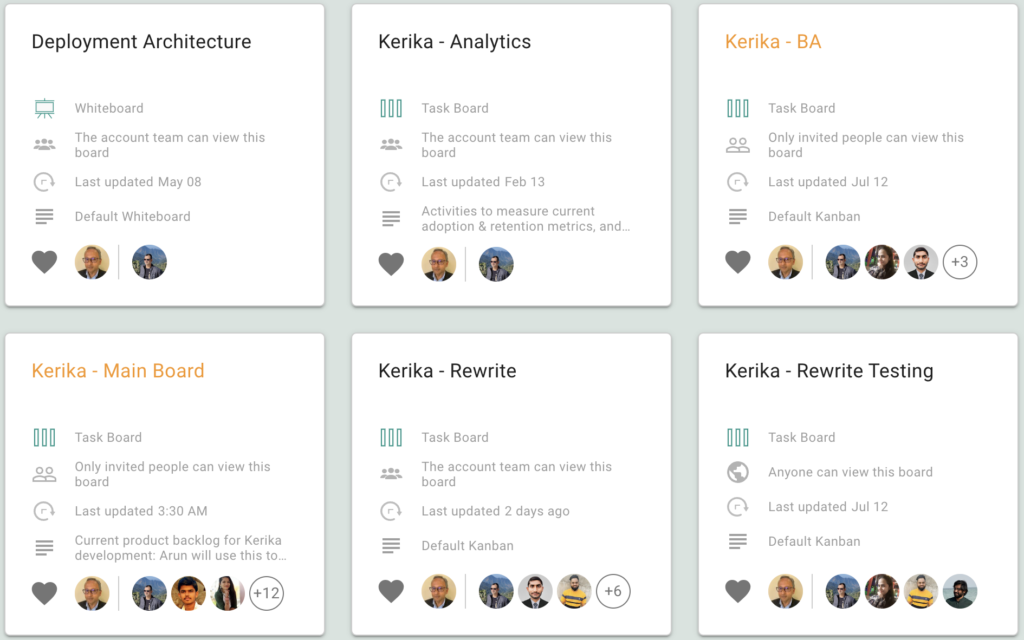
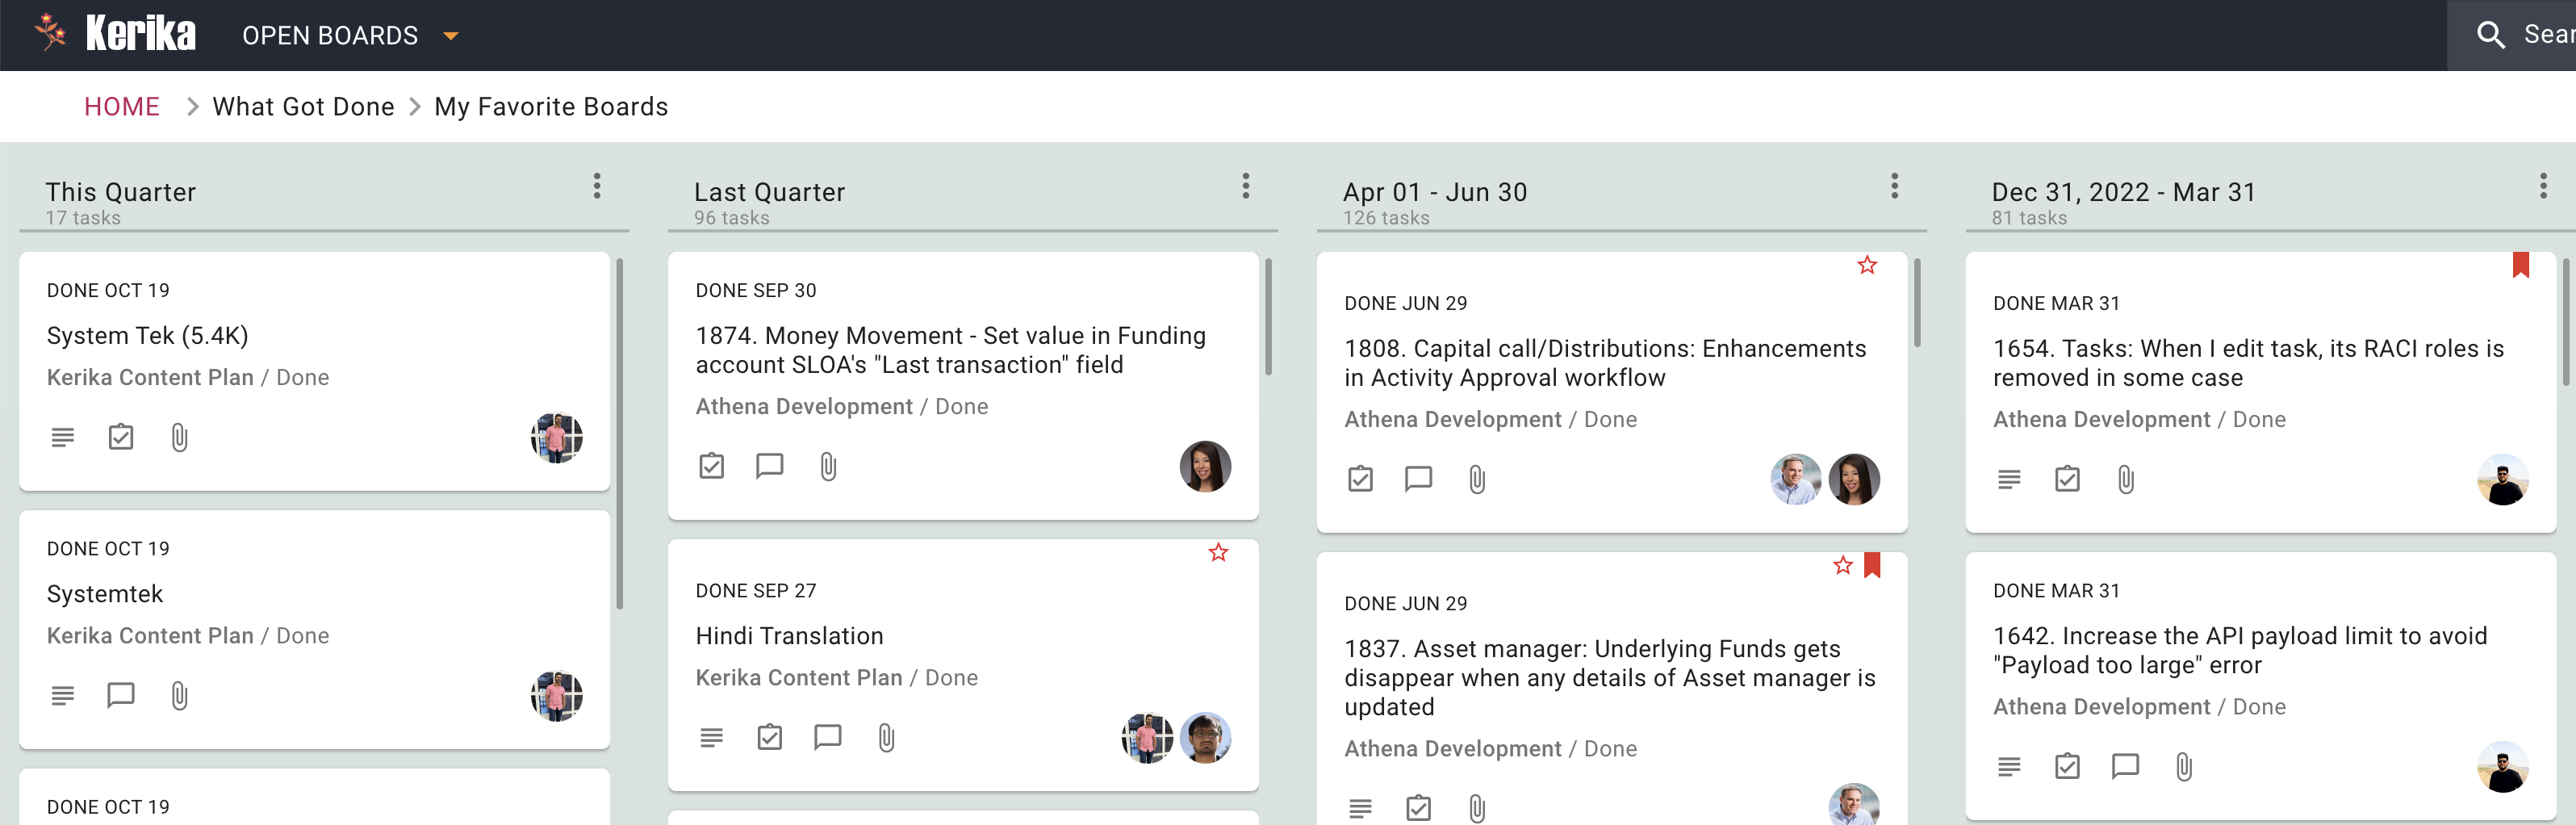
Visual Boards. Whiteboards and task boards from which users can see the big picture of a project. Visualize the workflow and identify any bottlenecks at a glance.
Integrated Chat. This feature eliminates the need for external communication tools to collaborate since team members can communicate in real-time without leaving the platform.
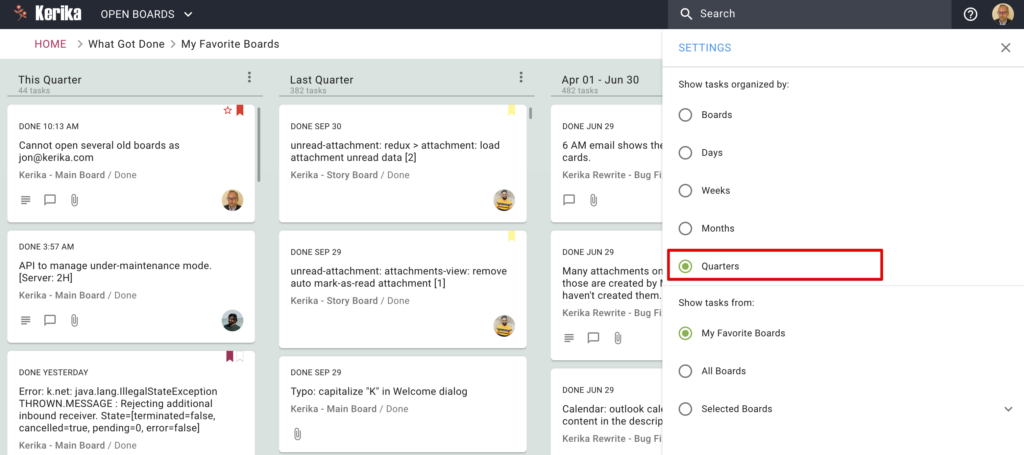
Task Assignments. Easily assign tasks to team members and track their progress in a complex yet intuitive tasks board. Ensure that everyone is aware of their responsibilities and deadlines, making it easier to complete projects on time.
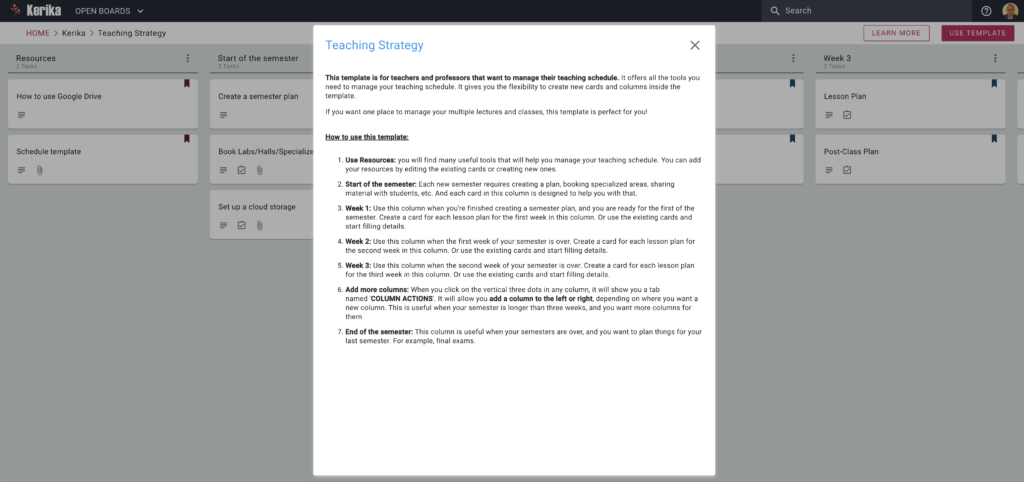
Customizable Templates. Kerika offers customizable project board templates that can be used for different types of projects. Save time and ensure that all team members are on the same page. Plus, templates are handy for onboarding new employees into your workflow.
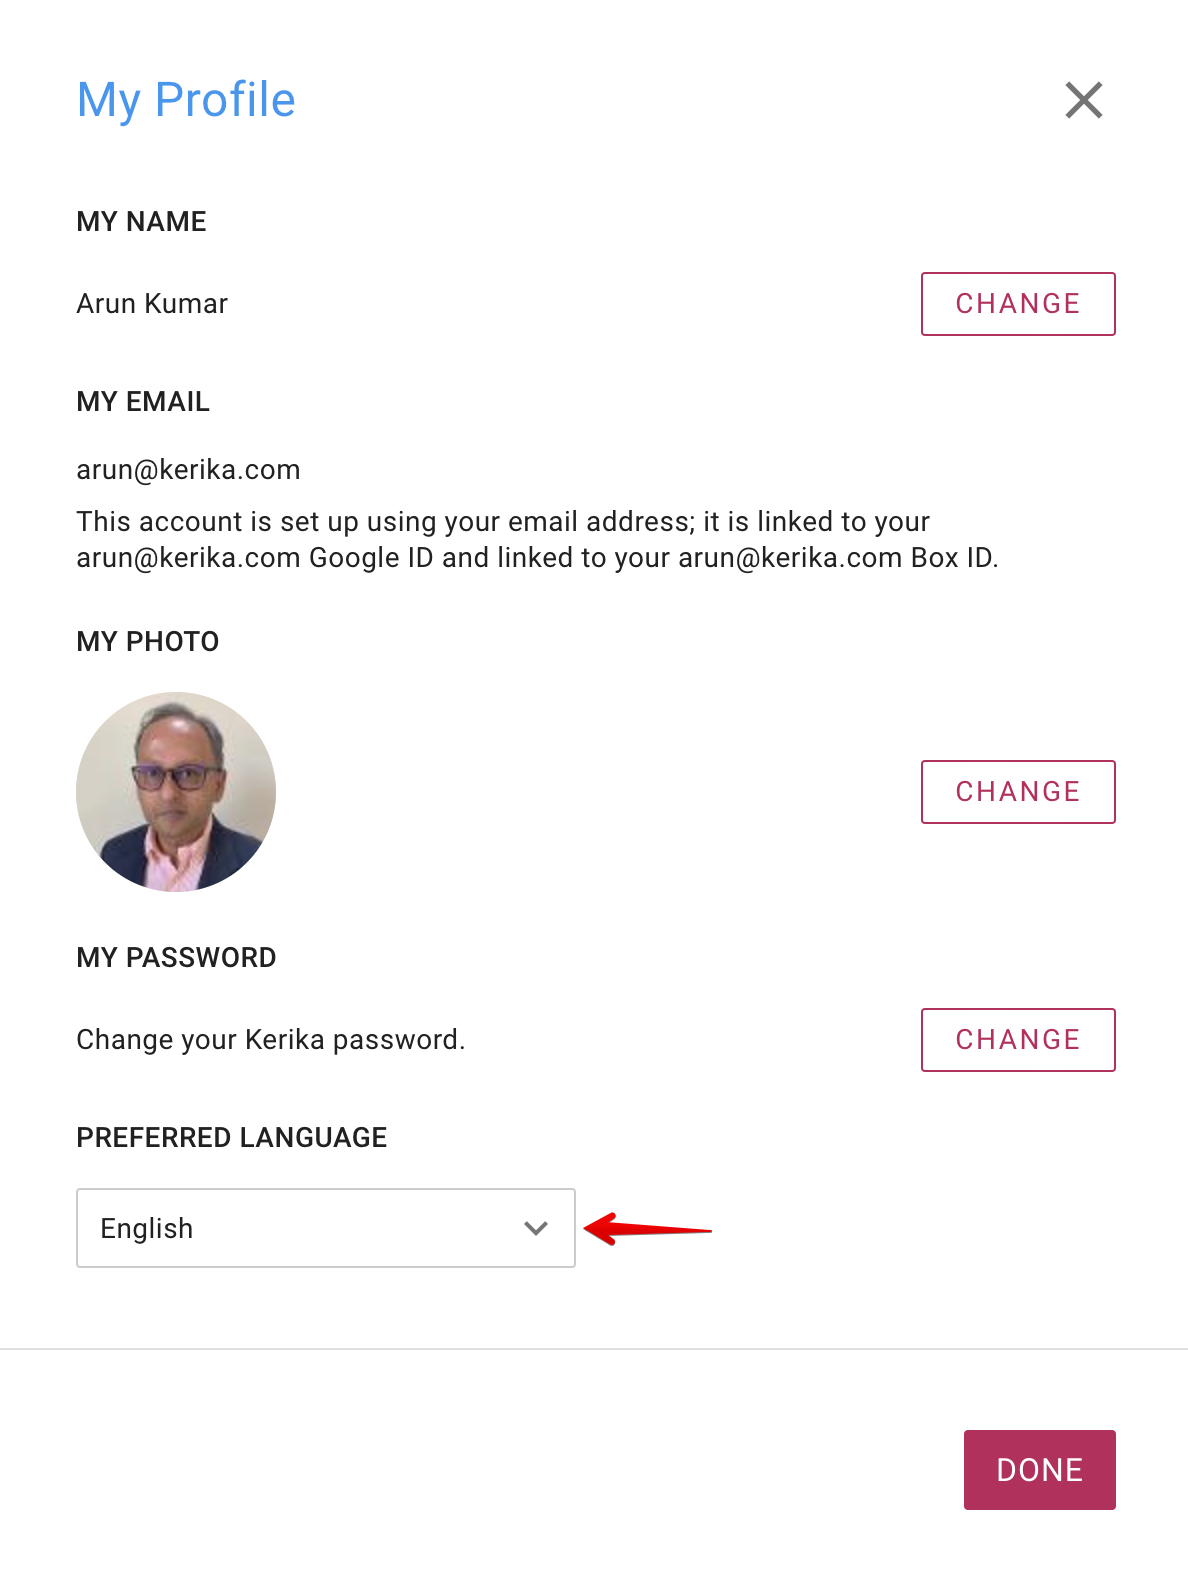
User-Friendly Interface. Kerika’s user-friendly interface makes it easy to navigate and use, so everyone on the team can use the tool without any training or technical expertise.
File Sharing and Collaboration Software
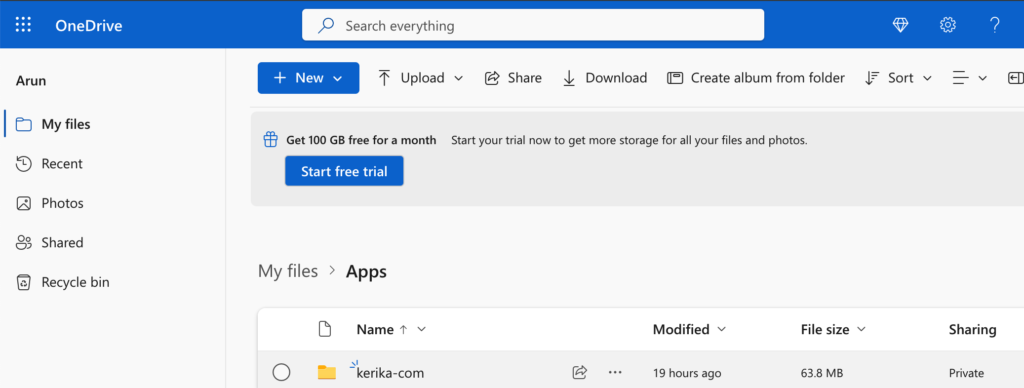
File-sharing software enables employees to store and work with files no matter where they are located and from multiple devices. Such flexibility reduces the time and effort needed to search for documents or to track down the latest version of a file, something methodic and disorganized employees enjoy alike.
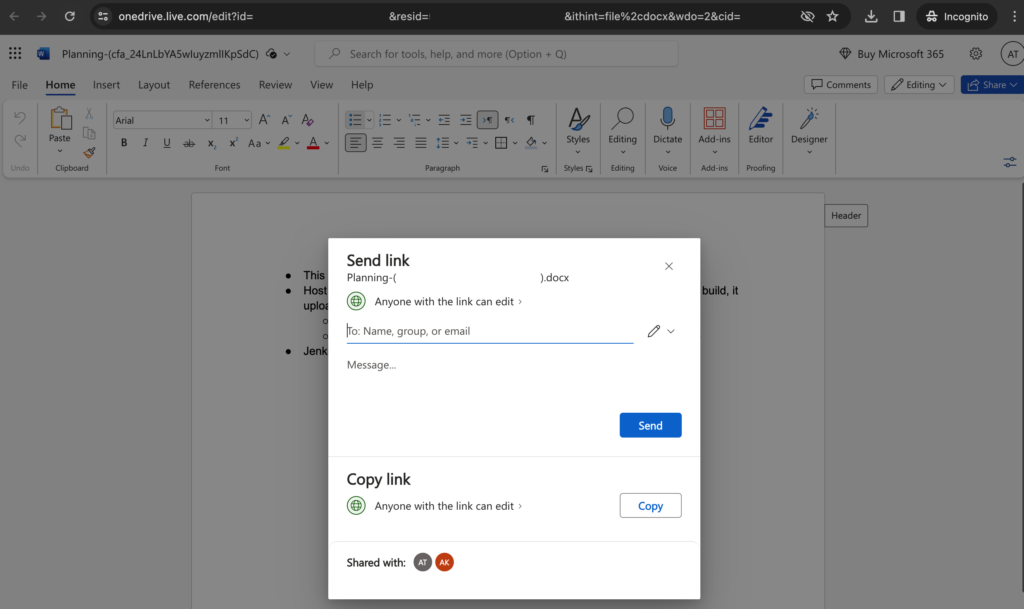
File-sharing tools such as Google Drive also enable multiple people to collaborate on the same document simultaneously, opening the possibility of real-time feedback and faster completion of tasks. In like manner, users can easily leave comments and make suggestions.
Administrators can easily control who has access to specific files or folders, ensuring that confidential information is kept secure. Permissions can be set to allow different levels of access to different users, making it easy to share files with only those who need to see them.
Communication Platforms
Effective communication is key to a successful digital workplace. With communication platforms such as Slack, Microsoft Teams, and Zoom, team members can stay connected and work together seamlessly through video and audio calls, and screen and file sharing.
On the other hand, video conferencing tools with virtual reality (VR) technology are a more cutting-edge option. VRth finds industrial applications in industries such as architecture and engineering by allowing teams to visualize and interact with 3D models Yet, VR can also work as a space for brainstorming, meetings, and events. To know more about VR meeting platforms, check Virbela and NextMeet.
Cybersecurity Tools
Cybersecurity tools such as firewalls, and intrusion detection systems help businesses to protect their data from cyber threats. On the other hand, these tools also help businesses to comply with data protection regulations such as the General Data Protection Regulation (GDPR) and the California Consumer Privacy Act (CCPA).
Additionally, virtual private networks (VPNs) are essential for any business that values data privacy and security. VPNs create a secure and encrypted connection between a business’s network and the internet, preventing unauthorized access to sensitive information. VPNs are especially important for remote workers who need to access company resources from outside the office. Here is a list of some of the cheapest VPNs.
Process Automation Software
Business process management software can help businesses streamline their operations by automating repetitive tasks and workflows, including data entry, invoice processing, and customer service.
Besides, artificial intelligence (AI) technology is increasingly being used to improve productivity in the digital workplace, taking care of complex tasks and clearing humans from them. AI-powered productivity tools can help automate tasks, provide personalized insights and recommendations, and analyze data to identify opportunities for improvement. Tools of this kind include beautiful.ai, for coming up with presentations, and Mem made to organize information.
Mind Mapping Software
Mind mapping software can help teams visualize and organize complex ideas and concepts through brainstorming, planning, and collaborating. Among popular mind-mapping tools, we find MindMeister, MindManager, and XMind.
On the other hand, digital whiteboards can help teams collaborate and brainstorm more effectively, especially in remote settings: Visualize ideas by drawing or writing them, or share them with others and receive feedback. Popular digital whiteboard tools include Miro, Google Jamboard, and Microsoft Whiteboard.
This template is for teachers and professors that want to manage their teaching schedule. It offers all the tools you need to manage your teaching schedule. It gives you the flexibility to create new cards and columns inside the template.
If you want one place to manage your multiple lectures and classes, this template is perfect for you!
How to use this template:
Use Resources: you will find many useful tools that will help you manage your teaching schedule. You can add your resources by editing the existing cards or creating new ones.
Start of the semester: Each new semester requires creating a plan, booking specialized areas, sharing material with students, etc. And each card in this column is designed to help you with that.
Week 1: Use this column when you’re finished creating a semester plan, and you are ready for the first of the semester. Create a card for each lesson plan for the first week in this column. Or use the existing cards and start filling details.
Week 2: Use this column when the first week of your semester is over. Create a card for each lesson plan for the second week in this column. Or use the existing cards and start filling details.
Week 3: Use this column when the second week of your semester is over. Create a card for each lesson plan for the third week in this column. Or use the existing cards and start filling details.
Add more columns: When you click on the vertical three dots in any column, it will show you a tab named ‘COLUMN ACTIONS‘. It will allow you add a column to the left or right, depending on where you want a new column. This is useful when your semester is longer than three weeks, and you want more columns for them.
End of the semester: This column is useful when your semesters are over, and you want to plan things for your last semester. For example, final exams.
If you’re a business owner or a freelance content writer, it’s important to have a content strategy. Without a solid content strategy, you end up wasting a lot of time managing your content.
By having a solid plan and sticking to it, you won’t have to spend time coming up with new ideas or scrambling to meet deadlines. One of the best ways to build a content strategy is to use a content planner.
A Sample Board to View
Whether you’re working alone or with a team, a good content planner can really boost your productivity. So, let’s see how this company uses a content planner to plan and publish its SEO content.
Click on this image to view this sample board, live!
A Free Template to Use
If you found this board interesting, here’s a free Template from Kerika that you can use to set up your own board in just seconds:
Click on this image to view the Template.
The rest of this article will walk you through the process of using this template:
Step 1: Gather resources
If you’re a serious content writer, you already know the importance of gathering resources before you start writing. After all, you need to have something to write about!
One of the best ways to manage your gathered resources is to use a Content Planner. A Content Planner can help you organize your thoughts and ideas, and it can also help you find new and relevant information to write about.
Step 2: Research Content Ideas
Before you start writing, you need to have an idea of what you want to write about. Make a list of content ideas that you think would be popular with your audience.
You can get content ideas by checking out your competitors, looking for news stories, looking for guest post ideas, and brainstorming ideas with your team.
Step 3: Drafting
Now it’s time to start writing your content. Keep your keywords in mind as you write and try to include them naturally in your text.
Step 4: Designing graphics content
Graphics in blogs capture your reader’s attention, communicate your message more clearly, and overall make your blog more visually appealing.
Once the article is ready, the next step is to add graphics to it. Graphics are important to capture your reader’s attention and make your blog more visually appealing.
Step 5: Integration/Schedule Content:
Once you’re finished writing, you need to integrate your content into your website. You can do this by adding a blog to your website or by scheduling your content to be published on your website later on.
Step 6: Promote Content
Finally, you need to promote your content. You can do this by sharing it on social media, writing guest posts on other blogs, or by paying for advertising.
If you’re a business owner or a freelance content writer, it’s important to have a content strategy. Without a solid content strategy, you end up wasting a lot of time managing your content.
By having a solid plan and sticking to it, you won’t have to spend time coming up with new ideas or scrambling to meet deadlines. One of the best ways to build a content strategy is to use a content planner.
Whether you’re working alone or with a team, a good content planner can really boost your productivity. So, let’s see how this company uses a content planner to plan and publish its SEO content.
Click to view this live Template
1. Gathering resources
If you’re a serious content writer, then you already know the importance of gathering resources before you start writing. After all, you need to have something to write about!
One of the best ways to manage your gathered resources is to use a content planner. A content planner can help you organize your thoughts and ideas, and it can also help you find new and relevant information to write about.
2. Research Content Ideas
Before you start writing, you need to have an idea of what you want to write about. Make a list of content ideas that you think would be popular with your audience.
You can get content ideas by checking out your competitors, looking for news stories, looking for guest post ideas, and brainstorming ideas with your team.
3. SEO optimization
Without SEO-optimized content, your articles and blog posts will never be seen by search engines, and you will never get the traffic you desire. Therefore, you need a solid SEO strategy.
4. Drafting
Now it’s time to start writing your content. Keep your keywords in mind as you write and try to include them naturally in your text.
5. Designing graphics content
Graphics in blogs capture your reader’s attention, communicate your message more clearly, and overall make your blog more visually appealing.
Once the article is ready, the next step is to add graphics to it. Graphics are important to capture your reader’s attention and make your blog more visually appealing.
6. Integration/Schedule Content
Once you’re finished writing, you need to integrate your content into your website. You can do this by adding a blog to your website or by scheduling your content to be published on your website later on.
7. Promote Content
Finally, you need to promote your content. You can do this by sharing it on social media, writing guest posts on other blogs, or by paying for advertising.
From the moment a new hire walks in the door, they start forming opinions about your company culture, their role within the organization, and what it will be like to work for you. That’s why when it comes to hiring new employees, first impressions matter.
When done correctly, on-boarding can help new hires feel welcome, valued, and prepared to do their best work. But when done poorly, there are a lot of things that could go wrong. Here are a few tips to help make your on-boarding process as smooth as possible:
1. Start with the background check
Before you bring a new employee on board, it’s important to run a background check. This will help you verify that the person is who they say they are and that they don’t have any red flags in their past that could negatively impact your business.
A background check can also give you peace of mind that you’re making the best hiring decision possible. To know about a candidate, you need a process that ensures the new employee is the right fit for the job. Check out how this company conducts a background check for its new employees.
Click to view this live board
Check one business reference
When it comes to bringing on new employees, it’s important to do your due diligence and check their business references. This will help you get a better sense of their work ethic and what they’re capable of.
Check one business reference
Check one personal reference
Personal references can give you valuable insights into an applicant’s character, work ethic and overall suitability for the job. They can also alert you to any red flags that might not be apparent from their resume or cover letter.
Asking for personal references is a simple but effective way to screen applicants and make sure you’re making the best possible hiring decision.
Check one personal reference
Check applicant’s resume/CV for completeness & accuracy
While on-boarding a new employee, it’s important to check their resume or CV for completeness and accuracy. This will help you ensure that there are no discrepancies in their work history.
If you find any inaccuracies, be sure to follow up with the employee to get clarification. It’s also a good idea to run a background check to verify the information on the resume. By taking these precautions, you can help ensure a successful on-boarding process for your new employee.
Check applicant’s CV for completeness & accuracy
Confirm that applicant has all claimed academic & professional qualifications
It’s always a good idea to confirm that an applicant has all of the claimed academic and professional qualifications before onboarding a new employee. This can help ensure that the individual is qualified for the role and can help avoid any potential issues down the road.
There are a few ways to go about doing this, such as contacting references or requesting transcripts. Take the time to do your due diligence and it will pay off in the long run.
Confirm that applicant has all claimed academic & professional qualifications
Credit Checks
Credit checks are an important part of the onboarding process for new employees. They help employers to verify an applicant’s identity and to ensure that the person is who they say they are. Credit checks also help to determine an applicant’s financial stability and to assess their risk of defaulting on their financial obligations.
(Optional) Credit Checks
2. Get the necessary paperwork
Make sure you have all the necessary paperwork in order before the new employee starts. Here is a good example of how a US-based company collects all the necessary paperwork upfront from a new employee. The paperwork includes the W-4 form to calculate taxes, the I-9: form to verify the employee’s identity and eligibility to work in the US, the direct deposit form, and the employee handbook acknowledgment.
Complete the necessary paperwork
3. Set clear expectations from the start.
New employees should know what is expected of them in their new role, and the best way to do this is to set up an Orientation Program and Schedule mandatory training sessions.
Orientation Program
The Orientation Program is a great opportunity for employees to learn more about their role, and ask questions and get to know their colleagues.
For the Orientation Program to go smoothly, choose a date and time that work for both you and the employee. You’ll want to make sure the program is informative and engaging. If your new employee feels welcomed and comfortable, they’ll be more likely to hit the ground running and be productive from day one.
Schedule Orientation Program
Schedule mandatory training sessions
Training sessions for compliance and regulation are important for several reasons. First, they ensure that new employees understand the company’s policies and procedures from the day one.
Second, they help to ensure that employees are up-to-date on any changes in the law that may affect their job.
Finally, training sessions provide an opportunity for employees to ask questions and get clarification on any points that are unclear.
Schedule mandatory training sessions
4. Make sure they have all the information about their team and department.
New employees should feel informed about their role, the company, and the team they’ll be working with. In the following example, the HR has organized a team lunch. This is a great to way to introduce a new employee, this gives a employees get to know each other well.
The department is also getting introduced to the new employee, and this is just as important. So a formal announcement about the new employee, helps existing employee know them better.
Prepare departmental announcement
And last, but not least, don’t forget a Team Lunch on Day One!
According to researchers at Ladders, 25% of professional jobs in North America will be remote by the end of 2022. Remote jobs skyrocketed from under 4% in 2019 to 9% in 2020 alone. This means that working from home is here to stay.
With this change in the job market demand, distributed teams have become more common and will continue to be adopted by small and big businesses alike. The need to secure company and employee data is important given the rise of internet scams. It is advisable to have all team members engage in security awareness training to have them prepared against malicious hackers and phishing sites.
Here are measures distributed teams can take to protect themselves and the company from a security breach.
Public Wi-Fi
Avoid using public Wi-Fi, especially from unknown service providers. If you must connect to a public server ensure you have a VPN installed on your computer to prevent hackers from monitoring your internet activity.
Social engineering
Social engineering uses manipulative techniques to gain confidential information that can put an individual or company at risk of cyber-attacks. Hackers have gotten smarter over time creating the need to be cautious mainly when workers use their own devices for office duties. Here are tips to save you from falling victim to such scams.
Be suspicious if an unknown person asks you for information, they shouldn’t have access to it. All workers have team leaders they report to or team members that handle specific company data. If someone aside from the usual team member is asking for such data, be alarmed and report it to your team leader.
Pay attention to emails. It can be daunting to always have to check an email sender to be sure you’re not under a phishing attack, but it can save you from putting your company at risk. Look out for grammatical errors and the sender’s email address to be sure they aren’t impersonating your company’s or an employee’s email.
Beware of heightened urgency. Resist the rush to perform an action if you are feeling pressured to perform a certain action. Creating urgency is a common tool phishing scammers use to make their victims act fast. You should be more suspicious if the person is trying to make you ignore a mandatory security protocol.
Always hover over links to see where they lead. Don’t be quick to click links and open attachments sent to you from new contacts. Offerings of things that are too good to be true are not true. An example is an email congratulating you on an iPhone in a competition you never attended.
Never download unauthorised software or plug in an unauthorised drive or USB to your device.
Setting passwords
Most websites will tell you to create an 8-character password that contains uppercase letters, lowercase letters, numbers, and symbols that should be changed every 90 days. However, cybercriminals now use technology that allows them to crack an 8-character password in 4 hours. That’s why you should be using strong password management.
Instead, use a 12–16-character password with uppercase and lowercase letters, numbers, and special characters. You can create a passphrase using multiple small words like “tiNyTombSPoon.” Combining your passphrase with numbers and special characters is advisable for added difficulty. Complex passwords like this should be changed every two years.
Never save passwords to browsers. Never share your passwords with anyone or log in to your work accounts with public computers. Ensure you use a unique password for each account, you can use a password keeper if necessary.
Always use two-factor authentication for all your accounts. Never use the same passwords for your personal and work accounts. Make sure to separate your personal and work life.
Security awareness at home
In a world of distributed teams, it is normal for workers to spend more time at home than in an office. Here are measures that can be taken to stay safe when working from home.
Never grant anyone access to your desktop unless you sort the remote connection. Always be careful of remote desktop inquiries. Never give out your login details to anyone over email or phone without consulting your supervisor.
Don’t respond to non-company numbers or messages regarding an issue when you didn’t open a ticket.
If you will be filling your data into any websites while working, ensure they begin with https://
Ensure your Wi-Fi router is secured with a strong password. Always restart your router frequently.
Keep your working devices out of the reach of family and guests. Use a different internet network for work and family or guests.
Only use company-approved USB sticks. Never use unencrypted USB sticks to connect or charge your work device in public places.
Never leave your work device unattended. If you aren’t actively using your device ensure you exit your work screen and lock or close your device.
Security awareness in videoconferencing
All virtual meetings should be cyber-safe and not open to the public. Links to video meetings must not be shared on public sites. Ensure all meetings require passwords to join. Avoid starting a meeting without the host – rather create a meeting room.
Enable host-only sharing, accept one user at a time, and lock the meeting after all the participants are in.
Other security measures
Avoid using your personal computer or smart devices for work. Ensure your operating system, antivirus and apps are updated frequently.
Beware of phishing links sent to your email. Alert your family members on using your devices without your supervision.
Beware of pop-ups on free movie sites and apps asking you to install software from unverified sources.
Conclusion
Although it is impossible to be 100% secure, raising awareness of the cybersecurity risks and taking all security measures stated above is key to preventing a security breach that can lead to catastrophic events. Ensure each team member is properly oriented on security measures to employ and things to look out for to prevent getting hacked.
We have added an exciting new feature: if you were previously using Trello, you can import that data, completely, into Kerika!
We have been testing this as a convenience feature and based upon positive feedback we have expanded this for everyone.
New users will be offered this as an option when they set up their Kerika accounts:
How new Kerika users can import boards from Trello
All users will have this option whenever they want to create a new Kerika board:
All users can import from Trello when creating a new Kerika board
We built this feature because we have heard from many people switched over from Trello and really liked Kerika’s user experience, features, and support. In the past they had to manually recreate their work inside Trello; now that’s all automated!
Everything is handled nicely: your Trello cards, lists, people, task details, etc. come over. Once you are done, a single click can then send out invitations to all your old Trello colleagues to join you in Kerika.
Enjoy.
This website uses cookies to improve your experience. We'll assume you're OK with this, but you can opt-out if you wish.AcceptRead More
Privacy & Cookies Policy
Privacy Overview
This website uses cookies to improve your experience while you navigate through the website. Out of these, the cookies that are categorized as necessary are stored on your browser as they are essential for the working of basic functionalities of the website. We also use third-party cookies that help us analyze and understand how you use this website. These cookies will be stored in your browser only with your consent. You also have the option to opt-out of these cookies. But opting out of some of these cookies may affect your browsing experience.
Necessary cookies are absolutely essential for the website to function properly. This category only includes cookies that ensures basic functionalities and security features of the website. These cookies do not store any personal information.
Any cookies that may not be particularly necessary for the website to function and is used specifically to collect user personal data via analytics, ads, other embedded contents are termed as non-necessary cookies. It is mandatory to procure user consent prior to running these cookies on your website.