Tag Archives: Usability

About software usability in general.

Using the AI Helper to improve your Task Details and Chat

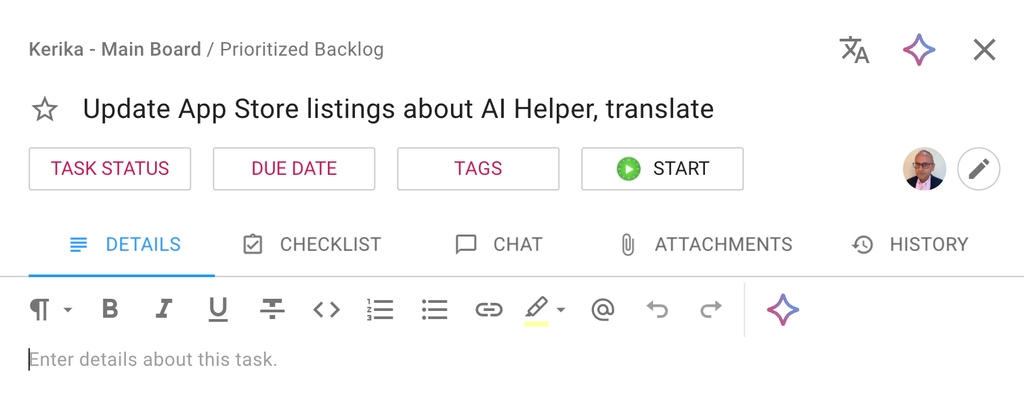
The AI Helper can now help you write better Task Details and chat messages: when you are editing a task’s details or writing a chat message, an AI button appears on the extended toolbar we recently implemented. Clicking on the AI icon brings up the AI Helper and immediately asks it to help you with your writing:
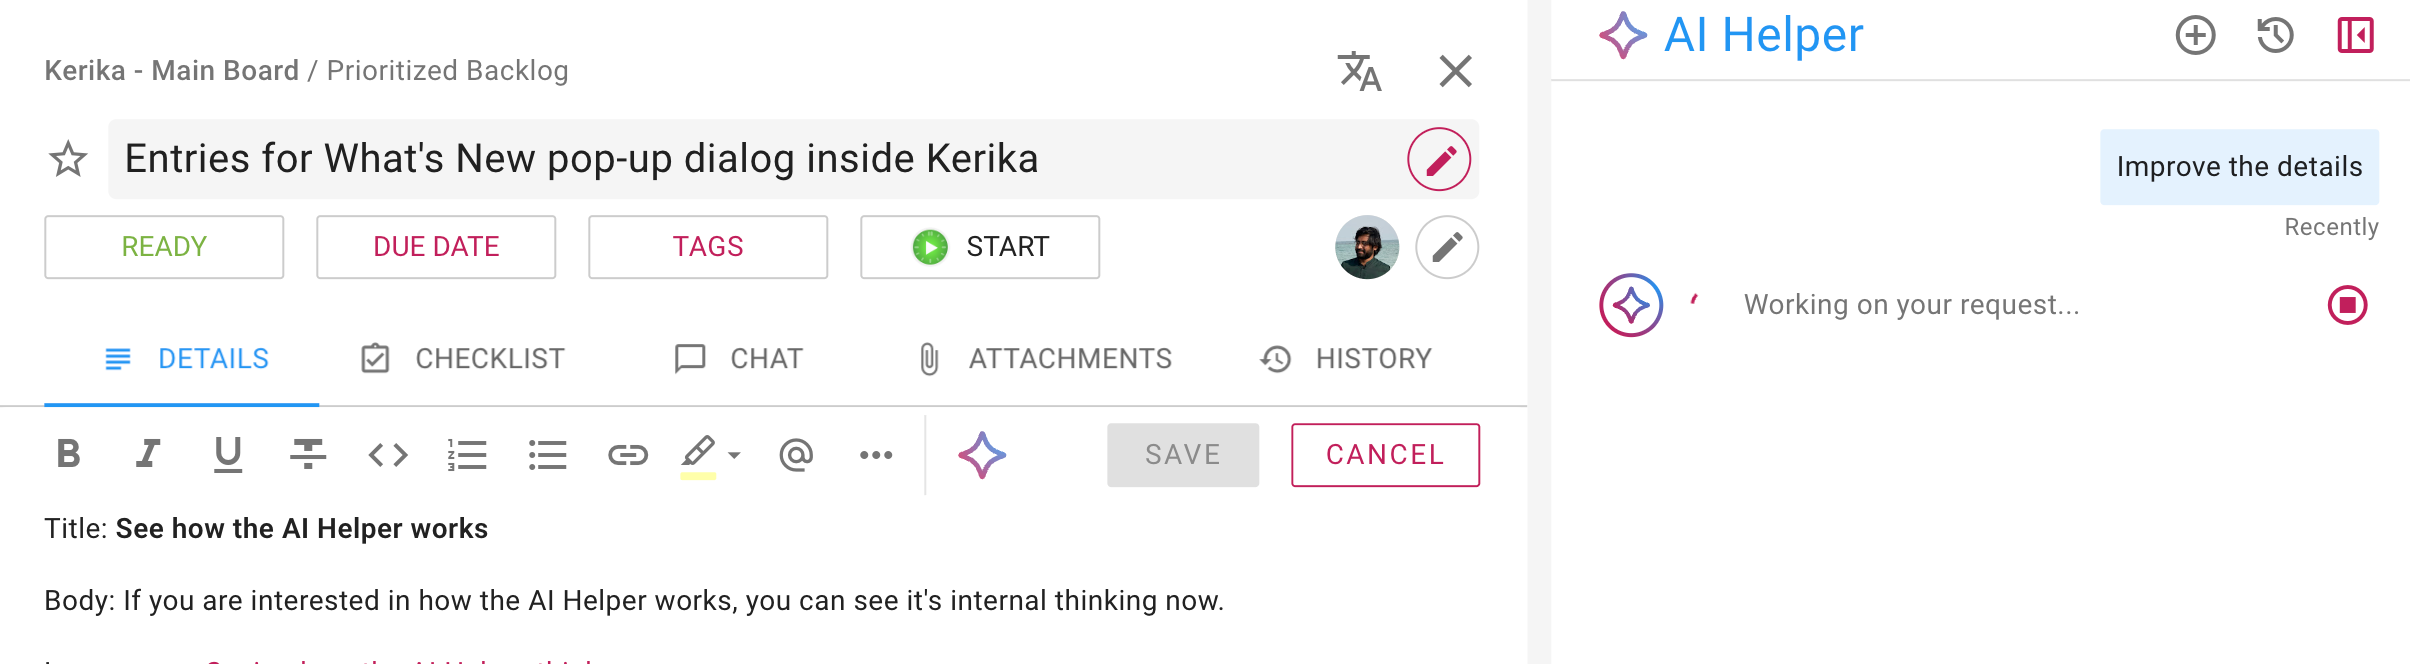
Screenshot showing the AI Helper working on reading the existing task details.

Here’s what the AI Helper suggested in this example:
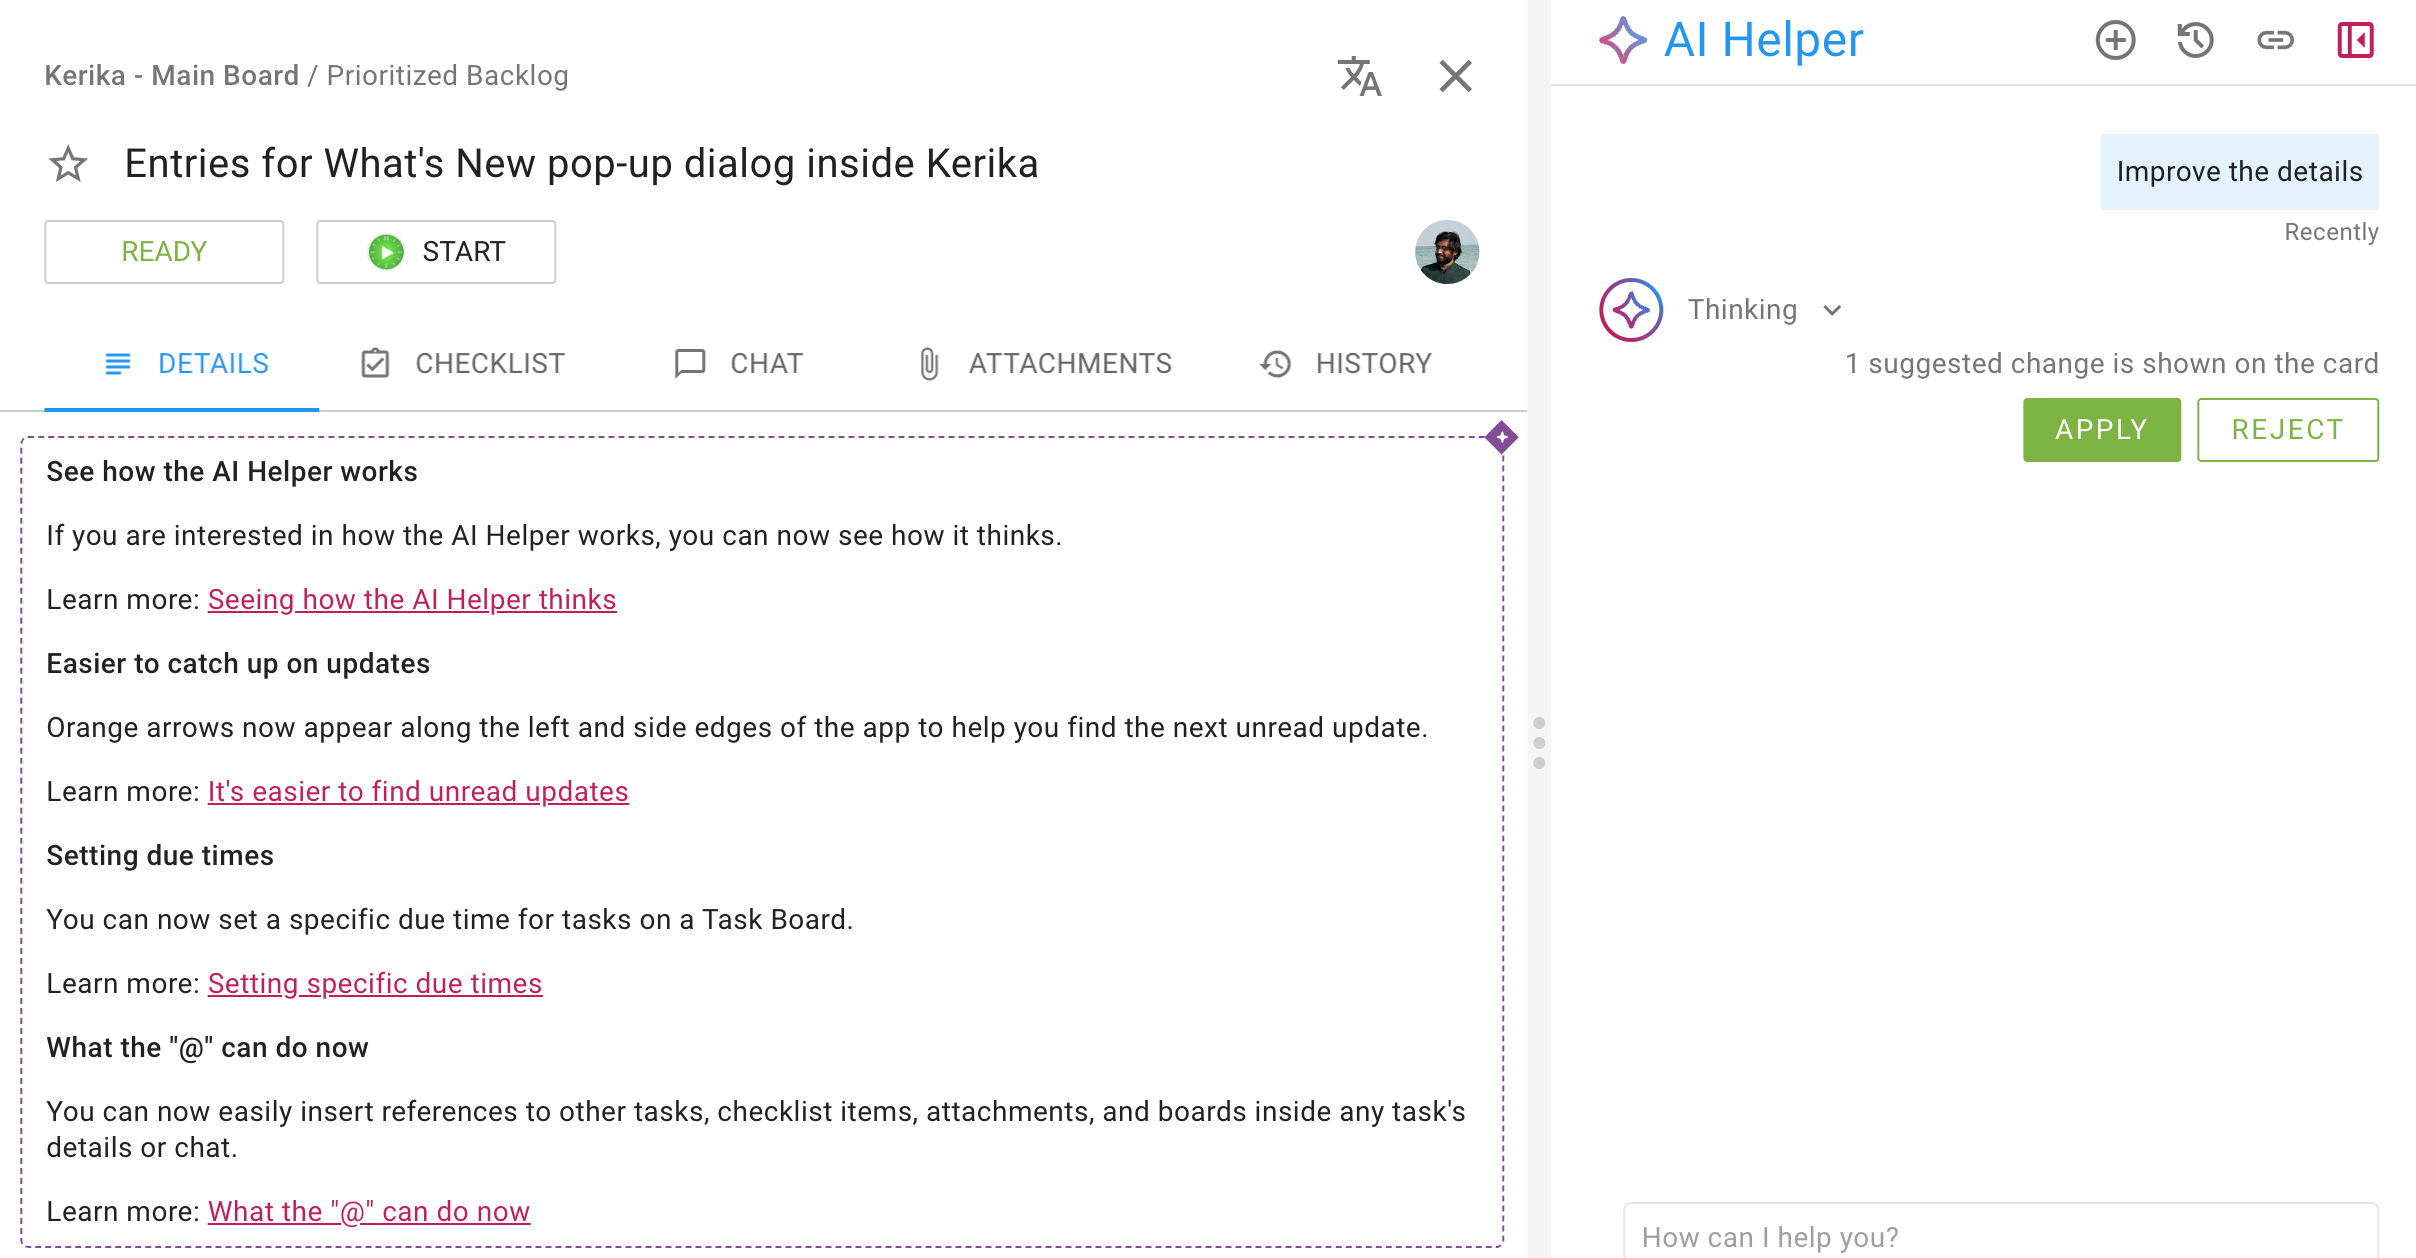
Screenshot showing how AI Helper suggestions for improved task details.

There are APPLY and REJECT buttons shown in the AI Helper pane; you can use these if a quick scan of the proposed new text is sufficient to make a decision.

If you want a more fine-grained look at the changes, you can hover your mouse over the proposed new text in the Task Details:
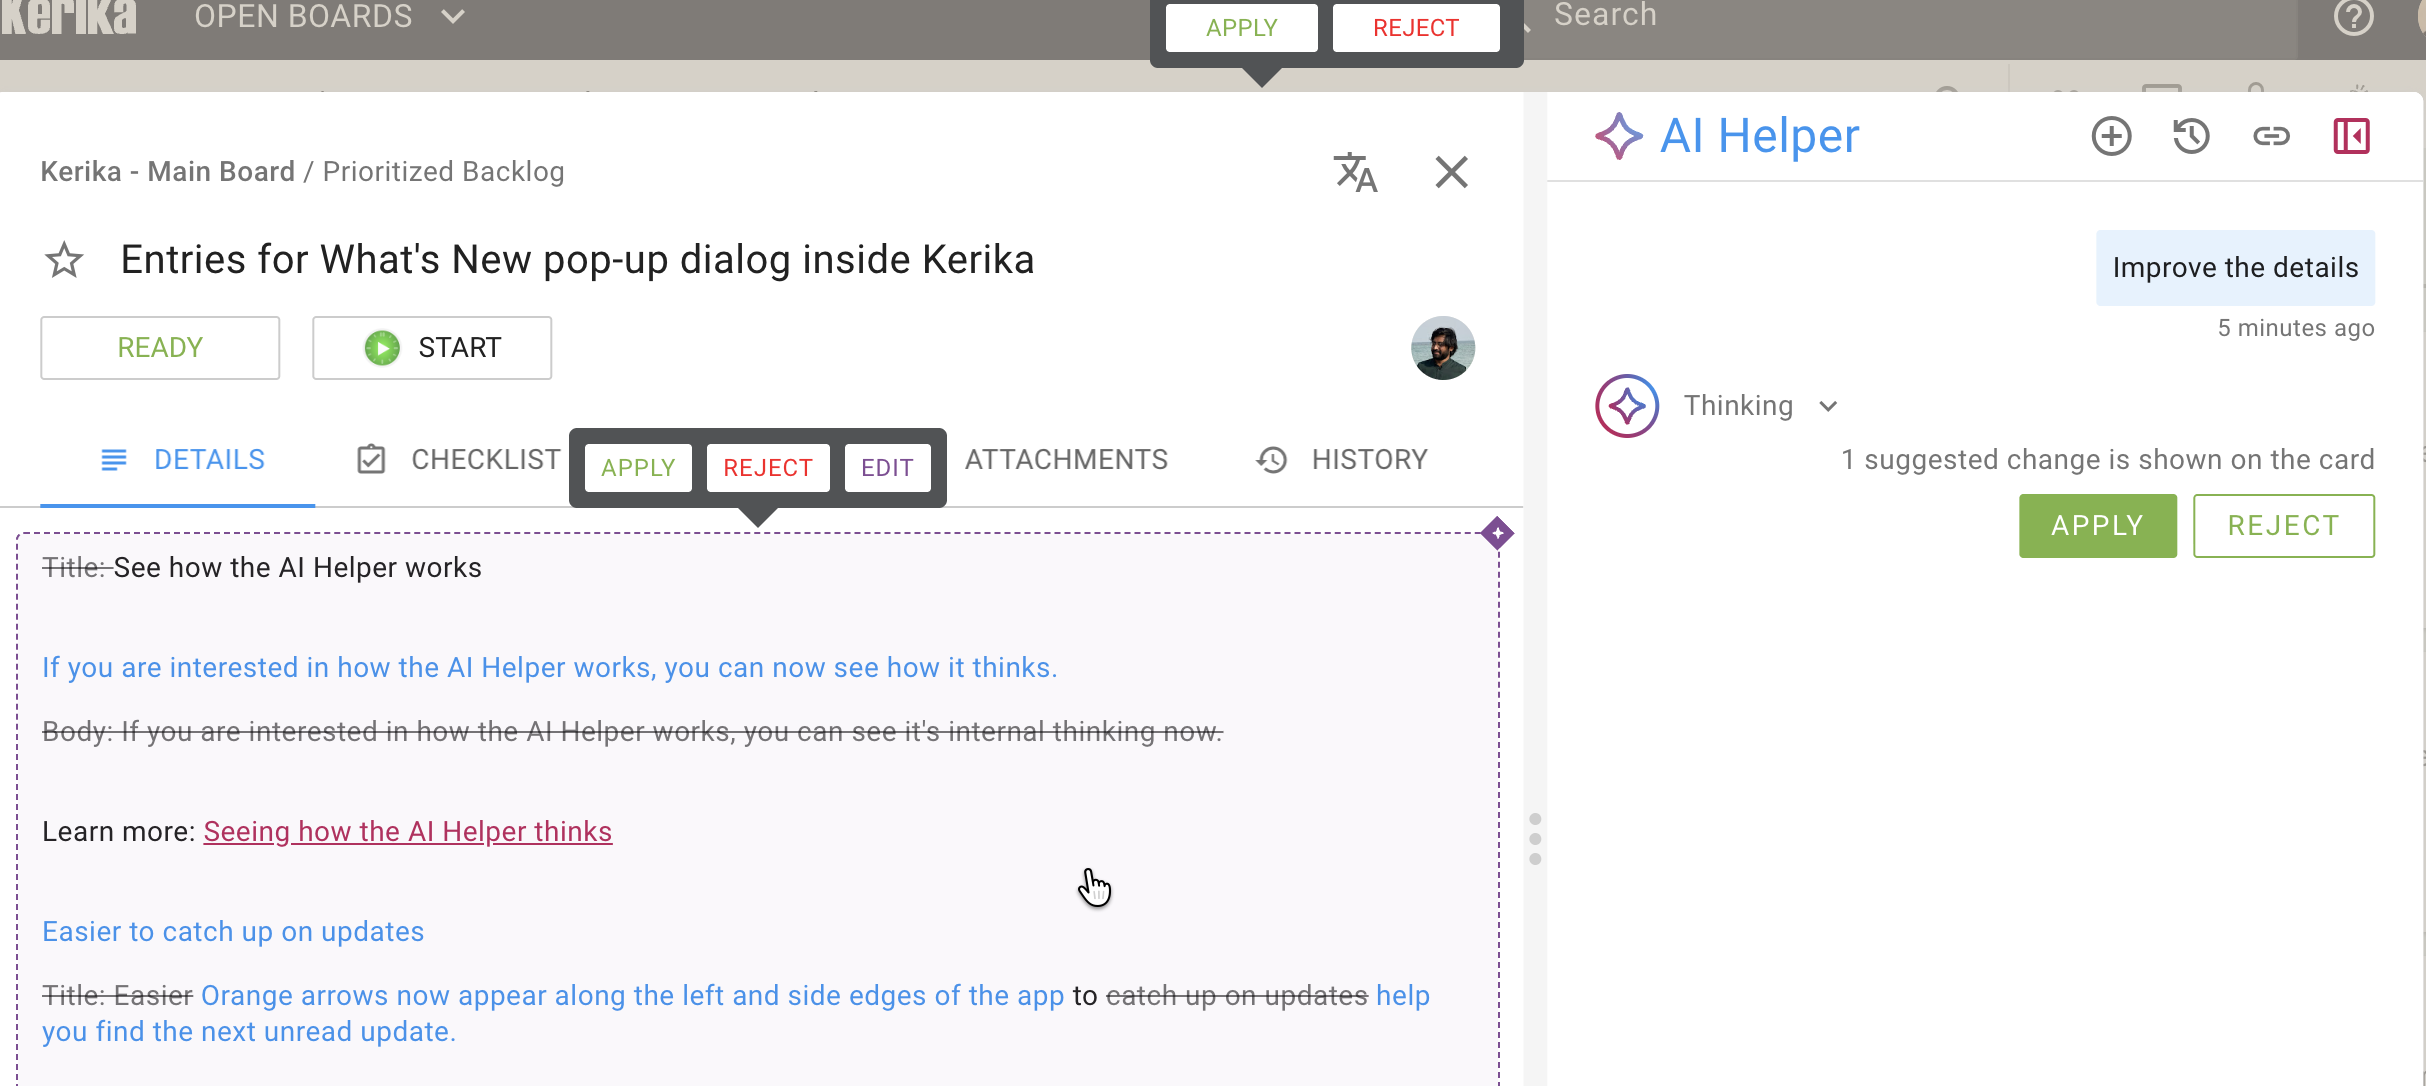
Text that the AI Helper thinks should be removed is shown with a strikethrough; text that the AI Helper thinks should be added is shown using blue font.

How this helps you

We have always been a multilingual team, distributed across two continents, and while our internal working language is English, not everyone is as fluent in this language as their coworkers. This is a common scenario for our users as well: we have users in nearly every country, and we support 38 languages!

In multilingual teams, people who don’t speak the dominant language as well as their coworkers may feel hesitant at times to contribute their thoughts, if they feel they may be misunderstood. This new feature directly address that concern: they can write a first draft quickly without having to worry about correct grammar and usage, and then a single-mouse click will invoke the AI Helper that will immediately work on reviewing and improving the text.

Give it a try and let us know what you think!
More ways to format your Task Details and Chat

We have added more ways for you to easily format your task details and chat messages. Now, when you are editing a task’s DETAILS tab, you will see an extended formatting bar appear:

Editing Task Details

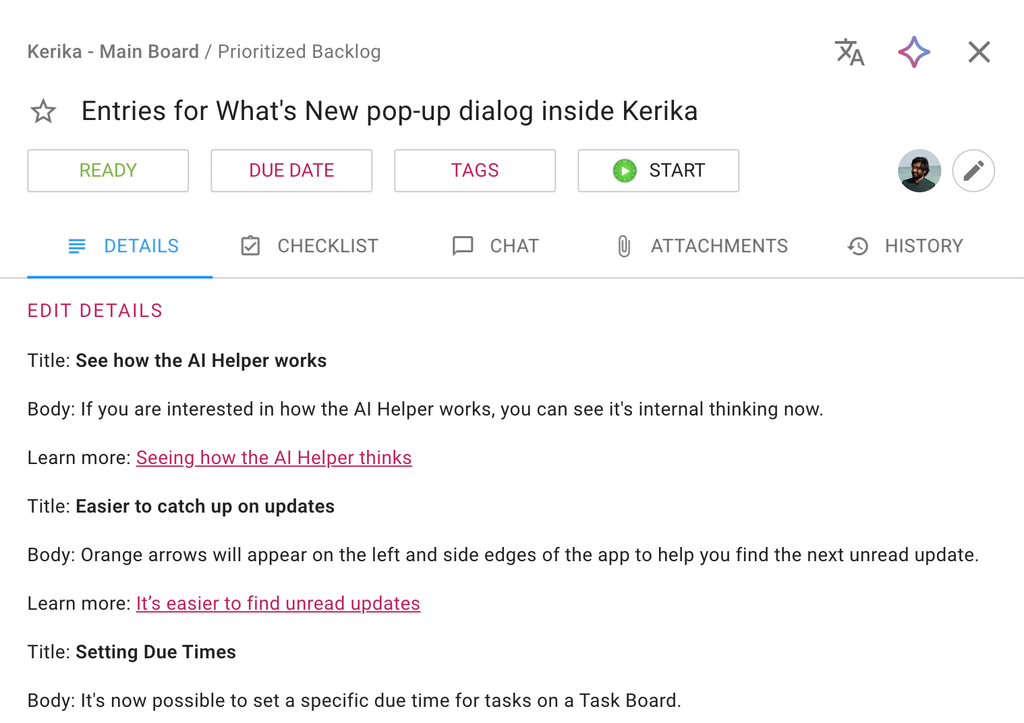
Here’s an example of a Task Detail:

Screenshot showing an example of the DETAILS tab of a task card.

You can edit a Task Details by clicking on the EDIT DETAILS link, or simply clicking on the existing details to enter the Edit mode:

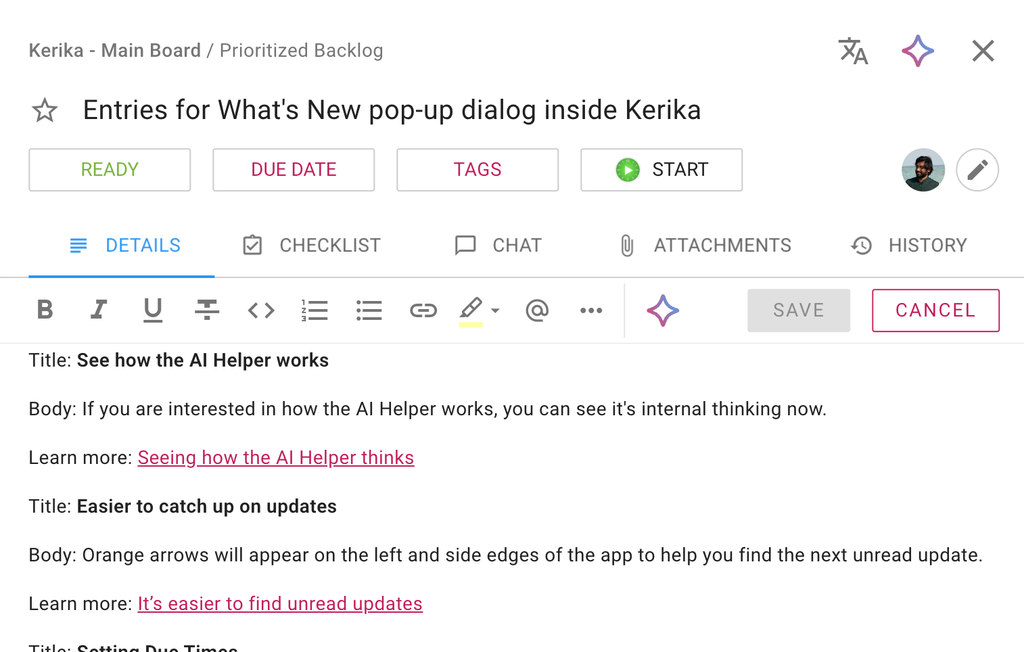
This shows the extended formatting bar that’s now available:

Screenshot showing a Task Details in edit mode, with an extended formatting bar.

In addition to the old buttons for Bold, Italic, Underline, Strikethrough, Numbered, and Bullet Lists, you now have buttons for:

  1. Marking parts of the text as code (which would result in that text appearing differently when you leave Edit mode): this is for our technical users.
  2. Selecting a piece of text and making that a link: Kerika will fetch the title of the referenced URL, and display that when you leave Edit mode.
  3. Highlighting text, using one of our 5 light pastel colors.
  4. Creating a reference to another task, checklist item, attachment, or board. (Follow that link to learn more about how that works.)
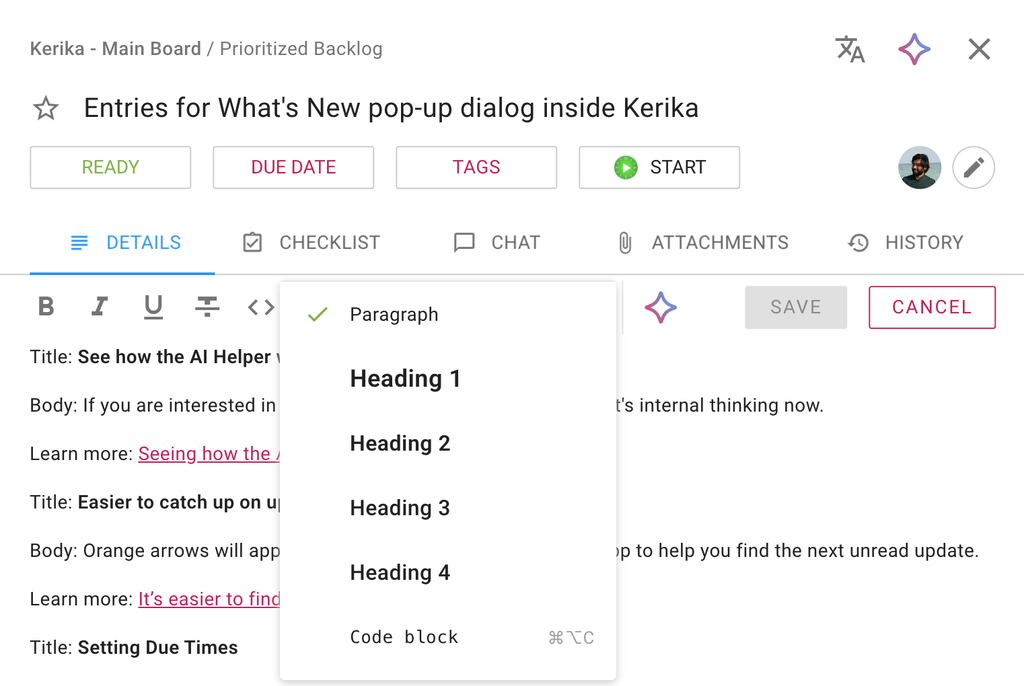
  5. Setting a style for the selected text; here are your options:
Screenshot showing that selected text can be set to Paragraph style, Heading (Heading 1 through 4) or Code Block.

Editing Chat Details

The same extended toolbar is available when you are composing task chat or board chat:

Try it

We think this will help you write more precise task details and chat messages, using more nuance and better organization of your thoughts, which will directly help with improving your teams’ overall productivity. Give it a try and let us know what you think!
What the “@” can do now

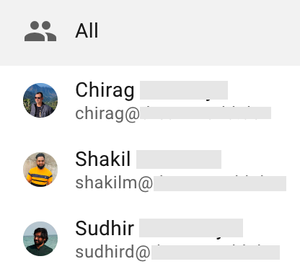
There has long been a way to reference a particular team member in chat, on a specific task card or the entire board, by using the standard “@” symbol which would bring up a list of everyone who was part of the board team, as well as an “All” option to include include everyone.

Screenshot showing an example of the board team members being shown after user enters the "@" symbol,
An example of the board team members being shown after user enters the “@” symbol

(Our team members value their privacy, so their names and emails have been obscured.)

Using the Search Function

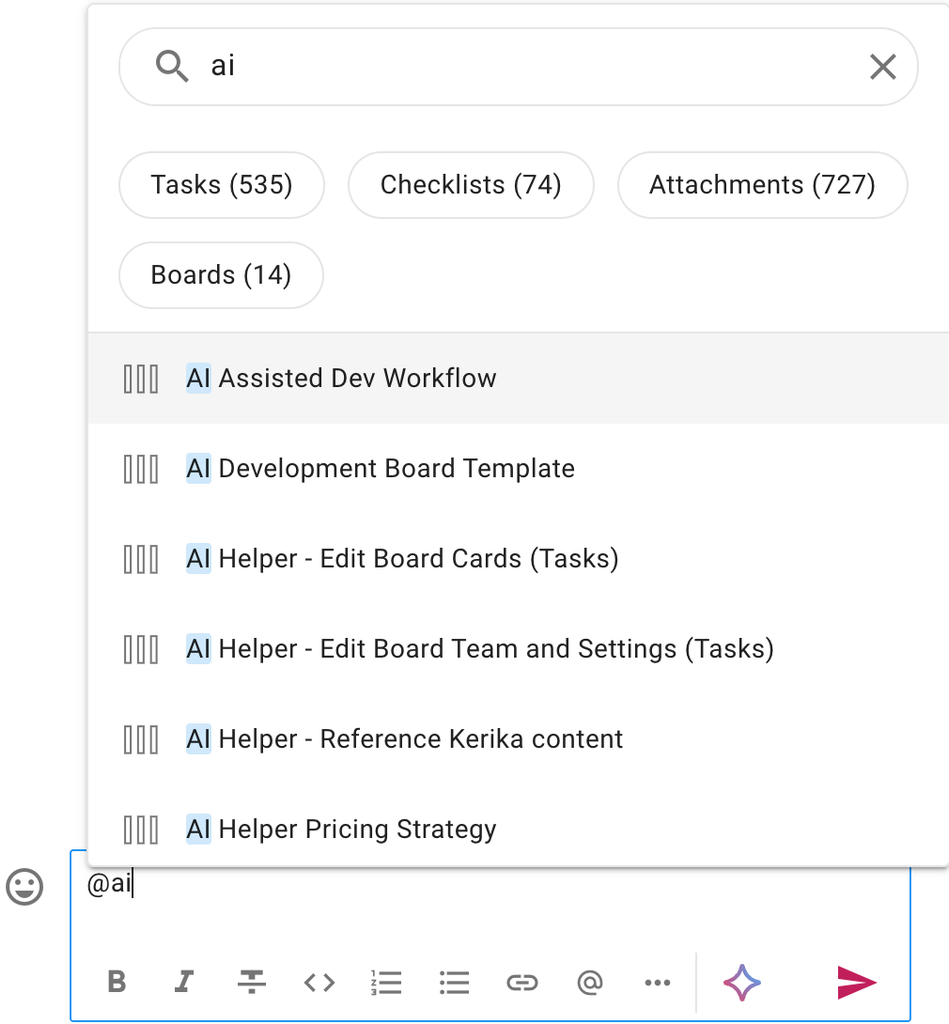
Now the “@” symbol can do so much more: it not only shows a list of people on the board team, there’s also a Search bar at the top that will help you find anything in Kerika that you may want to include in your reference. Here’s an example:

Screenshot showing a user using the Search box in the pop-up dialog that appears when the user types "@" in a chat message. The user has searched for "ai" and the Kerika has immediately returned all the references to "ai" that existing within the account, grouped by tasks, checklists, attachments, and boards

The Search results appear immediately, and are comprehensive. In the example shown above, the user typed the word “ai” and Kerika found there are 535 task cards that contain this text, 74 checklist items, 72 attachments, and 14 boards. (That’s a lot!)

Filtering the Search Results

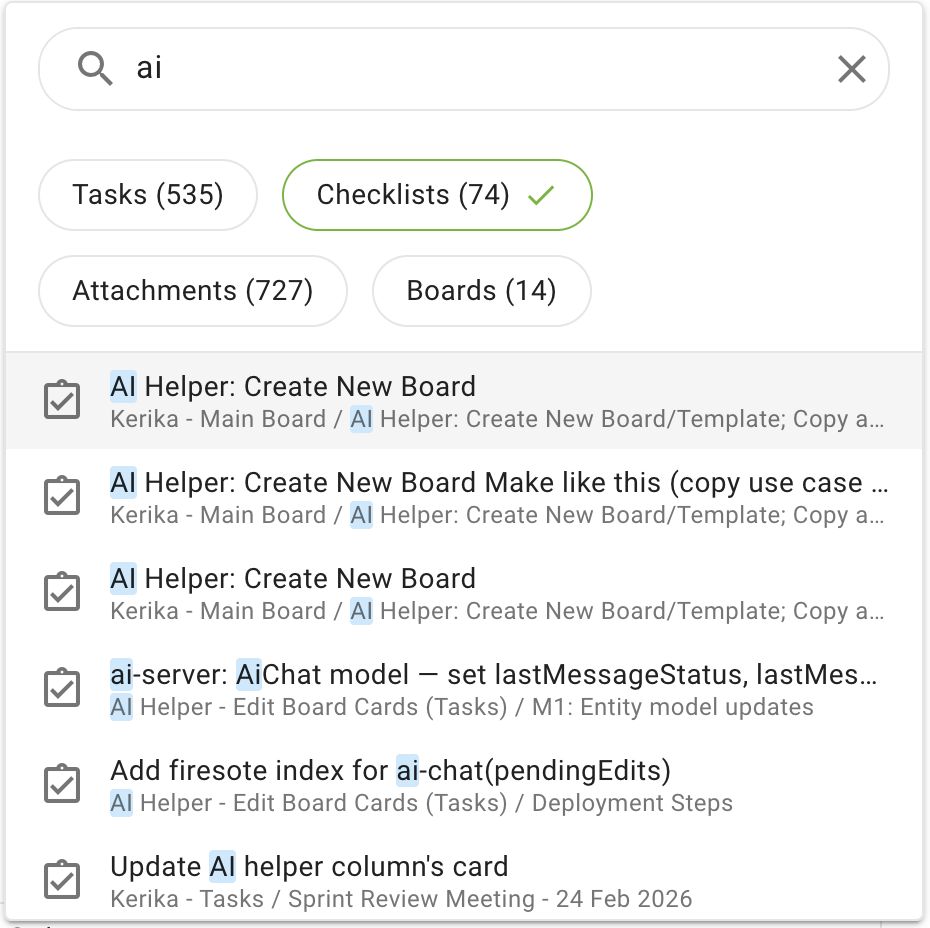
The results are shown with boards first, followed by tasks. The grouping shown at the top of this pop-up dialog can be used to quickly filter the complete list to show, for example, just checklist items:

Screenshot showing a filter view of search results, with just checklist items listed.

Referencing Tasks from inside Chat

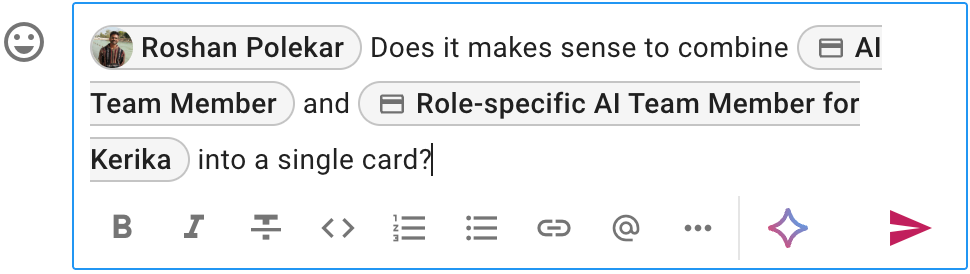
Here’s an example of a chat message being composed that includes references to a board team member and two task cards:

Screenshot showing an example of a chat message being composed that includes references to a board team member and two task cards

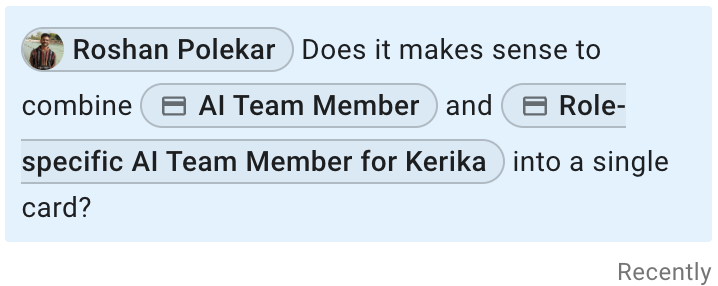
When it is sent, the chat message shows up with live links to the referenced task cards:

Screenshot showing a chat message with live references to task cards that were embedded in the chat by the sending, using the "@" feature.

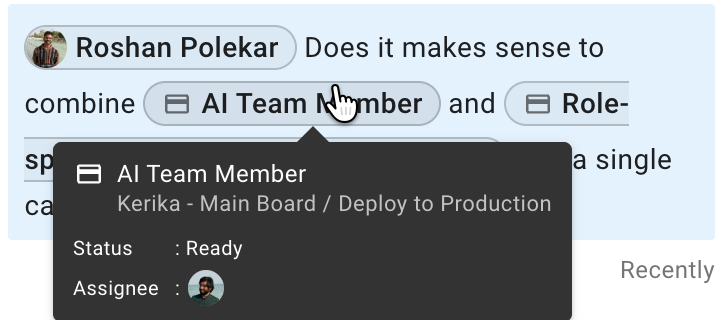
Hovering your mouse over a reference will bring up a small display telling you more about the object it is pointing to, so you can confirm that it is what you think it is, before clicking on the link:

Screenshot showing the mouse hovering over an embedded link in a chat message, and a small popup dialog appearing with some details about the object that the link points to.

We can see at a glance that this embedded reference is to a task card on the “Kerika – Main Board” that is currently in the “Deploy to Production” column; it’s status is READY, and we can also see who it it is currently assigned to!

Click on the reference, and that task card will immediately open so you can deal with it in depth.

Adding References to Task Details

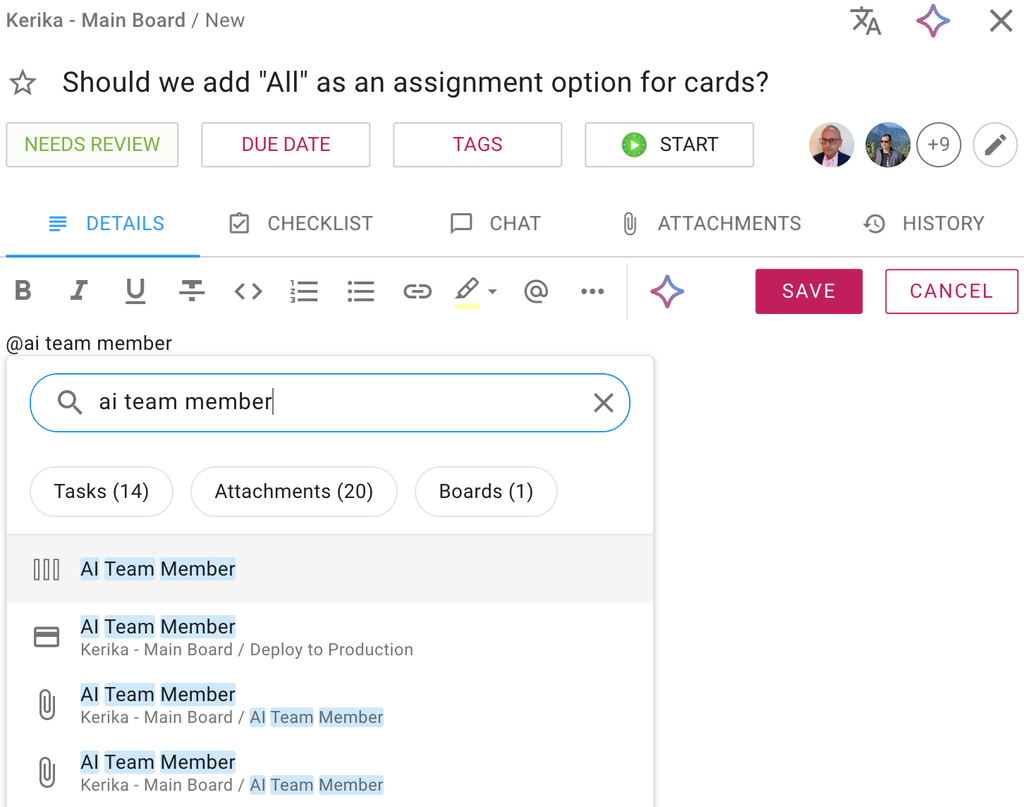
It’s not just task and board chat where this new “@” functionality is available: you can also use to make references to people, tasks, checklists items, attachments, and boards when you are writing in the Task Details tab that appears after you open a task card:

Screenshot showing a card details dialog, open on the DETAILS tab, with the user searching for references to "ai team member" that they can embed in the task details.

Try out this very cool new feature, which helps you link together related work items, content, and entire projects, and let us know what you think!
Setting specific Due Times

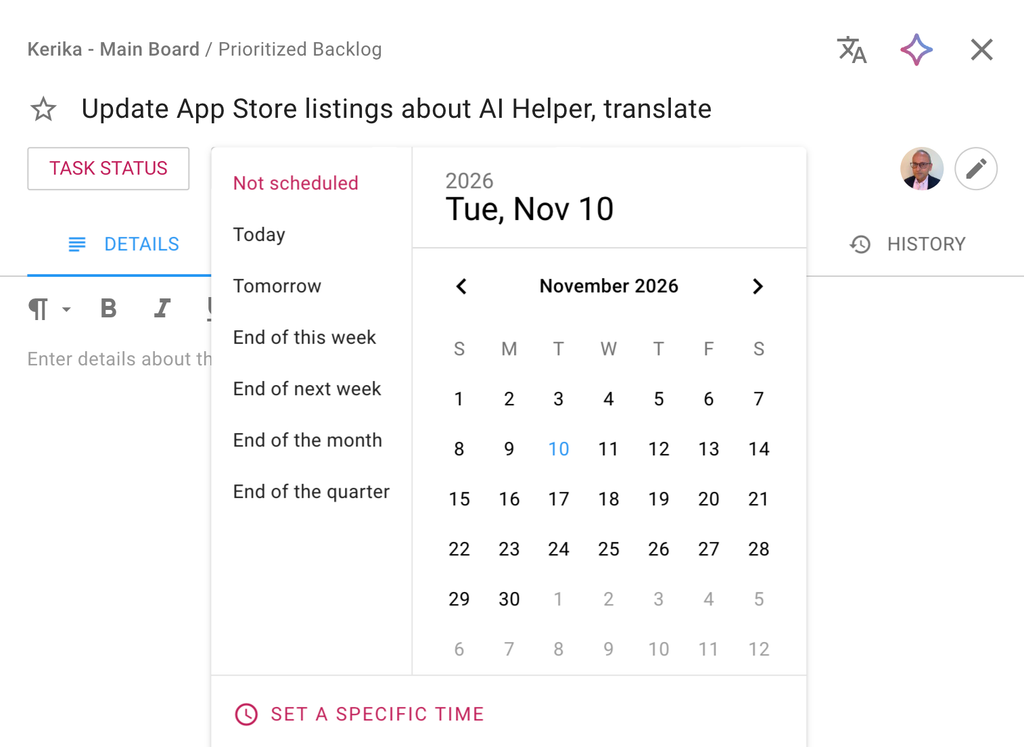
We have improved the process of setting a due date on a task on a Task Board in two important ways:

Partial screenshot of a task details dialog.

It’s easier to select common due dates

Screenshot showing options for quickly selecting a due date

The due dates that people set most often, are now available as quick choices:

  1. Today
  2. Tomorrow
  3. End of this week
  4. End of next week
  5. End of the month
  6. End of the quarter

These require just one click to set the due date.

Setting Due Time

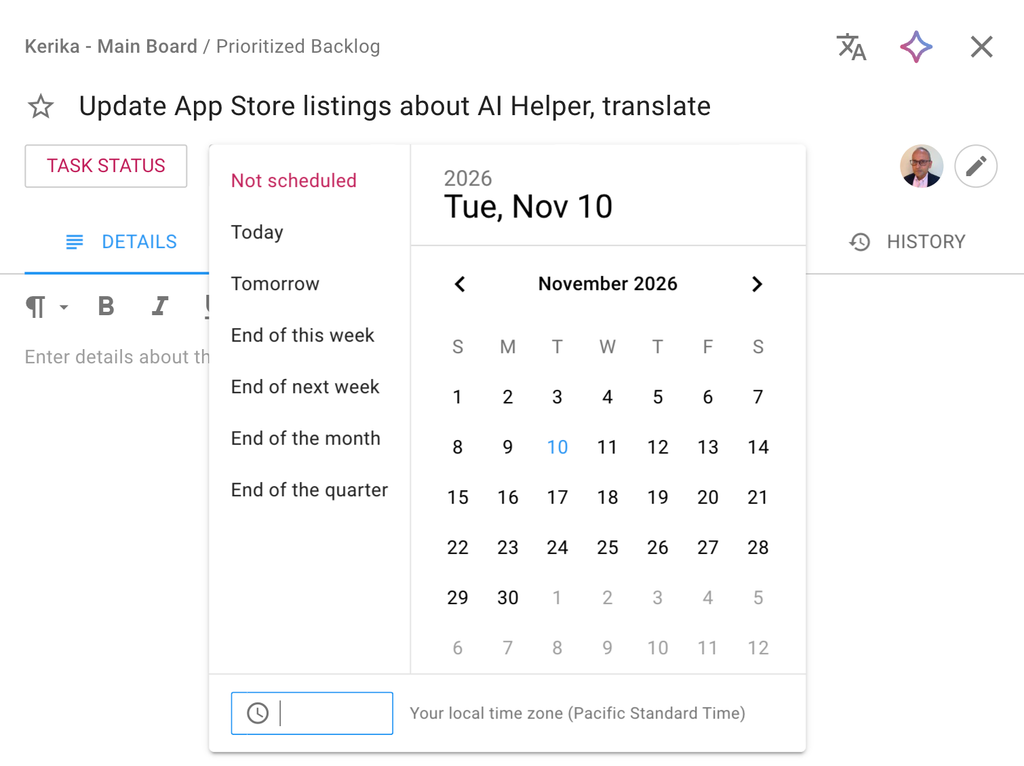
We have also added the ability to se a specific Due Time:

Screenshot showing how a user can set a specific due time for a task on a task board

The timezone used automatically defaults to your current location, and the time shown on the task to everyone else on the board team will automatically adjust to their local timezones as well.

Some improvements to our mobile app

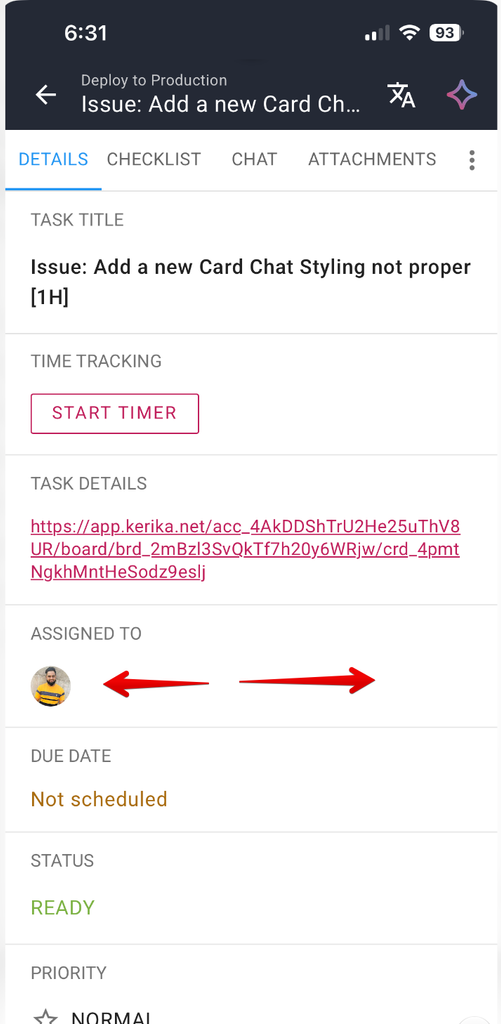
When you have a task (card ) details open, you can swipe left to right to switch between the tabs:

Screenshot showing a task (card) details dialog, open to the DETAILS tab by default.  Red arrows indicate that swiping left-right is possible.

When you open a task on your phone, it opens to the DETAILS tab by default. Swipe right and you will get to the next tab (CHECKLIST); swipe again and you will get to CHAT.

You can go back the same way by swiping left. And when you swipe left from the DETAILS tab, it will close the task details and return you to the board view.

A naming change for Done and Trash

We are making a change to the names of the Done and Trash columns on Task Boards, to make it easier for new users to understand what these columns represent.

The Done column will become Completed and the Trash column will become Deleted.

Looking at the demographics of our new users, we found that over 80% had never used any kind of boards before, and we think the new names will be easier for them to understand.

This is just a naming change, there’s no difference in functionality.

It’s easier now to see how many checklist items remain

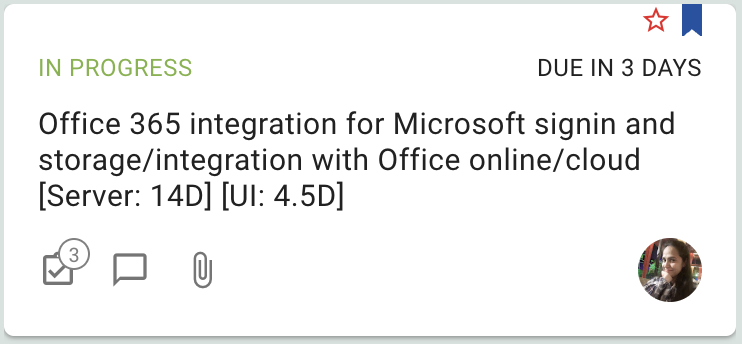
We made a small UI improvement that makes it easier now for you to see how many Checklist items (subtasks) remain open on a card:


A number will appear next to the Checklist icon when you are looking at tasks on a board: this is the number of open Checklist items for that task. We don’t show the total number because it’s the remaining ones that are more important, but if you hover over the number a tooltip will show you that as well:

It’s now even easier to catch up on changes in attachments and checklists

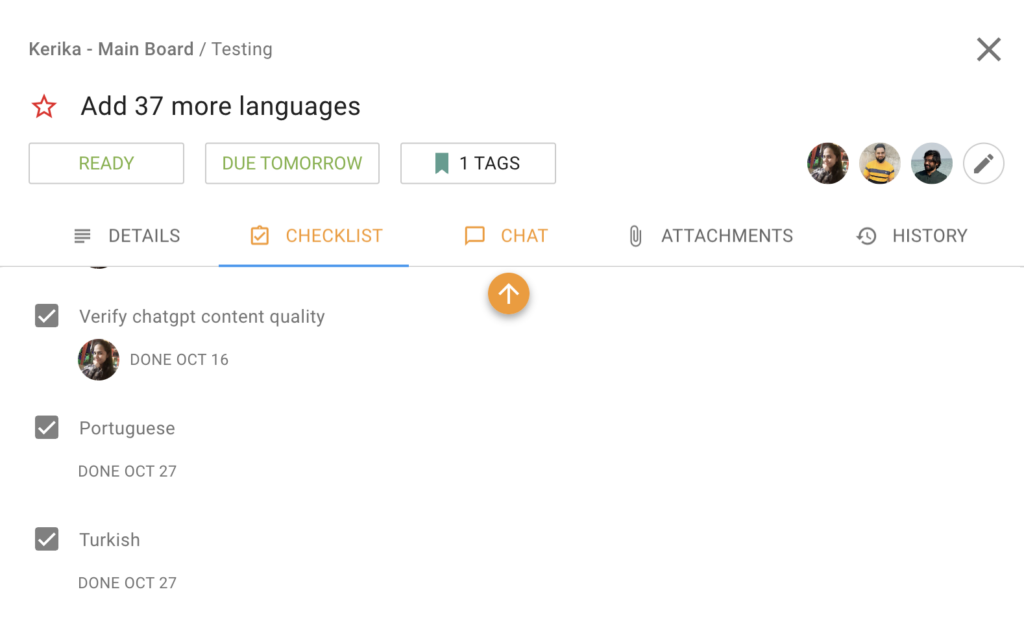
The orange arrow that appears at the top or bottom of a column when there are unread updates that are out of view has proved to be a very useful and popular feature, so we have extended the concept to work inside of tasks (cards) as well: if there is an unread change to a checklist item, or attachment, that’s out of view for you, an orange arrow will appear to help guide to you it:

The way these orange arrows work is very intuitive: just click on it to have the view scroll up automatically to show the next unread checklist item or attachment.

Another way to stay on top of what’s happening

When you are working on several boards, we want to make sure you don’t miss any updates that might be happening elsewhere in Kerika.

There’s a new feature that helps with that: if you have open boards (or templates) with unread updates, the drop-down on the “board switcher” appears in orange:

When you click on the OPEN BOARDS button, Kerika will show you all your open boards, with the updated ones highlighted in orange:

This should help you stay on top of what’s happening across your entire Kerika world: you don’t need to switch to different boards just to see if there’s anything new.