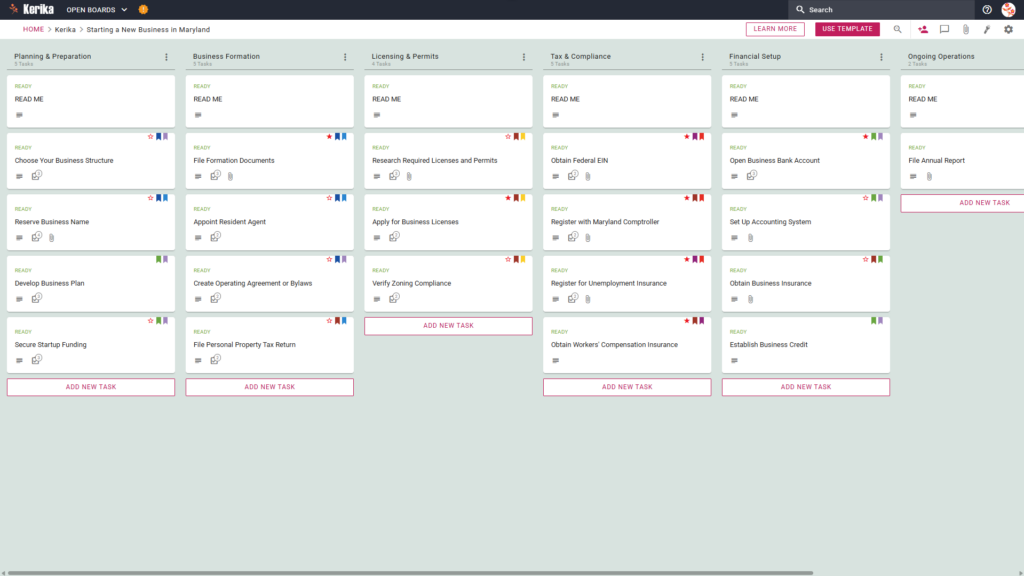
We have very significantly improved the AI Helper to now work as an assistant within Task Boards, and even within individual cards (tasks) on a Task Board.
To use, click on the AI button that appears on the bottom right corner of the Kerika app, on the desktop or mobile. Here’s an example of what it looks like, for desktop users:
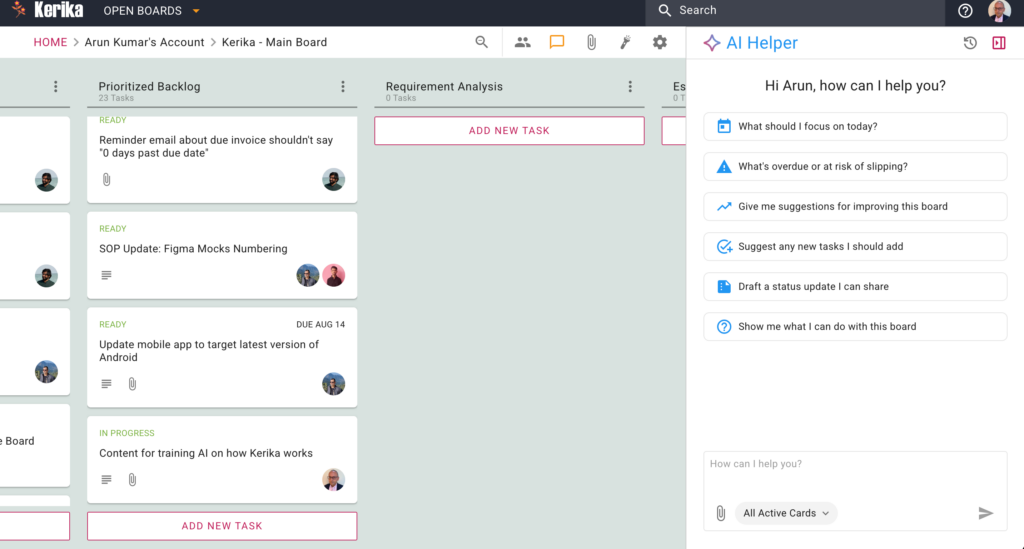
Let’s take a closer look at the components of the AI Helper pane:
On the top-right corner are buttons to access old AI Helper Chats, and to close the AI Helper pane:

Old Chats
The old chats are shown in reverse-chronological order, with the most recent on top:
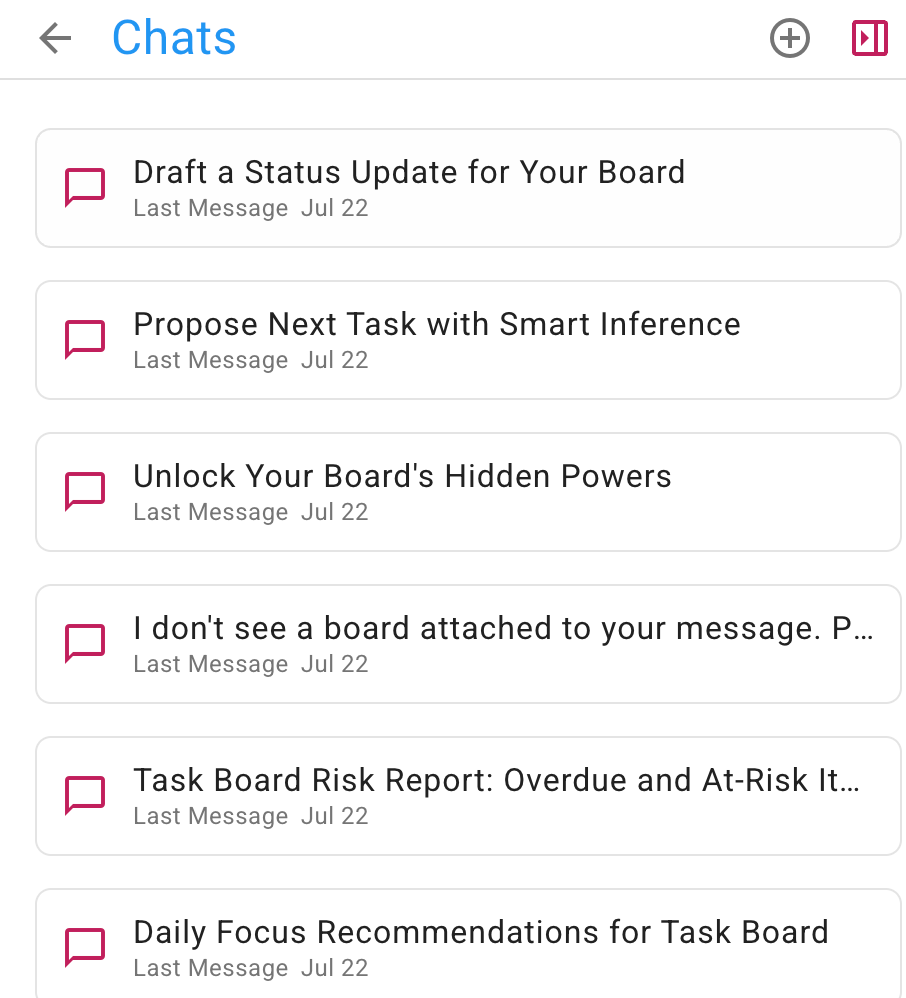
You can resume any old chat at any time, if you want to return to a particular discussion you had with the AI Helper. It’s useful to keep different discussions in different chat streams, because that helps the AI Helper understand more easily the context for your requests.
Quick Actions for Boards
Within the main body of the AI Helper, shown whenever you start a new chat, are some Quick Actions:
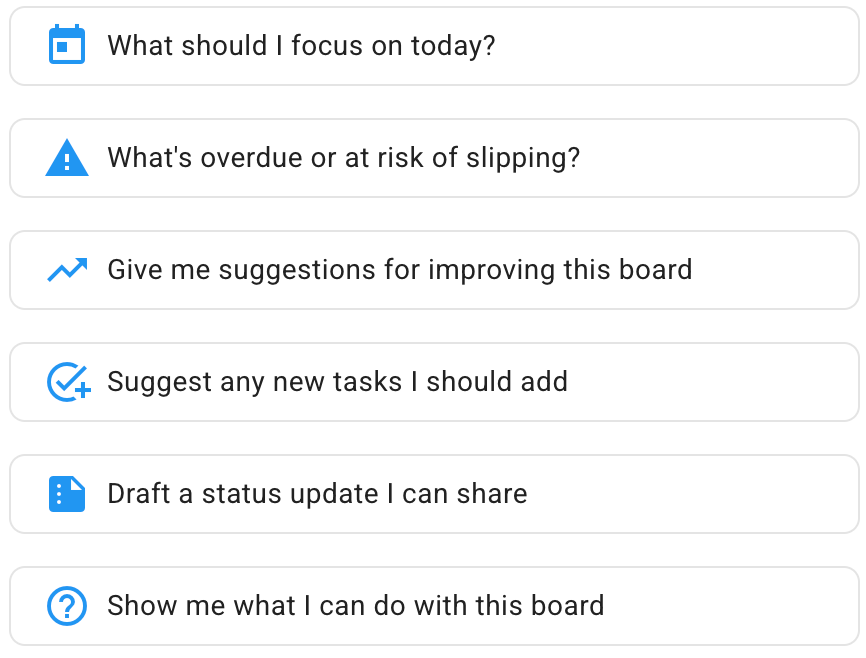
These are:
- What should I focus on today? A common question that many users face, particularly when they are working on a large project, with many tasks underway and all in different stages of progress.
- What’s overdue or at risk of slipping? Something that’s particularly important to project managers (Board Admins) who need to make sure everything is going well, not just their personal tasks.
- Give me suggestions for improving this board. This can help everyone, but Board Admins in particular: the AI Helper can take a look at the entire board and see if the team is using Kerika to its fullest capabilities — are the columns, representing the workflow, optimal? Are tags being used to gather together related tasks? And so on.
- Suggest any new tasks I should add. Here the AI Helper looks at all your tasks and tries to identify any steps that are missing from your project’s workflow.
- Draft a status update I can share. If your manager keeps asking for status updates (and they really shouldn’t, because with Kerika you can add them as Visitors so they always have a real-time view of what’s going on!), this handy Quick Action will take care of drafting a status report for you.
- Show me what I can do with this board. This is another way of making sure you are using Kerika optimally to achieve your project goals. The AI Helper can identify tasks that need priorities and due dates to be set, and much more.
Quick Actions for Cards
There are Quick Actions for individual cards on Task Boards as well: you can see these when you open the AI Helper after having opened the card first.
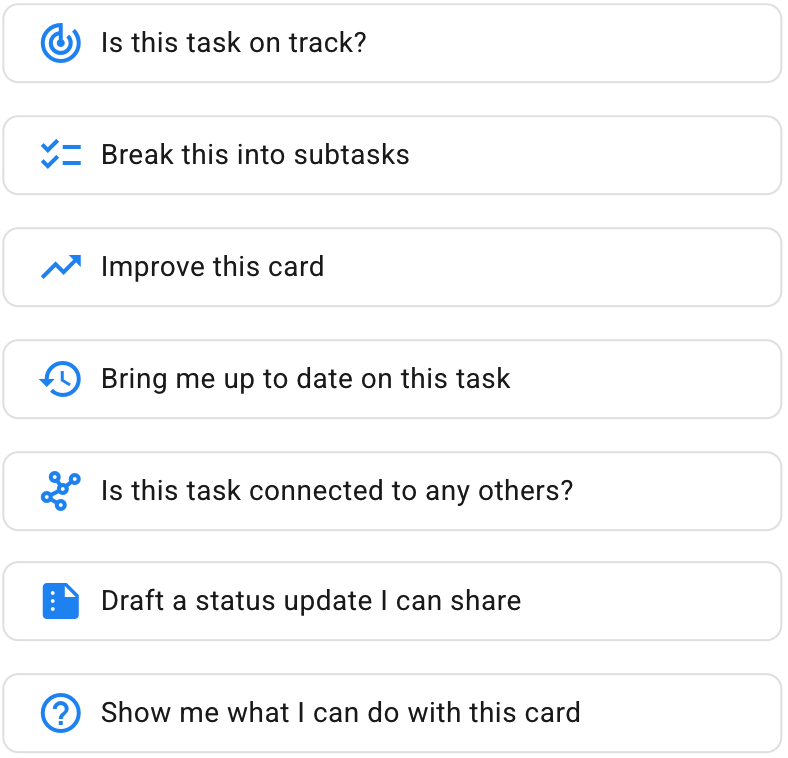
While the AI Helper focuses on the entire board when no individual card is open, here the AI Helper focuses on a single card. The Quick Actions are:
- Is this task on track? The AI Helper looks at whether there is a due date or priority set, and whether the task needs a checklist of sub-tasks to make it easier to get the task done.
- Break into subtasks. A handy one-click way of getting a complete set of sub-tasks that will help get this task done faster and better.
- Improve this card. The AI Helper can improve an individual card in many ways: suggesting better task titles or details/descriptions, use of tags, due dates, etc.
- Bring me up to date on this task. Kerika is ideal for globally distributed teams working across different geographies and timezones. (The Kerika team itself is a globally distributed team, and has been from the very beginning.) This Quick Action summarizes activity on this card in an easy-to-understand format.
- Is this task connected to any others? Very helpful when you have a lot of things going on in a large board, with many tasks underway.
- Draft a status update I can share. Another handy way to deal with managers who insist on (daily?!) status updates.
- Show me what I can do with this card. Similar to the Quick Action for Boards, but focused on a particular card.
We would to hear from you on how well the AI Helper works in general, and whether our Quick Actions can be improved!