An updated primer, showing for organizations that are using G Suite (formerly known as Google Apps for Business) can install and authorize Kerika for their domains:
1. Go to your G Suite Admin Console
The organization’s Google Admins (and there’s usually more than one such person) can view their Google Console at https://admin.google.com: click on the Apps button.
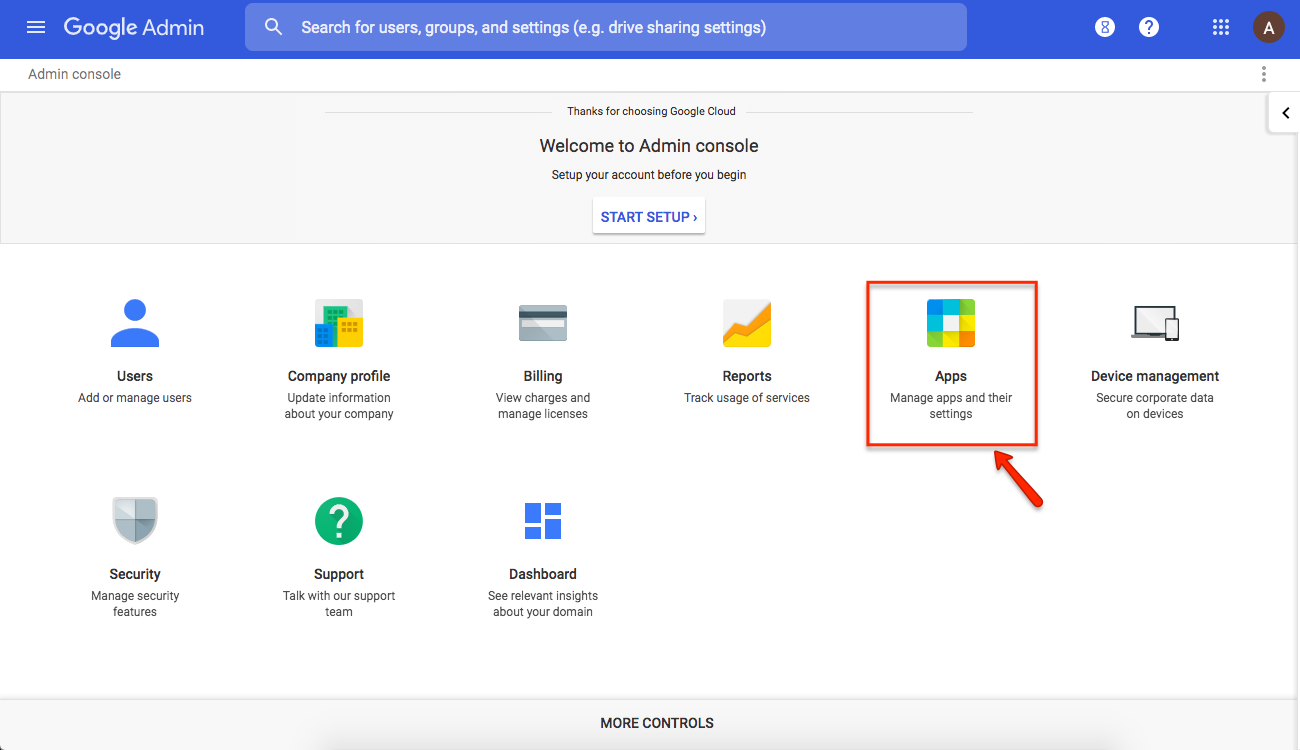
2. This will take you to all your Google-related apps.
Kerika falls into the Marketplace Apps category, so click on that button.
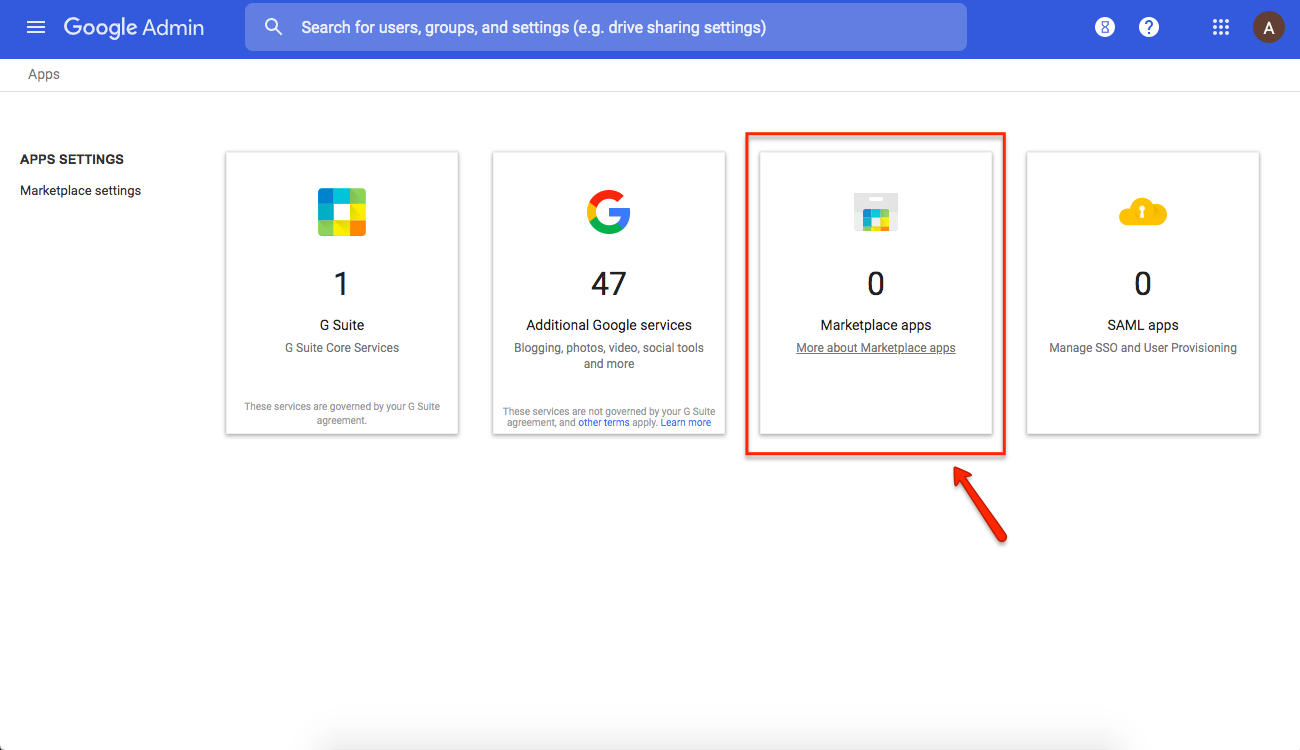
(All the other buttons are for apps from Google itself; Marketplace is where third-party vendors like Kerika show up.)
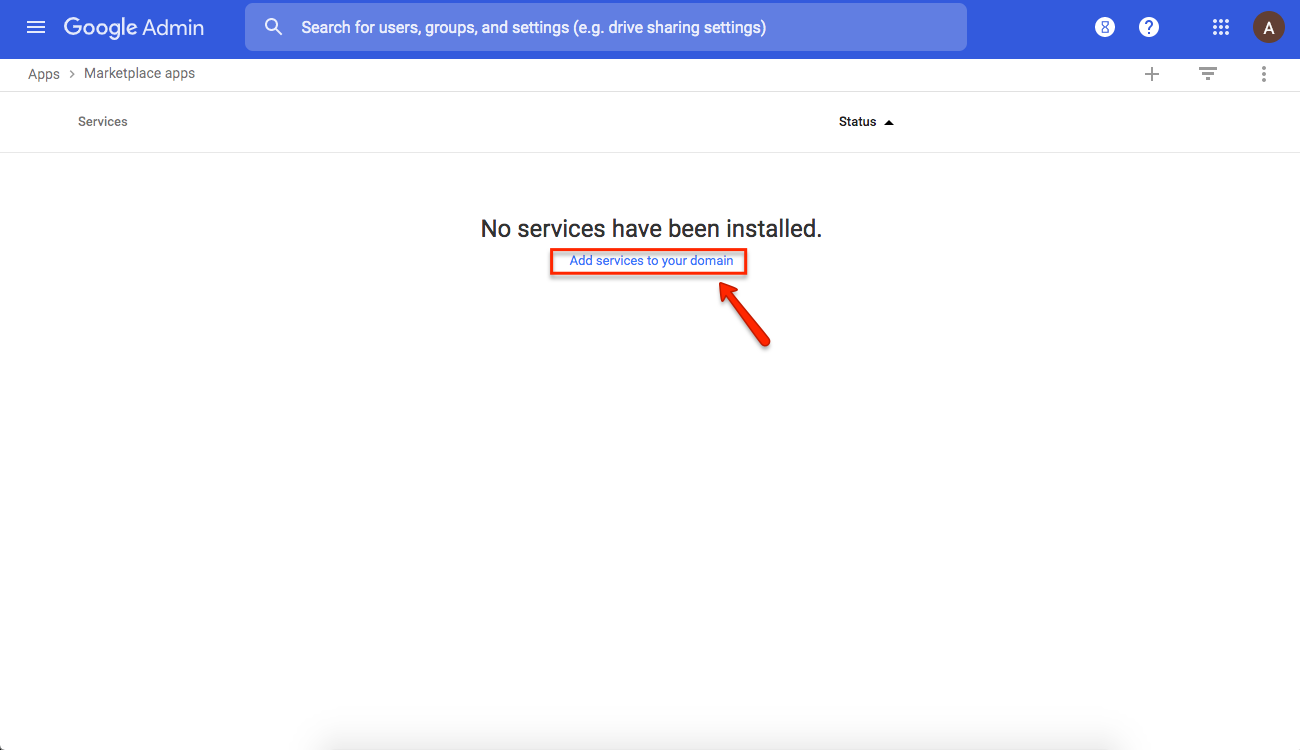
3. Click on Add Services
This will take you to the G Suite Marketplace
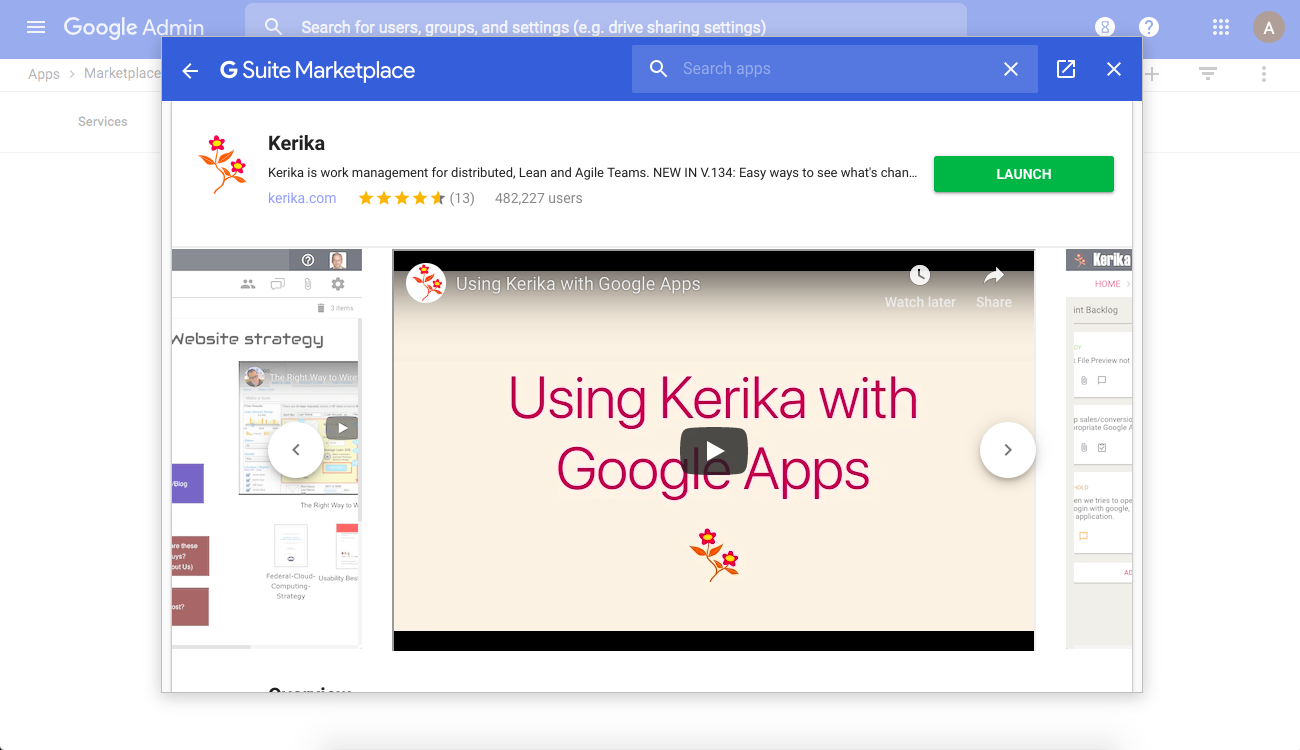
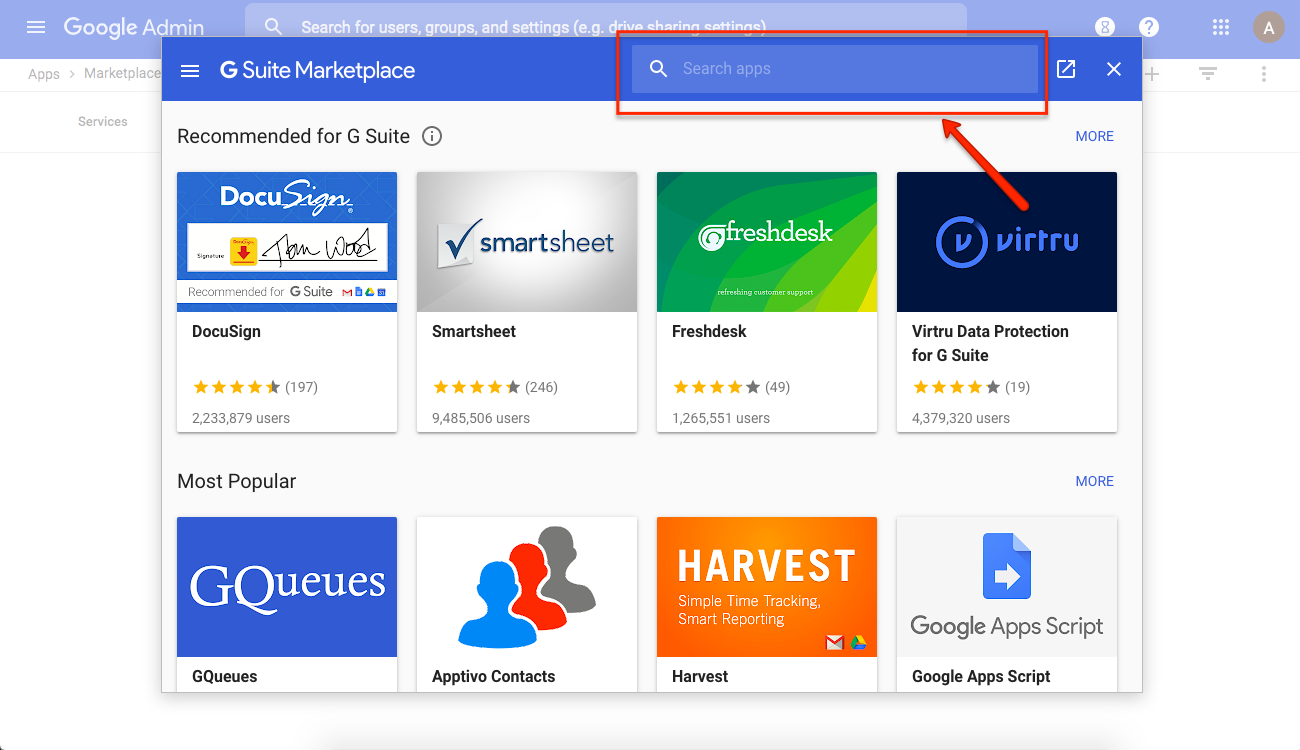
4. Search for Kerika
It would be nice if Kerika showed up right away, but you need to search for it in the box shown below:
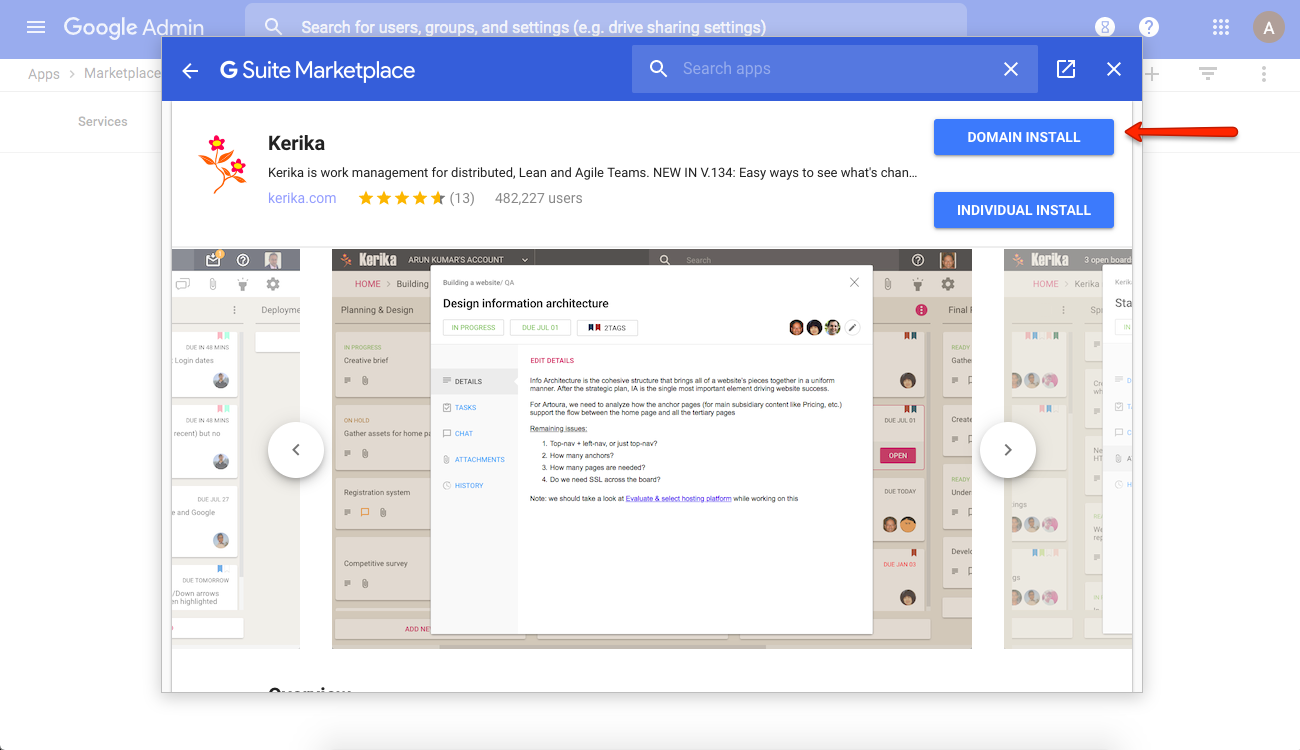
5. Select Domain Install
The Domain Install option will allow everyone in your organization to use Kerika:
6. Accept the Terms

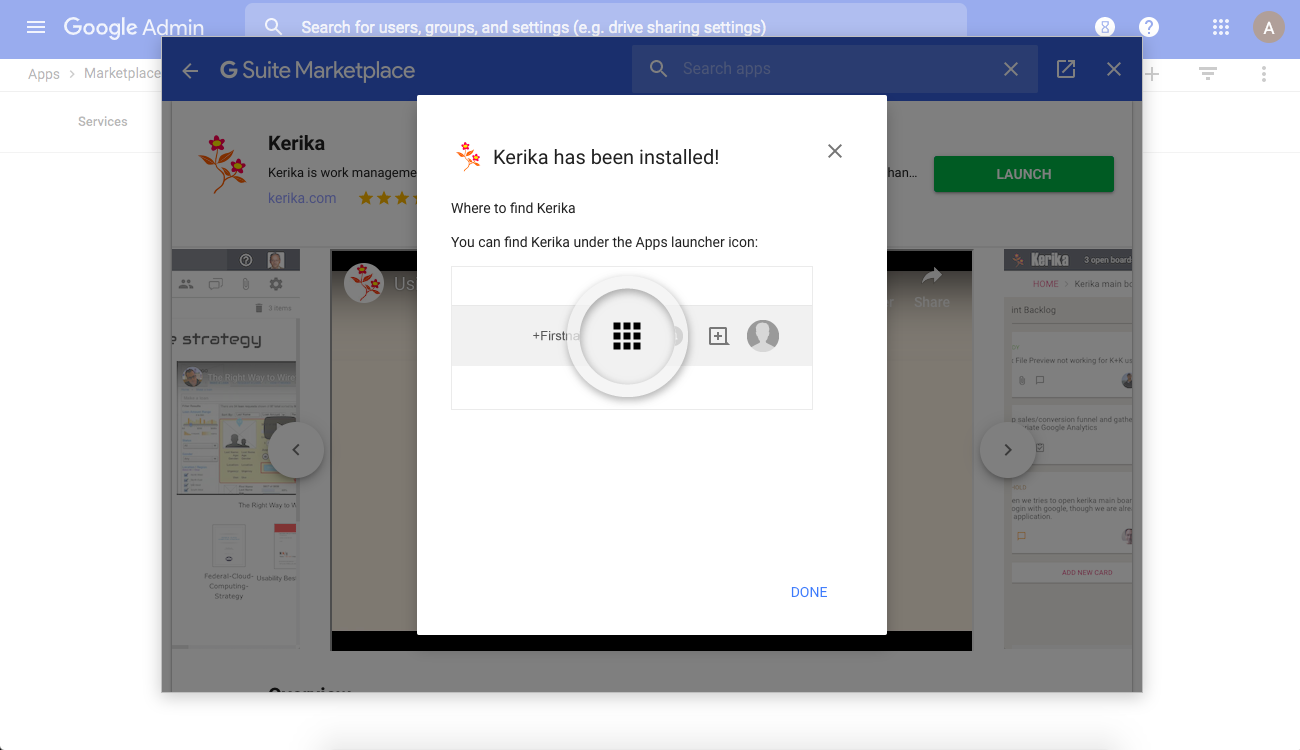
7. Success!
Kerika is now installed for your organization’s use:
8. All done
You are all done. Enjoy Kerika.