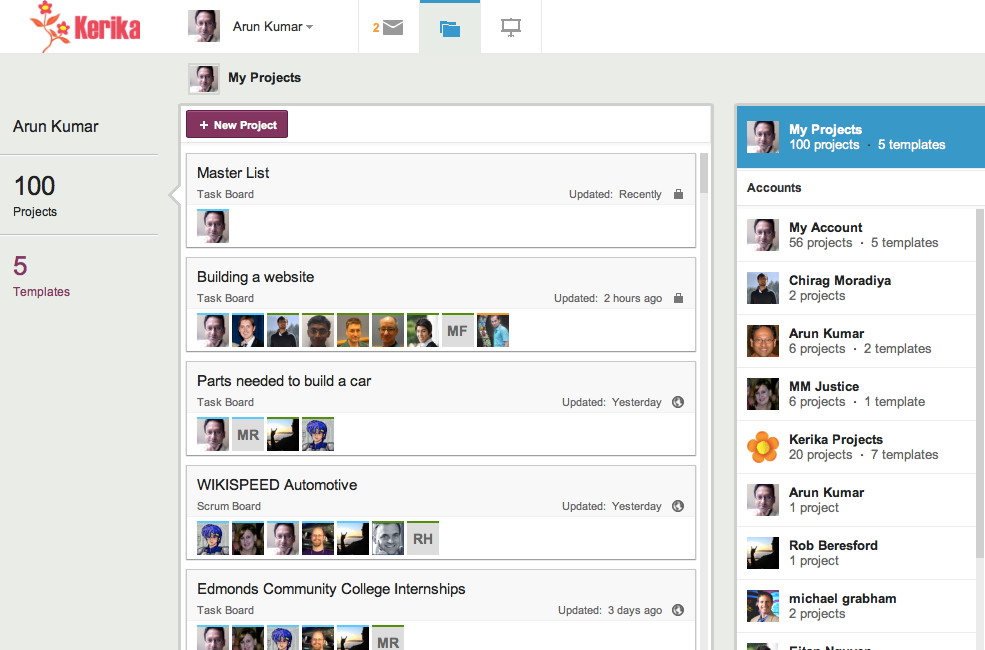
In many industries, a small proportion of the users will consume a disproportionate amount of the product, and will provide the vast bulk of a company’s profit.
This is true in the beer business for example: the beer companies have long known that a small percentage of their customers will drink a vast amount of beer every day. (This factoid used to be a staple of marketing classes in the 1980s, when it was offered as an example of the 80:20 rule — 20% of the consumers will drink 80% of the beer. Which actually amounts to about a case of beer a day…)
It is also true for Software-as-a-Service (SaaS) businesses: Forbes reported in 2011, for example, that just 4% of Dropbox’s users pay for the service, and yet Dropbox is a growing, profitable company! The other 96% contribute indirectly, by adding to the network effect and recruiting others who have a 4% probability of becoming a paid-up subscriber of Dropbox.
These percentages can seem small, but they can quickly add up when you have millions of users.
Facebook has a similar profile of users: a small number of people are logged in obsessively, and these will provide the bulk of their advertising revenues — not just because they are more like to see the advertisements, but because they are more likely to view Facebook as a trusted source of useful content.
In this context, creating Facebook Home on Android makes a lot of sense: it doesn’t matter whether a very large proportion of your user base never uses it, if you can get the addicted segment to be logged in all the time. These people will drink all the beer you are selling.