All posts by Roshan Polekar

How to Start a New Business in Delaware with Kerika’s Business Setup Template

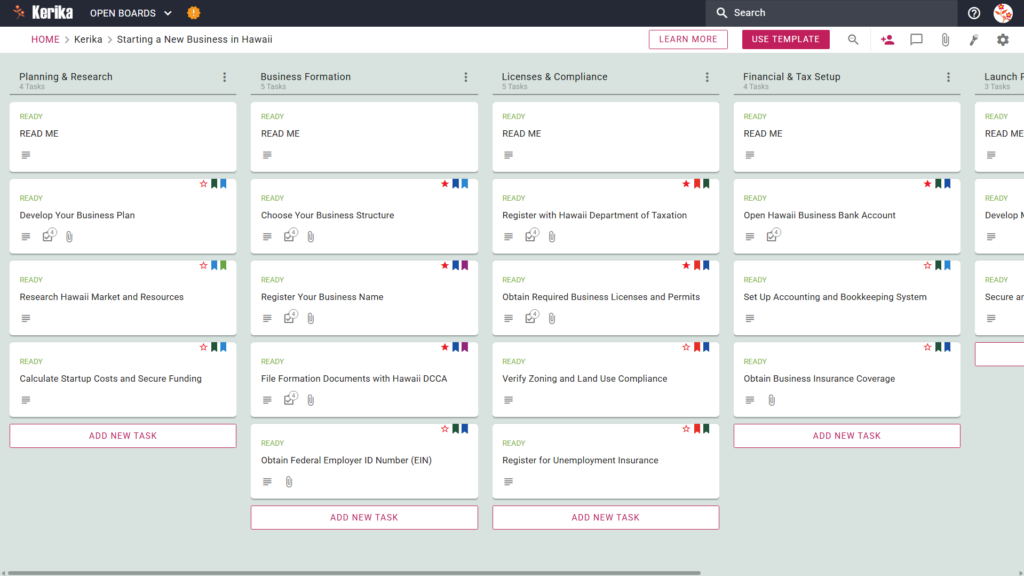
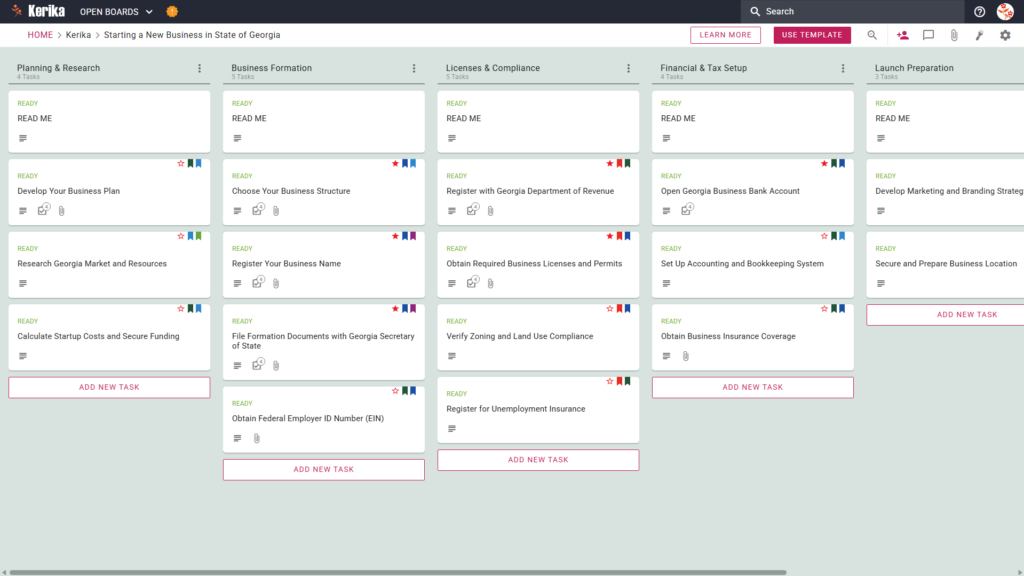
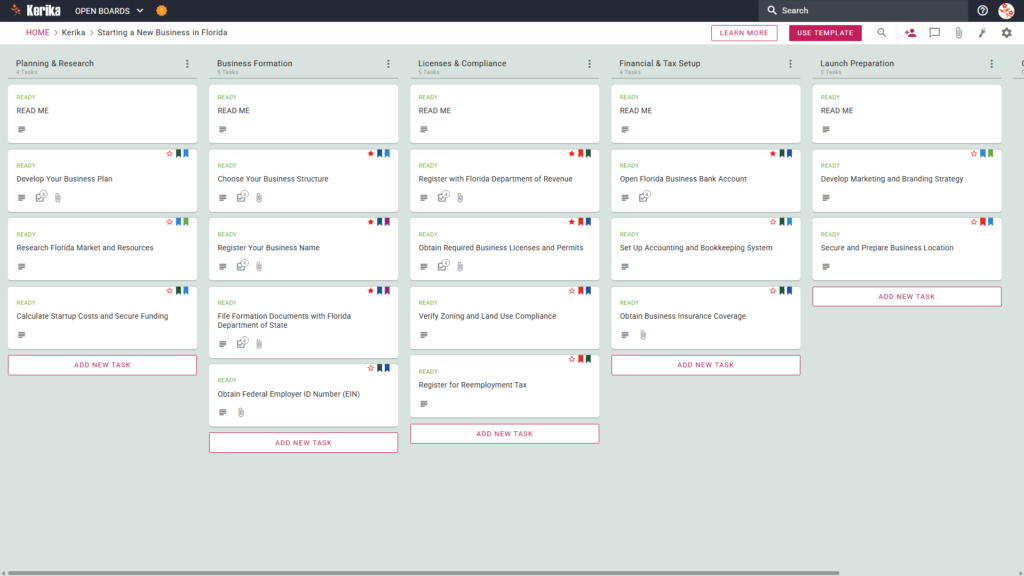
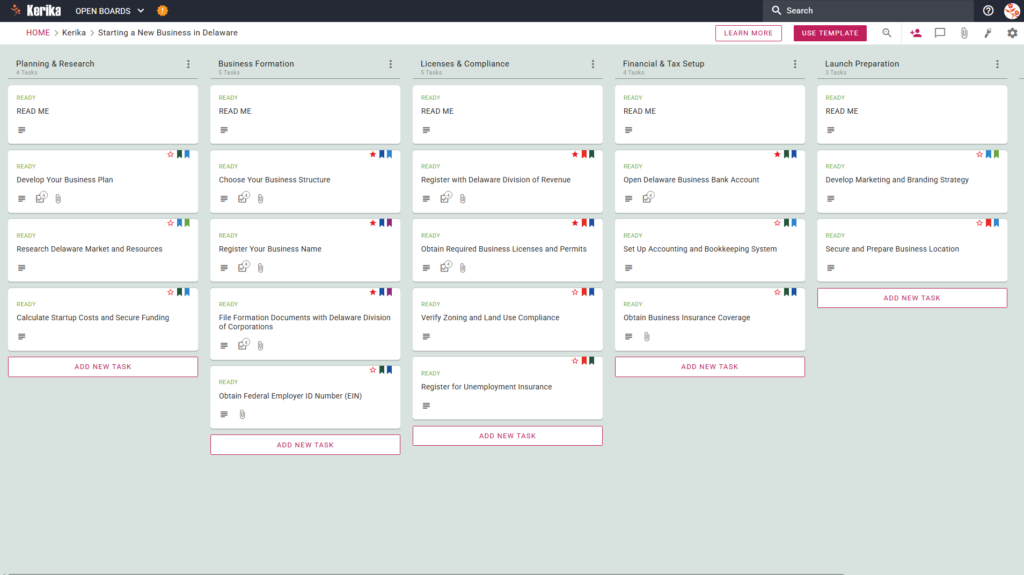
Banner titled "Starting a New Business in Delaware" featuring a screenshot of a Kerika Kanban board with task columns for Planning & Research, Business Formation, Licenses & Compliance, Financial & Tax Setup, and Launch Preparation.

Click the image above to open the live template in a new tab

Starting a new business can feel like a huge undertaking, especially when you are trying to manage planning, legal registrations, taxes, banking, and launch preparation all at once. For many founders, the hardest part is not just doing the work, it is making sure nothing important gets missed along the way.

But don’t worry, this guide is here to help. If you want a clear and practical way to move from idea to launch in Delaware, this template is exactly what you need. We designed this board to give you a structured workspace where you can track every major step, collaborate with your team, and move forward with confidence.

Ready to build your business with less stress and more clarity? Let’s get started.

1. Who Can Use This

This template is designed for people who want a more organized way to launch a business in Delaware.

  • First-time founders: People who need a step-by-step system for handling formation, tax setup, and launch tasks.
  • Small business owners: Teams or solo operators who want to keep planning, compliance, and financial setup in one place.
  • Startup collaborators: Co-founders, assistants, and advisors who need shared visibility into who is doing what, and what comes next.
  • Consultants and service providers: Professionals helping clients start businesses in Delaware in a repeatable, organized way.

2. What it includes

The template gives you a complete visual workflow for launching a new business in Delaware, with each column representing a major stage in the setup process.

  • Planning & Research: Cards for developing your business plan, researching the Delaware market, and estimating startup costs and funding needs.
  • Business Formation: Tasks for choosing your business structure, registering your business name, filing formation documents, and obtaining your EIN.
  • Licenses & Compliance: Steps for registering with the Delaware Division of Revenue, obtaining licenses and permits, checking zoning requirements, and registering for unemployment insurance.
  • Financial & Tax Setup: Cards for opening a business bank account, setting up accounting and bookkeeping, and obtaining business insurance coverage.
  • Launch Preparation: Final tasks for developing your marketing and branding strategy and securing your business location.

3. When You Should Use This

This template is most useful when you need a reliable process for setting up a business without relying on memory, scattered notes, or disconnected tools.

  • When you are starting from scratch: Use this board when you need a complete roadmap from early planning to launch readiness.
  • When multiple steps are happening at once: This is especially helpful when legal, financial, and operational tasks are moving in parallel.
  • When you are working with a team: If founders, partners, or advisors are involved, this template creates a single source of truth for progress and accountability.

4. How To Use It

Managing your business launch is straightforward when you move through the board from left to right, one stage at a time.

  1. Start with the READ ME cards: Each column begins with a READ ME task that explains how to use that phase correctly. Always review these first before moving or adding tasks.
  2. Use IN PROGRESS to show active work: As soon as a task begins, update its status so the rest of the team knows it is underway.
  3. Pay close attention to the checklists: Every card includes sub-tasks that help make sure you do not miss critical requirements, filings, or approvals.
  4. Assign responsibility clearly: Delegate tasks to the right people so there is no confusion around ownership or deadlines.
  5. Move completed work forward: Shift finished tasks into the COMPLETED column to make progress visible and keep momentum high.
  6. Keep communication inside the board: Use task chats and attachments to centralize documents, decisions, and updates in one place.

Conclusion

Using this Delaware business setup template helps turn a complicated launch into a more manageable and structured process. Instead of trying to track everything across emails, notes, and spreadsheets, you get one visual workspace for planning, formation, compliance, financial setup, and launch preparation.

That means less confusion, better collaboration, and more confidence that nothing important will fall through the cracks. When you can see the full path clearly, it becomes much easier to keep your business moving forward.

Need Something Different?

If this template isn’t exactly what you need, let us know at support@kerika.com and we will create a custom version for you, free!
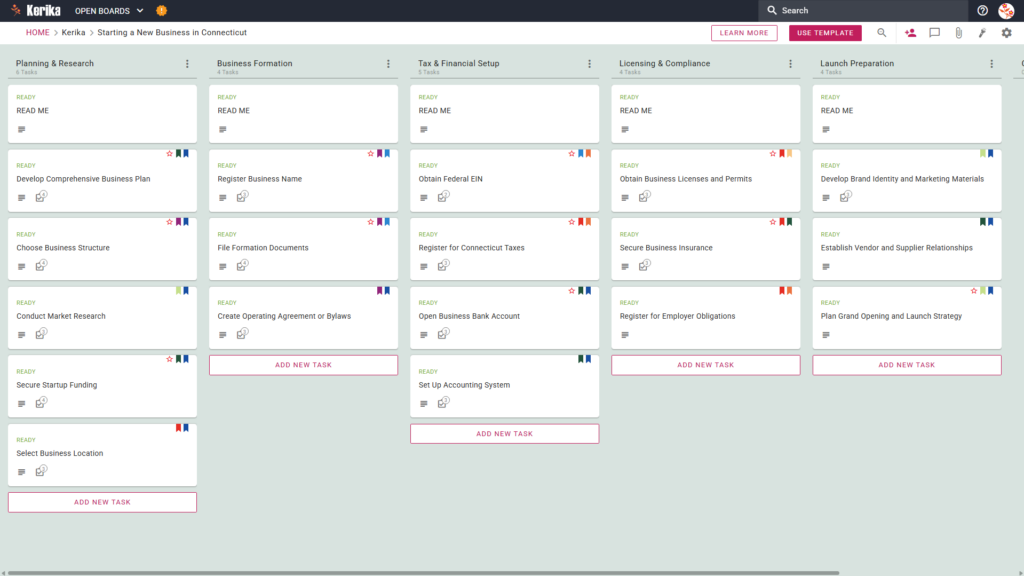
Starting a New Business in Connecticut: Your Step-by-Step Launch Template

Screenshot of the Kerika's kanban board titled "Starting a New Business in Connecticut." The board features a left-to-right workflow with columns for Planning & Research, Business Formation, Tax & Financial Setup, Licensing & Compliance, and Launch Preparation, containing specific task cards like "Develop Comprehensive Business Plan" and "Obtain Federal EIN."

Click the image above to open the live template in a new tab

Starting a business in the Constitution State is an exhilarating journey, but let’s be honest—the administrative “red tape” can feel like a mountain of paperwork. Between local zoning permits and state-level filings, it is easy to feel overwhelmed by the dozens of moving parts required to get your doors open.

But don’t worry, think of this template as your digital co-founder. We designed the Kerika Starting a New Business in Connecticut template to act as your roadmap, stripping away the friction of administrative setup. Our goal is to handle the heavy lifting of organization so you can focus on your vision and reach launch day with confidence.

1. Who Can Use This

This template is a tailored workspace for anyone establishing a professional presence in Connecticut:

  • Solo Entrepreneurs who need a structured, step-by-step roadmap to turn their first dream into a legal reality.
  • Small Business Partners who require a shared, real-time workspace to divide responsibilities and track progress together.
  • Nonprofit Founders looking to make a community impact. Kerika is committed to “doing well by doing good,” which is why we offer a 50% discount for nonprofits to ensure you have access to professional-grade tools.

2. What it Includes

We have pre-configured this board to cover the specific hurdles of a Connecticut launch. Each column begins with a READ ME card containing the exact criteria you need to meet for that phase:

  • Planning & Research: Resources for building a solid business plan and researching the unique Connecticut market.
  • Business Formation: The “how-to” for choosing a structure, registering your name, and filing with the Secretary of State.
  • Legal & Tax Foundations: Crucial steps for obtaining your Federal Employer ID Number (EIN) and navigating state tax registrations.
  • Compliance: Managing the specific sequence between State Tax registration and Department of Labor compliance, including registering for Unemployment Insurance.
  • Financial Setup: Tasks for opening your business bank account and establishing professional accounting systems.
  • Launch Strategy: Securing your physical location, verifying local zoning, and executing your marketing plan.

3. When You Should Use This

  • You should use this template as your single source of truth from the moment you begin navigating CT.GOV (Connecticut’s Official State Website).
  • State requirements involve strict sequences; for instance, you often cannot complete labor registrations until your tax foundations are set.
  • By using this template, you ensure you follow the correct order, avoiding the administrative delays that can push back your opening day.

4. How To Use It

  • Initiate Your Board Select the “Starting a New Business in Connecticut” template to instantly generate your workspace. All the columns, tasks, and READ ME cards are pre-loaded, so you don’t have to spend hours setting up your project structure from scratch.
  • Assemble Your Team Add your co-founders or employees as Team Members. Kerika’s pricing is straightforward: you pay for each person on your Account Team who is a Team Member, plus yourself.
  • Include Stakeholders Need a lawyer or a mentor to review your progress? Add them as Visitors. Visitors have read-only access, meaning they can see your progress in real-time without the risk of accidental edits to your board. Best of all, Visitors are always free.
  • Methodically Progress Drive your progress by dragging task cards from left to right as you complete them. Before you start a new phase, always read the ‘READ ME’ card at the top of the column. It acts as your expert guide for that specific stage of the Connecticut registration process.
  • Facilitate Communication Keep your launch organized by using the Chat feature located directly on individual task cards. This keeps your conversations regarding EINs, permits, or lease agreements centralized and out of your messy email inbox.
  • Monitor Advancements Check your Dashboard for a high-level view of your launch. Kerika provides an expert-level “roll-up” feature: any dates or assignments you set on subtasks are automatically rolled up to the main task card, so you can see exactly when a major milestone is due at a single glance.

Conclusion

Launching a business is a marathon, and Kerika is here to help you cross the finish line. Our platform handles the document versioning for you, meaning you’ll never have to wonder if you’re looking at “Plan-v2” or “Plan-Final-Final.”

You also maintain total control over your data. If you sign up using your Google, Microsoft, or Box ID, your files stay in your own account, ensuring you always own your intellectual property. (Note: if you sign up with just an email address, we securely store your files in Kerika’s own Google Drive). With Kerika, your files stay organized, versioned, and secure.

Need Something Different?

If this template isn’t exactly what you need, let us know at support@kerika.com, and we will create a custom version for you, free!

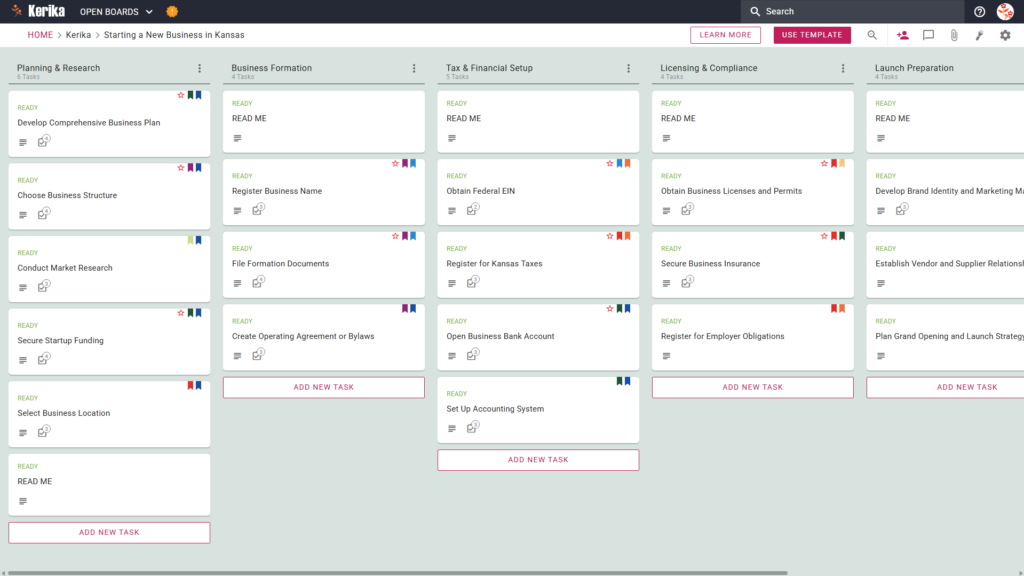
Starting a New Business in Colorado: Your Step-by-Step Launch Template

Kerika Kanban board template for starting a new business in Colorado, illustrating a step-by-step visual roadmap for business planning, legal formation, state licensing, tax setup, and launch preparation.

Click the image above to open the live template in a new tab

Starting a business in the Centennial State is an incredibly exciting journey, but we know it often comes with a daunting list of administrative hurdles. From navigating state filings to structural planning, the complexity can feel overwhelming for even the most seasoned entrepreneur. This Kerika template is designed specifically as your professional roadmap to help you reclaim your time by reducing the administrative overhead of your legal and financial setup. Instead of getting lost in disjointed spreadsheets or messy email chains, you can focus on building a foundation for scalability and success. Ready to launch with confidence? Let’s dive in!

1. Who Can Use This

This template is a dedicated resource for entrepreneurs and small business owners in Colorado. It is designed for:

  • Founders who need to organize Colorado-specific paperwork and administrative filings.
  • Local founders looking for a “single source of truth” to manage every moving part of their launch.
  • Distributed teams and co-founders who need to collaborate seamlessly while maintaining clear accountability.

2. What it includes

The Colorado Business Launch template provides a pre-configured workflow across five essential columns, including critical tasks pre-loaded from the Colorado Secretary of State and Department of Revenue requirements:

  • Planning & Research: Conduct market research and calculate startup costs to develop your comprehensive business plan.
  • Business Formation: Choose your legal business structure, register your name, and file formation documents with the Colorado Secretary of State.
  • Licenses & Compliance: Identify your specific state and local licenses, register with the Colorado Department of Revenue, and handle local tasks like Verify Zoning and Land Use Compliance.
  • Financial & Tax Setup: Set up your accounting system, secure insurance, open a business bank account, and complete the critical Register for Unemployment Insurance task.
  • Launch Preparation: Finalize your launch strategy, secure your business location, and prepare your branding for the grand opening.

3. When You Should Use This

  • You should adopt this workflow from day one of your journey to ensure your files remain secure and organized in your own Google Drive, OneDrive, or Box account.
  • This template serves as your primary navigation tool when visiting business.colorado.gov (the official state resource); as you gather information, you can attach relevant URLs and PDFs directly from the state site to your task cards so they are never lost.

4. How To Use It

  1. Initiate Your Board

Select the Colorado Business Launch template to immediately populate your board with pre-configured columns and tasks. This instant setup provides a clear roadmap, transforming a complex government process into a manageable visual workflow.

  1.  Assemble Your Team

Invite your co-founders or legal advisors to the board as Team Members with read+write access. This allows everyone to contribute to tasks and upload documents in real-time while Kerika automatically handles the backend file permissions.

  1.  Include Stakeholders

Add mentors or investors as Visitors to provide them with real-time, read-only access to your progress. This is a high-value way to keep your inner circle in the loop without incurring additional licensing costs.

  1.  Methodically Progress

Every column begins with a READ ME card that contains the “Definition of Ready” for that phase—be sure to check these to ensure compliance. Move task cards through the workflow as you finish them, knowing that all dates and assignments roll up to the task level for clear visibility.

  1.  Facilitate Communication

Use the Chat feature on specific task cards to keep all discussions connected to the work itself rather than scattered in emails. These conversations stay forever connected to the task, making it easy to retrieve decisions or context months after your launch.

  1.  Monitor Advancements

Leverage the Dashboard to get a high-level summary of your entire project across multiple boards. This view highlights exactly what needs your attention, effectively eliminating the need for manual status reports or time-consuming update meetings.

Conclusion

Launching a business is complex, but your project management shouldn’t be. By using a visual Kanban-style board, you replace the confusion of email threads with a streamlined, professional process. Kerika keeps your Colorado business data secure by automatically managing file permissions when user roles change, ensuring your documents remain entirely under your ownership and control.

Need Something Different?

If this template isn’t a perfect fit for your specific venture, we are here to help. Email support@kerika.com and our team will create a free custom version designed specifically for your unique business needs.

How to Start a New Business in California with Kerika’s Template

A screenshot of a Kerika Kanban board titled "Starting a New Business in California," showing workflow columns for Planning & Research, Business Formation, Registration & Compliance, Financial Setup, and Launch Preparation, each populated with step-by-step task cards.

Click the image above to open the live template in a new tab

Starting a business in California is an exciting milestone, but navigating the state’s specific administrative and legal requirements can easily feel like a massive logistical hurdle. But don’t worry, this guide is here to help! We designed this template to simplify the complex process of getting your California business off the ground. Built using the official resources from the California Secretary of State, it provides a visual, structured workspace for your entire team. Ready to reclaim your time and productivity? Let’s get started!

1. Who Can Use This

This template is built to support the diverse group of professionals and dreamers looking to launch in the Golden State:

  • Aspiring Entrepreneurs: Individuals who need a clear, visual roadmap to launch their first venture without missing crucial state deadlines.
  • Small Business Owners: Leaders who want an organized way to handle local compliance and setup.
  • Distributed Teams: Professionals working across different locations who need a “single source of truth” to collaborate without losing track of document versions.

2. What it includes

The template provides a comprehensive starting point with a pre-configured, visual layout:

  • A Five-Column Workflow: Your progress is tracked through clearly defined stages: Planning & Research, Business Formation, Registration & Compliance, Financial Setup, and Launch Preparation.
  • The READ ME Card: You will find a “READ ME” file at the top of every column. Always check these first. They contain specific rules on the criteria that must be met before adding or moving tasks to the next stage.
  • Actionable Sub-tasks: Every task card comes with a dedicated checklist of sub-tasks. Check these off one-by-one to ensure no detail, like a specific figure or date, is ever missed.
  • Key Deliverables Built-in: By the end of your journey on the board, you will have a finalized business plan, secured financing, registered business structure, acquired EIN, state tax accounts, required licenses/permits, and a fully set up accounting system, business bank account, and insurance coverage.

3. When You Should Use This

This workspace provides the most value in environments where organization and strict legal compliance are critical:

  • Moving from Idea to Execution: Use this template when you are ready to transition from dreaming about your business to tackling the actual paperwork and structural requirements.
  • Navigating State Compliance: This is the perfect solution when you want a reliable, step-by-step process to hit all the official milestones required by the California State government.

4. How To Use It

Managing your business launch is straightforward with these steps:

  1. Initiate Your Board: Click the USE TEMPLATE button to swiftly set up your board with this template, providing a robust foundation for your project’s journey.
  2. Assemble Your Team: Collaboration is the lifeblood of any project. Add team members and define their roles and responsibilities clearly to facilitate smooth execution.
  3. Include Stakeholders: Grant stakeholders, like clients or upper management, Visitor access to your board. They can track progress and contribute insights without altering the project’s course directly, fostering a transparent and trustful relationship.
  4. Methodically Progress: Start with the first card, in the leftmost columns. Use the IN PROGRESS status to mark the commencement of tasks, keeping the whole team in the loop. Delegate tasks to specific individuals or teams to ensure clear accountability. Emphasize deadlines to keep the project on track and highlight any potential delays.
  5. Facilitate Communication: Leverage the built-in chat for immediate discussions and ensure all relevant materials are attached to tasks. This strategy centralizes information, enhancing accessibility and organization.
  6. Monitor Advancements: Shift completed tasks to the COMPLETED column to visually signify progress. This not only demonstrates advancement but also motivates the team by celebrating achieved benchmarks.

Conclusion

Using the Kerika template ensures your business launch is supported by professional, organized preparation. By moving to a visual board, you can eliminate messy email chains and ensure your organization maintains the highest professional standards.

Need Something Different?

If this template isn’t exactly what you need, let us know at support@kerika.com and we will create a custom version for you, free!
Starting a New Business in Alaska: Your Visual Roadmap to Success

Screenshot of the Kerika's kanban board displaying a project board titled "Starting a New Business in Alaska." The board features a left-to-right workflow with columns for Planning & Research, Business Formation, Licenses & Compliance, Financial & Tax Setup, and Launch Preparation, containing specific task cards like "Develop Your Business Plan" and "Obtain Alaska Business License."

Click the image above to open the live template in a new tab

Starting a business in the Last Frontier is an exhilarating journey, but the logistical hurdles and bureaucratic friction can often feel like a climb up Denali. From navigating state-specific regulations to managing the paperwork required by various agencies, the administrative overhead is enough to stall even the most inspired entrepreneurs.

But don’t worry, we’ve mapped it out for you. We designed the Kerika Alaska Business Template to simplify this complex process, providing a visual, structured workspace that guides you from your initial research through your official launch.

Ready to turn your Alaskan dream into a reality? Let’s get started!

1. Who Can Use This

This template is built specifically for entrepreneurs and small business owners located in or moving to Alaska. Whether you are currently brainstorming your first idea or are ready to transition your passion project into a legal entity, this roadmap provides the structure you need.

It is designed to support both solo founders and small teams who need a “single source of truth.” By keeping all your documents and tasks in one place, you can collaborate with partners or advisors without losing track of your progress or document versions.

2. What it includes

The “Starting a New Business in Alaska” Kanban board provides a comprehensive workflow organized into five main stages, each designed to ensure you meet every state requirement:

  • Planning & Research: Build a solid foundation by creating your business plan, researching Alaska Market and Resources, and calculating your startup costs and funding needs.
  • Business Formation: Navigate the legalities of choosing a business structure, registering your business name, and filing official formation documents with the State of Alaska.
  • Licenses & Compliance: Manage critical requirements including obtaining your Alaska Business License, securing local permits, and registering for unemployment insurance.
  • Financial & Tax Setup: Organize your business infrastructure by opening bank accounts, setting up your bookkeeping systems, and securing necessary insurance coverage.
  • Launch Preparation: Finalize your entry into the market by developing your Marketing and Branding Strategy and securing a physical location for your operations.

The primary deliverables you will achieve using this template include a finished business plan, all required state and local licenses, and a functional accounting system.

3. When You Should Use This

You should use this template the moment you are ready to navigate the official requirements from the Alaska State government’s Small Business Assistance Center.

Attempting to track state-specific regulations and high-stakes compliance through messy email threads or static spreadsheets often leads to confusion and missed deadlines. This template acts as your central hub, eliminating the guesswork and ensuring you meet every regulatory milestone with confidence.

4. How To Use It

Managing your business launch is straightforward with these six steps:

  1. Initiate Your Board: Start by opening the template to create your own personal or team workspace.
  2. Assemble Your Team: Add your co-founders or employees as collaborators so everyone can see the project’s progress in real-time.
  3. Include Stakeholders: Invite external advisors, such as lawyers or accountants, to provide feedback directly on specific tasks.
  4. Methodically Progress: Move task cards from left to right through the columns. Always check the READ ME card at the top of each column for specific criteria and use the CHECKLIST tab within each card to manage sub-tasks and details.
  5. Facilitate Communication: Use the discussion features within each task card to ask questions and share updates, keeping all project-related talk organized in context.
  6. Monitor Advancements: Regularly review the board to track the overall health of your business launch and identify any tasks that need immediate attention.

5. Conclusion

Using a visual Kanban system like Kerika ensures that your business formation is supported by organized, professional preparation. By moving away from fragmented notes and into a structured workspace, you can manage every detail of your Alaskan launch from one central location.

Because Kerika integrates seamlessly with your existing cloud storage including Google Drive, OneDrive, and Box, you maintain full ownership of your files while ensuring your team has the access they need. Launch your business with the confidence that nothing has been overlooked.

6. Need Something Different?

If this template isn’t exactly what you need, let us know support@kerika.com  and we will create a custom version for you, free!

How to Organize a Board of Directors Meeting with Kerika’s Board Pack Template

Kerika Board Pack Template screenshot showing a Kanban board workflow for organizing a board of directors meeting, including preparation, review, and distribution tasks.

Click the image above to open the live template in a new tab

Organizing a board meeting can feel like a massive logistical hurdle, especially when you’re dealing with the administrative overhead of governance. For leaders in both commercial and nonprofit organizations, the real friction usually lies in the “board pack.” 

It’s a complex assembly of reports, agendas, and financial statements that you need to distribute and update in real-time. But don’t worry, this guide is here to help! If you’re wondering how to get your board pack together quickly and easily, this template is exactly what you need. We designed this template to simplify the complex process of board prep. It provides a visual, structured workspace for your entire team, whether they are across the hall or across the globe.

Ready to reclaim your time and productivity? Let’s get started!

1. Who Can Use This

This template is built to support the diverse group of professionals responsible for high-level governance:

  • Corporate Secretaries and Administrative Professionals: Those who manage the logistics and final assembly of board materials.
  • Executive Leadership Teams (CEOs and CFOs): Leaders who must provide high-level strategic and financial updates.
  • Committee Chairs: Specifically those leading Audit, Risk, Governance, or Remuneration committees who must submit specialized reports.
  • Distributed Teams: Professionals working across different time zones who need a “single source of truth” to collaborate without losing track of document versions.

2. What it includes

The Board Pack template provides a comprehensive starting point with a pre-configured, visual layout:

  • A Four-Column Workflow: Your progress is tracked through the Preparation, Review & Approval, Final Distribution, and Completed columns.
  • Standard Board Documents: Pre-configured cards include the Meeting Agenda and Schedule, CEO Report and Strategic Updates, and Financial Reports and Analysis.
  • Committee Reports: Dedicated cards are ready for the Audit Committee Report, Risk and Compliance Committee Report, Governance and Nominations Committee Report, and Remuneration Committee Report.
  • Quality Control Cards: To ensure accuracy, the template includes cards for Board Pack Quality Review and Fact-Checking and Chair and Committee Chair Review.

3. When You Should Use This

This workspace provides the most value in high-stakes environments where organization and security are critical:

  • Quarterly Board Meetings: Use this template when you need a repeatable, reliable process every three months to keep your board cycles consistent.
  • Remote Board Coordination: This is the perfect solution when your directors and staff are spread across different locations. Kerika handles time zone adjustments automatically so everyone stays in sync.
  • High-Stakes Document Security: Use this when your IT department requires strict access control. Kerika is the only task management tool that leaves file ownership entirely with you by storing documents in your own Google Drive, OneDrive, or Box account.

4. How To Use It

Managing your board prep is straightforward with these steps:

  1. The READ ME Card: You will find a “READ ME” card at the top of every column. Always check these first. They contain specific rules on the criteria that must be met before adding or moving tasks to the next stage.
  2. Advancing the Workflow: Only move task cards from Preparation to Review & Approval once the initial content is fully drafted. This ensures the review team only sees “ready” materials.
  3. The CHECKLIST Tab: Open every card and navigate to the CHECKLIST tab to manage sub-tasks. Check these off one-by-one to ensure no detail, like a specific figure or date, is ever missed.
  4. The ATTACHMENTS Tab: Use the ATTACHMENTS tab to upload reports or spreadsheets directly to the relevant card. These files stay in your secure cloud storage, and Kerika ensures they are shared automatically with the right people.

Conclusion

Using the Kerika Board Pack Template ensures your board meetings are supported by professional, organized preparation. Because Kerika integrates seamlessly with Google Workspace and Microsoft 365, access rights are managed for you. When you change a user’s role in Kerika, their file access in your cloud storage is updated instantly.

Team members get the read+write access they need to build the pack, while board directors are added as Visitors with read-only access. By moving to a visual board, you can eliminate messy email chains and ensure your organization maintains the highest professional standards.

Need Something Different?

If this template isn’t exactly what you need, let us know at support@kerika.com and we will create a custom version for you, free!
Adding Teammates to Your Board With Kerika

Collaboration works best when everyone knows their role and has access to the right tools. With Kerika, inviting teammates to your board is simple and flexible.

Whether you’re working with a project manager, developers, designers, or external stakeholders, Kerika makes it possible to assign roles and ensure everyone has the level of access they need.

Here’s how you can add teammates and manage their roles effortlessly:

Adding Teammates to Your Board

Adding Teammates To The Board Preview
Click here to see how it works

Step 1: Invite Teammates

  1. Open your board and click the Team Icon in the toolbar.
  2. Enter the email address of the person you want to invite.
  3. Select a role for them: Board Admin, Team Member, or Visitor.

Step 2: Assign Roles

  • Board Admin: If you have created the board, then by default you’re a Board Admin. But you can give full control of the board to someone, which includes managing team members and settings.
  • Team Member: Can collaborate on tasks, upload files, and contribute to the board. Ideal for designers, developers, and other contributors.
  • Visitor: View-only access. Great for external stakeholders or clients who just need to monitor progress.

Step 3: Add Them to the Team

  • Click Add, and your teammate is instantly part of the board with the role you’ve assigned.

The Benefits of Kerika’s Role-Based Access:

1. Board Admin: Full Control for Team Leads

Preview of Board Admin Access

If you created the board, you’re the admin by default. But Kerika also lets you assign admin rights to others.

Key Benefits:

  • Manage team members, update board settings, and maintain control over the board’s structure.
  • Perfect for projects with multiple leads or project managers who need equal control.
  • Avoids bottlenecks that might occur if there’s only a single Board Admin who is unavailable for some reason, e.g. on vacation.

Admins ensure the board stays organized and functional while empowering leadership collaboration.

2. Team Member: Empower Your Contributors

Board Teammember View

Team Members have all the tools they need to get the job done. They can collaborate on tasks, assign tasks to each other, upload files, and contribute to the board’s progress.

Key Benefits:

  • Ideal for designers, developers, and other active contributors.
  • Keeps the board dynamic by enabling hands-on collaboration while maintaining admin oversight.

Team Members drive the project forward, making them the backbone of productive teamwork.

3. Visitor: Keep Stakeholders in the Loop

Viewers View

Visitors have view-only access, which means they can monitor the board’s progress without making changes.

Key Benefits:

  • Perfect for external stakeholders or clients who only need to see updates.
  • Ensures transparency without compromising the board’s structure or workflow.

Visitors are ideal for keeping everyone informed without adding complexity.

With Kerika, adding teammates isn’t just quick – it’s designed to support how your team works best. Whether you’re managing a tight-knit group or collaborating with external stakeholders, Kerika’s role-based system makes teamwork seamless and efficient.

Ready to streamline your team collaboration? Start inviting teammates and assign roles today with Kerika!

Find Tasks Faster Using Tags

Working across multiple tasks and projects can make it challenging to focus on specific types of work, like design or research tasks, without scanning through the entire project board. This process can be time-consuming and may even lead to missed deadlines.

Tags provide a simple solution. By marking tasks with clear, customizable labels, you can quickly filter and highlight exactly what you need to focus on. With just a few clicks, tags help bring order to even the busiest boards.

So What Are Tags?

Preview of using tagsScreenshot illustrating how easily tags can be applied to tasks in Kerika for better organization. The image shows a task card ('Design User Interface') where clicking the '3 TAGS' button opens the 'SET TAGS' pop-up. This pop-up displays a list of customizable tags (like 'analysis', 'collaboration', 'planning') with checkboxes, allowing users to visually categorize work effortlessly. This feature enhances workflow flexibility by letting teams tailor organization methods to their specific needs, improving clarity and collaboration.
Review this board

Tags act as visual markers that can be added to tasks. They let you categorize work based on topics, teams, priorities, or anything that suits your workflow. And the best part? They’re completely customizable.

How to Create and Apply Tags

Screenshot demonstrating the straightforward process of creating and managing tags in Kerika's board settings. Accessed via the gear icon, the 'TAGS' tab provides a central location to 'ADD NEW TAG', edit existing ones, and see how many tasks use each tag. This highlights Kerika's ease of use and customization capabilities, empowering teams to define their own organizational system for any project, ensuring the tool perfectly adapts to their unique workflow.
Review this board

Creating tags is straightforward:

  • Go to Board Settings: Navigate to the settings icon in the top-right corner of your board.
  • Select the Tags Tab: Here, you can create, edit, or remove tags.
  • Add a New Tag: Assign a name and color for easy identification.

Once your tags are ready, applying them is just as simple:

  • Open a Task Card: Click on the task where you want to add a tag.
  • Choose Tags: In the card’s details, select or apply existing tags to categorize the task.

Using Tags For Filtering and Highlighting

Screenshot showcasing how Kerika tags dramatically improve focus through the 'Highlight Tasks' feature. The image shows selecting the 'admin' tag within the 'Custom highlight' options, instantly filtering the board view. This demonstrates how easily users can cut through clutter and zoom in on specific categories of work, saving time and boosting productivity. Combining tags with other filters offers powerful workflow flexibility for targeted task management.
Review this board

Tags are not just for looks – they’re your secret weapon for filtering tasks:

  • Use the Highlight Option: In the board menu, click on “Highlight Tasks on This Board.”
  • Select a Tag: Choose the tag you want to focus on. Instantly, only the tasks with that tag are highlighted, cutting through the noise.
  • Combine with Other Filters: Add due dates, priorities, or statuses to refine your search even further.

Why You’ll Love Using Tags

  • Streamlined Focus: Whether it’s a tag for “Urgent,” “Research,” or “Collaboration,” tags make it easy to zoom in on specific tasks.
  • Customizable Organization: No two projects are alike, so why should your tags be? Tailor them to suit your workflow.
  • Time-Saving Navigation: With tags and highlights, you’ll never waste time hunting for a task again.

Wrap-Up

Tags are more than just labels: They’re a practical tool for boosting productivity and maintaining clarity. By creating, applying, and filtering tasks with tags, you can streamline your workflow and stay organized, no matter the complexity of your project.

Breaking Down Tasks: Improve Task Management With Checklists

This Kerika task card showcases the power of checklists to break down complex tasks like "Home page development" into manageable steps. See how easily you can add items and gain clarity on the individual actions required for successful completion.

Click here to review this task card

Big projects can often feel overwhelming, with multiple moving parts and team members juggling different responsibilities. That’s where checklists come in, offering a simple yet powerful way to break down complex tasks into manageable steps.

Why Use Checklists?

  1. Clarity Through Simplicity: Checklists turn daunting tasks into actionable steps, helping your team understand what needs to be done.
  2. Improved Collaboration: Assigning individual checklist items to teammates ensures clarity in roles and responsibilities.
  3. Tracking Progress: Checklists make it easy to monitor the completion of subtasks, keeping the larger project on track.

How Checklists Work

How Checklists WorkClick here to review this task card

Checklists are seamlessly integrated into task management workflows, providing flexibility and structure. Here’s how you can use them effectively:

1. Create a Checklist Within a Task Card

  • Open a task card and go to the “Checklist” tab.
  • Add items that represent the smaller steps needed to complete the main task.

2. Set Due Dates for Checklist Items

  • For each checklist item, assign specific due dates. This ensures every subtask is completed on time without losing sight of the overall deadline.

3. Assign Items to Teammates

  • Easily assign individual checklist items to team members, making it clear who is responsible for what. This feature eliminates ambiguity and keeps everyone aligned.

4. Use Cases for Checklists

  • Breaking Down Deliverables: Divide a big deliverable, like a website redesign, into smaller tasks such as wireframes, content creation, and testing.
  • Tracking Dependencies: Ensure subtasks are completed in the correct order by setting due dates and assigning them to the right team members.
  • Collaborating on Shared Goals: For team projects, assign specific checklist items to leverage individual strengths and keep everyone accountable.

5. Benefits of Using Checklists

  • Better Organization: Simplifies complex tasks by presenting them in a structured format.
  • Improved Efficiency: Ensures that smaller steps don’t fall through the cracks, speeding up the overall process.
  • Enhanced Communication: Provides clarity by assigning tasks to specific people and tracking their progress.

In Action

The ability to set due dates and assign team members directly from the checklist keeps everything streamlined. For example, in the “Home Page Development” task (illustrated above), individual checklist items like “Create Homepage” are assigned with specific due dates, ensuring everyone knows their role and timeline.

Wraping-Up

Checklists are more than just a to-do list, they’re a tool for breaking down complexity, fostering collaboration, and ensuring that every detail is accounted for. Whether you’re managing a small project or a large team, checklists empower you to stay organized, efficient, and focused.

Executing a Successful Audit Program: A Step-by-Step Guide

Running a successful audit program requires careful planning, attention to detail, and a focus on collaboration. The essential steps, ranging from defining the scope and objectives to analyzing data and implementing improvements, form the backbone of any effective audit. These steps ensure that compliance is maintained, risks are identified, and processes are improved to align with organizational goals.

However, the path to success is not without its challenges. Common pitfalls like vague objectives, poor communication, and disorganized workflows can derail even the most well-intentioned audit programs. These issues can lead to overlooked details, missed deadlines, and a lack of actionable insights.

Fortunately, with the right tools and strategies, these challenges can be tackled head-on. In this guide, we’ll provide you with a step-by-step framework for executing an effective audit program. 

To illustrate this process, we’ll also walk you through a practical example of a well-structured workflow and share tools that can help you streamline collaboration, organize tasks, and keep your audit on track. Let’s get started!

Successfully execute your audit program with Kerika's structured visual workflow. This example shows how to manage each phase - Initiation, Fieldwork, Analysis, Reporting, and Final Review - ensuring compliance, identifying risks, and improving processes. Try Kerika and streamline your audit process with better organization and collaboration

Click here to check out this Audit Program Board

Essential Steps For Executing a Successful Audit Program

A successful audit program doesn’t just happen; it’s built on a foundation of strategic planning, meticulous execution, and continuous evaluation. Here’s a detailed roadmap to guide you through the key steps:

1. Define the Scope and Objectives

Start by outlining the purpose of your audit. What do you aim to achieve? Whether it’s ensuring compliance with regulations, identifying process inefficiencies, or validating financial accuracy, having clear objectives sets the tone for the entire program. Identify the departments, processes, or systems to be audited.

Define success metrics and establish key performance indicators (KPIs). Click here to read about the top metrics you should look out for according to Audiboard.com Communicate objectives to stakeholders to align expectations.

Watch out for:

  • Unclear objectives that can lead to wasted time and incomplete or irrelevant findings.
  • Lack of clear success metrics and KPIs.

2. Assemble the Right Team

A competent and collaborative audit team is essential to delivering accurate and actionable results. Assign roles and responsibilities, ensuring each team member has the skills needed for their tasks. You can learn more about the key responsibilities of audit team members from Validworth in this article. Involve both internal staff and external experts, depending on the complexity of the audit. Provide training on audit procedures, tools, and reporting standards.

Watch out for:

  • Poor task delegation and role clarity can cause confusion, missed deadlines, or duplicated efforts.
  • Insufficient training or expertise among team members.

3. Develop a Comprehensive Plan

An effective plan serves as a blueprint for the entire audit process. Break the audit into phases, such as planning, execution, analysis, and reporting. Set realistic timelines for each phase, ensuring deadlines are achievable. Identify potential risks and challenges, and prepare contingency plans to address them.

Watch out for:

  • Inefficient collaboration and communication can result in misunderstandings, overlooked tasks, and fragmented reporting.
  • Unrealistic timelines or inadequate risk assessment.

4. Gather and Analyze Data

The quality of your audit depends on the accuracy and relevance of the data you collect. Use standardized tools and methods for data collection, such as surveys, interviews, and system logs. Verify the reliability of your sources to minimize errors. Analyze the data systematically to uncover patterns, anomalies, or areas for improvement.

Watch out for:

  • Incomplete or inaccurate data can compromise the validity of audit findings.
  • Inadequate data analysis or interpretation.

5. Engage Stakeholders Throughout the Process

Regular communication with stakeholders ensures transparency and builds trust. Share progress updates at key milestones to keep everyone informed. Address concerns or questions promptly to maintain alignment with objectives. Involve stakeholders in reviewing preliminary findings and shaping actionable recommendations.

Watch out for:

  • Limited visibility for stakeholders can lead to mistrust and misalignment.
  • Inadequate communication or stakeholder engagement.

6. Document Findings and Provide Recommendations

The way you present your findings can determine how effective your audit will be in driving change.

Compile results into a structured report, highlighting key insights and areas of concern. Offer clear, actionable recommendations supported by evidence. Prioritize recommendations based on their potential impact and feasibility.

Watch out for:

  • Poor documentation practices can result in audit findings that lack context or clarity.
  • Inadequate or unclear recommendations.

7. Implement and Monitor Changes

The audit’s value lies in its ability to drive improvement. Develop a plan to implement recommended changes, assigning tasks and deadlines. Monitor the impact of these changes over time to measure effectiveness. Schedule follow-up audits to ensure sustained compliance and progress.

Watch out for:

  • Resistance to change can hinder the implementation of recommendations.
  • Inadequate monitoring or evaluation of changes.

8. Evaluate and Improve the Audit Process

Every audit is an opportunity to refine your approach for the next one. Conduct a post-audit review to identify lessons learned and areas for improvement. Update your audit processes, templates, or tools based on feedback. Recognize and celebrate successes to build momentum for future audits.

Watch out for:

  • Lack of continuous evaluation and improvement.
  • Inadequate documentation or retention of lessons learned

By following these steps and being aware of potential concerns, you can create an audit program that not only ensures compliance but also drives meaningful organizational improvements.

Using the Right Tools

Executing a successful audit program requires more than just good planning – it demands a tool that can help you overcome the common pitfalls we discussed earlier. A powerful task management solution can make all the difference in organizing your workflow and ensuring nothing slips through the cracks. 

The following demo board is a prime example of how an audit team has built a structured workspace to tackle each phase of their audit program seamlessly.

See how Kerika enables seamless audit program execution. This image exemplifies a structured workspace designed to address each phase of the audit process with clear task assignments and progress tracking. Learn how Kerika helps teams prioritize tasks, communicate effectively, and maintain a streamlined audit program from initiation to final review

Check How This Team Executes Their Audit Program

Take a closer look at how this audit team has designed their workspace to address every stage of the audit process. From conducting initial meetings in the Initiation Phase to validating compliance in the Fieldwork Phase and wrapping up in the Final Review, this board ensures that every step is meticulously planned, tracked, and executed.

This virtual workspace enables the team to prioritize tasks, communicate effectively, and track progress, all in one place. Let’s break down how this team uses their board to make sure their audit program stays on track.

Take a Closer Look at This Audit Program Board

Optimize your audit workflow with Kerika. Customize your Kanban board to streamline the audit process with features that let you add tasks, tailor columns, and manage team access. Prioritize team accountability, securing data and tasks by assigning the best roles to each member with just a few clicks.

1. Capturing Critical Action Steps with Detailed Task Cards

Capture all critical action steps within the Kerika platform using detailed task cards. See how this visual workspace organizes the scope of key objectives with structured sections, creating a more dynamic way to manage every step of the action plan. Improve clarity and boost team efficiency with Kerika’s detailed task management system

Adding tasks is straightforward and ensures that no step in the audit process is overlooked. By using the “Add New Task” button at the bottom of each column, team members can quickly create tasks, such as conducting stakeholder interviews or validating security measures. This ensures that action items are captured as they arise.

2. Flexible Workflow Customization with Column Actions

Customize and streamline your audit program using a flexible workflow with Kerika. Use this Kanban-style board to stay organized and efficient with clear organization and categorization. This workflow easily adapts to the evolving needs of any audit. Ensure a well-organized, well-documented action plan with clearly labeled columns

The ability to customize columns ensures the workflow adapts to the evolving needs of the audit program. This feature allows teams to rename columns, add new ones, or rearrange existing columns with ease. 

For example, moving tasks from “Fieldwork Phase” to “Analysis & Validation” ensures proper task progression without confusion. The option to hide or delete columns helps declutter the workspace, keeping the board focused and efficient. This customization enables teams to maintain a dynamic workflow while ensuring no task is misplaced. 

3. Assigning Roles and Permissions to Enhance Collaboration

Enhance team collaboration during audit programs by assigning the best roles to members and customizing permissions in Kerika. Customize visibility and edit control to keep sensitive audit action plans on track and accurate. Secure your team and your tasks by assigning roles such as Board Admin, Team Member, or Visitor

Managing roles ensures that team members are accountable and understand their responsibilities within the audit program. This feature lets you assign roles such as Board Admin, Team Member, or Visitor based on their level of involvement. 

For example, auditors responsible for key tasks can be assigned as team members, while external stakeholders can be given viewing access as visitors. This setup promotes structured collaboration, minimizes confusion, and secures sensitive project data by controlling access. 

4. Centralized Communication Using Board Chat

Improve team synergy by using Kerika board chat as a centralized communication hub. Say goodbye to endless email chains; instead, share updates, clarify issues, and leave feedback in one place. Effortlessly keep tasks aligned while promoting a better collaborative environment

Rather than relying on scattered emails or chat messages, the board’s built-in chat feature ensures that all discussions related to tasks remain accessible in one place. Team members can share updates, clarify issues, and leave comments directly on the board, allowing everyone to stay informed without the need to search through multiple communication channels. This approach reduces confusion and keeps conversations tied to their respective tasks, making collaboration more seamless and productive. 

5. Centralized File Management for Seamless Access

Keep all important documents in one place with centralized file management for seamless access. Simplify audits with easy file upload, document linking, and quick collaboration

The board’s attachment feature provides a streamlined way to manage and share files relevant to each task. Whether it’s audit guidelines, evidence documentation, or stakeholder reports, all files can be uploaded, created, or linked directly on the board. 

This eliminates the need for external storage systems and ensures team members can access the most up-to-date documents without delays. With everything in one place, your team can focus on executing tasks efficiently.

6. Highlight and Prioritize Critical Tasks

Focus on what matters most during your audits by managing the highlighting of tasks within Kerika. Highlight urgent tasks by filter and status to ensure deadlines are always met. Effortlessly apply high-priority tags with just a few clicks for an efficient workflow

The board’s highlight feature allows teams to quickly identify tasks that need immediate attention based on various criteria, such as assigned users, task status, due dates, and priority levels. This ensures that high-priority audits, overdue items, or tasks tagged with specific labels are easy to spot. 

By using this filter, teams can streamline their focus, tackle urgent tasks, and avoid missing deadlines; keeping the entire audit program on track and well-coordinated.

7. Fine-Tune Board Settings for Optimal Control

Ensure a streamlined audit with Kerika’s Fine-Tune Board Settings. Simplify complex action items, customize your visual workplace, maintain team workload, and meet goals with ease by using clearly defined, streamlined task actions

Efficient auditing requires a board that adapts to your evolving needs. The board settings let you control access with privacy options, ensuring that only the right people see the sensitive details of the audit process. You can set WIP (Work-in-Progress) limits to manage team workload and prevent bottlenecks. 

Auto-numbering tasks ensures consistent tracking, while tags help in organizing tasks across departments, phases, or categories. Additionally, the board overview provides real-time insights into the status of the audit program, making it easy to identify tasks that are completed, pending, or overdue. 

With export and archive options, you can back up or pause tasks while keeping your audit workflow organized and future-ready.

Break Down Tasks Into Manageable Steps 

When managing an audit program, be sure not to overlook any detail! This demo board shows how you can effectively take actions in clearly-defined steps. This includes detailed task descriptions and objectives, checklists for easy actionable progress, the ability to share files, task-specific communication and, most importantly, setting clear priorities

When managing an audit program, breaking down tasks is the key to ensuring no critical detail is overlooked. This demo board exemplifies how each task is divided into actionable, trackable steps for better clarity and collaboration. 

Here’s how this team approaches task segmentation effectively:

  1. Details Tab for Task Descriptions: The Details tab allows teams to document comprehensive task descriptions, requirements, and key objectives. This ensures everyone involved understands the task scope without needing constant clarification.
  2. Setting Task Status for Progress Tracking: Assigning a status such as Ready, In Progress, or Needs Review enables clear visibility into the progress of tasks. With updated statuses, team members can easily track completion or identify bottlenecks.
  3. Checklist Tab for Subtasks: Complex tasks can be broken down into smaller, actionable subtasks using the Checklist tab. Each subtask can be ticked off upon completion, helping teams stay organized and avoid overlooking essential steps.
  4. Due Dates to Maintain Deadlines: Setting deadlines ensures tasks remain on schedule, while visibility into upcoming due dates helps the team prioritize work and avoid missed timelines.
  5. Tags for Categorization: By assigning relevant tags, such as compliance audit or disaster recovery, tasks can be categorized and filtered efficiently. This feature makes it easy to locate related tasks and ensure streamlined workflows.
  6. Chat Tab for Task-Specific Discussions: Instead of scattered messages across different platforms, the Chat tab centralizes all task-related conversations. Teams can collaborate, provide updates, and resolve questions directly within the task card.
  7. Task Assignments for Clear Ownership: Assigning tasks to specific team members ensures accountability. Each team member knows their responsibilities and can focus on their assigned tasks without confusion.
  8. Attachments Tab for Storing Relevant Files: Important documents, reference files, or evidence can be attached directly to the task through the Attachments tab. This keeps everything task-specific and avoids searching through external storage systems.

With tasks broken down into manageable steps, this board demonstrates how complex audits can be simplified, making it easier to track progress, identify blockers, and ensure all objectives are met seamlessly.

Conclusion: Building an Effective and Scalable Audit Program

A well-executed audit program is the backbone of organizational compliance, risk management, and process optimization. By breaking down tasks into manageable steps, ensuring proper categorization, and fostering clear team communication, you create a workflow that is structured yet flexible enough to handle unexpected challenges. 

The right planning and execution will help you stay on top of deadlines, improve collaboration, and ultimately achieve audit success with confidence.