A new tutorial video on how to use Work-In-Progress (WIP) Limits on your Kerika Task Boards and Scrum Boards — even if you are not strictly following the Kanban model.
Monthly Archives: July 2015
How Project Settings Work in Kerika (A Preview of Coming Attractions)
Here’s a teaser video of the new Kerika user interface, which we are getting close to releasing…
Among other things, we will consolidate and improve a bunch of project management features under a new “Project Settings” button.
Check it out:
Box restores our Box Notes hack :-)
Our last blog post noted that a very useful Box Notes hack had gone away, following an unexpected update to the Box platform a couple of weeks ago.
We asked Box if they could consider adding something to their API that would allow us to restore this functionality, and their response has been very helpful and very fast!
Here’s how fast they responded:
- July 15, we enter a support request at 6PM.
- The next morning, Box Support put us in touch with Jon Berger, the Product Manager for Box Notes.
- The same day, Jon talks to his dev team and commits to providing us with a fix.
- Less than a week later, the fix is in production!
Very nice.
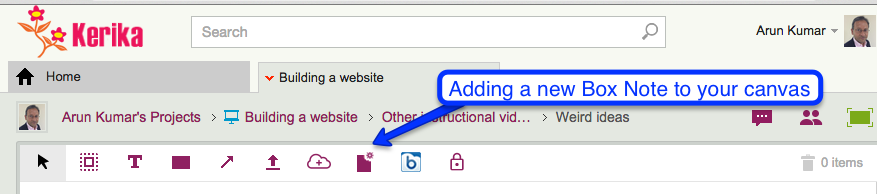
A nice Box hack that’s going away?
For a while now, our Kerika+Box users have had a very nifty feature that allowed them to create a new Box Note from within Kerika itself, and have that note automatically attached to the Task Board or Scrum Board card that they were working on.

(Which meant, naturally, that this new Box Note was also automatically shared with everyone on that particular board’s project team!)
And since this was a very handy integration with Box, we added it to our Whiteboards and canvases as well:
We added this because Google Docs had equivalent functionality: Google enabled us to create a new Google Doc from within a Kerika+Google board and have that new Google Doc attached to the card the user was working on.
The trouble was, Box’s Content API didn’t really have an official way of doing this, so we came up with a workaround that worked fine for the longest time — so long, in fact, that we forgot that it was even ever implemented as a workaround…
Unfortunately, that broke a few days ago. Box did an update to their platform that stopped our workaround from working any more, which means that, at least for now, we will have to stop offering this feature for our Kerika+Box users.
Hopefully we will be able to get Box to give us official support for this feature, so Kerika+Box remains at least as good as Kerika+Google :-)
A new tutorial video on how Notifications work in Kerika
We have created a new tutorial video on how Notifications work in Kerika. It is based upon our new user interface, which hasn’t been released yet, so some of the menu options shown on the top-right of Kerika boards will look a little unfamiliar :-)
Moving projects from one Account to another
We are sometimes asked how people can move projects from one account to another, either because someone has left their organization, or simply because they want to consolidate ownership of all project assets within a single account owner.
We plan to make this process simpler in the future, but for now here is a simple workaround that can help you achieve the end-goal.
Step 1: Add User B to User A’s project as a Team Member.
This is the simplest option: once User B has been added as a Team Member on User A’s project, she can then copy and paste the entire project over from User A’s account into her own.
Step 2: Copy User A’s Project
Normally, your Home Page shows a consolidated list of all the projects you are working on, regardless of who owns them.

But, you can filter your view of the Home Page to just show those projects owned by a certain user, like this:
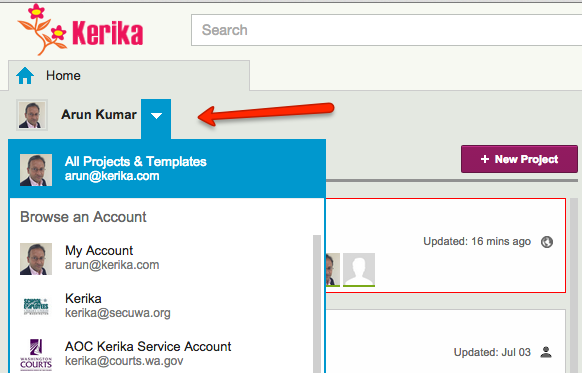
Using this filtering option can make it easier to find just those projects that are owned by a particular user, like this:
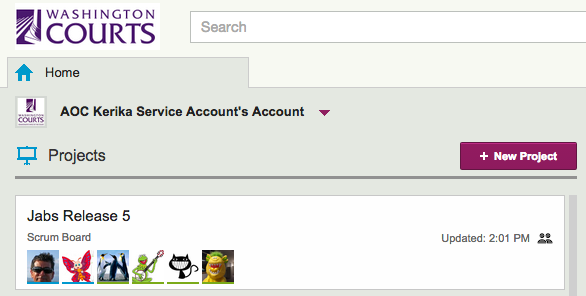
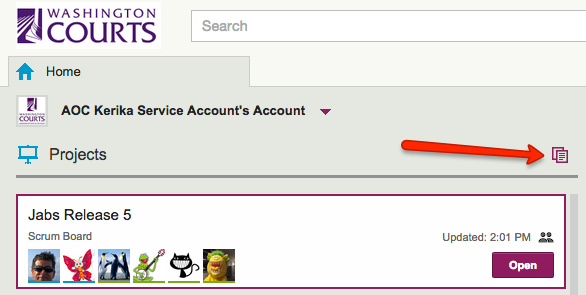
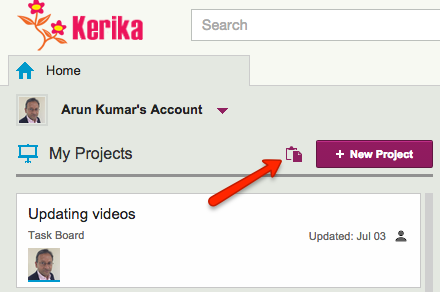
Now, User B can select one of User A’s project (that she has access to), and do a Copy using the Copy button that appears at the top of the list of projects:
Step 3: Paste the Project
Once User B has copied the project into her Kerika Clipboard (which, by the way, exists on the server and not on her browser itself, so you don’t have to worry about your browser crashing in the middle of this operation), a Paste button will appear when she then returns to view her own account:
Step 4: Get rid of the old Project
Once the Paste operation has finished (it can take a minute or two, depending upon how big the board is that that is being copied and pasted, and in particular how many files are attached to that board), it would be a good idea for User A to get rid of her original project, so that there is no longer any confusion about which version is the active one.
Deleting a project is simple: just select something that you own, and you will see a “Move to Trash” button appear at the top of the list of projects:
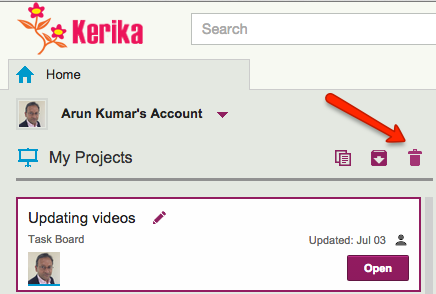
(Since Kerika offers a Trash/Recycle Bin feature, deleting is actually a “move to Trash” operation: if you delete a project by mistake, you can always restore it from your Home Page’s Trash.)