We are thrilled to announce a partnership with Twine, a global expert network that major companies are using to outsource all kinds of work:
Designers
Animators
Musicians
Filmmakers
Photographers
Marketers
Developers
Illustrators
Twine has over 500,000 registered members already, and is growing fast — and we are thrilled to be partnering with them to help Twine’s freelancers and clients get more done using our Task Boards.
Twine’s users are exactly the kind of folks that Kerika was designed for: creative people, developers, freelancers and businesses that need to come together quickly to execute on a project. In an environment that’s that fast-moving, having access to a task management tool that’s designed specially for remote and distributed teams, with a design that’s simple enough for anyone to get going with, is essential.
And that’s where Kerika can help Twine’s community.
As part of this partnership we will develop custom templates that can help Twine projects get going faster. And that’s just a starting point: we hope, over the coming months, to deepen this relationship!
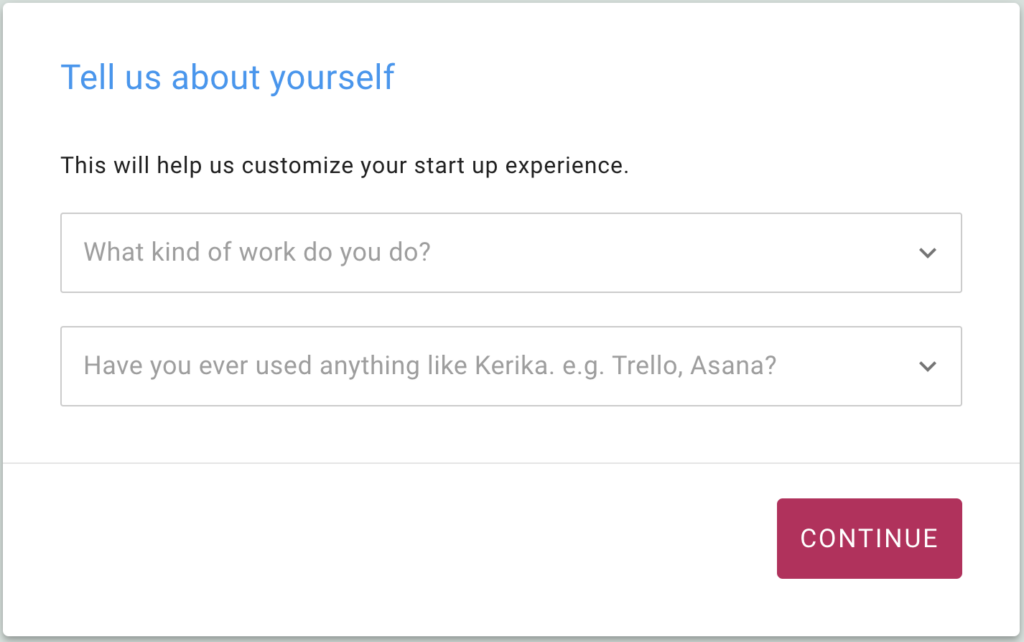
We are asking new users two simple questions, at the time of sign up:
Questions at Sign Up
These two questions, that take just a few seconds to answer, will help us create a more custom onboarding experience for new users. This is still a work-in-progress, of course, and in the first step we are just collecting some data while we get the rest built. There are a bunch of customization ideas we are exploring. Stay tuned.
Our team has had much to celebrate over the past few months, as we achieve milestone after milestone. This is the India-based development team of Kerika:
We have made a very big extension to Kerika, by integrating with Microsoft 365: now you can sign up using your Microsoft ID, and have your files stored in your own OneDrive account!
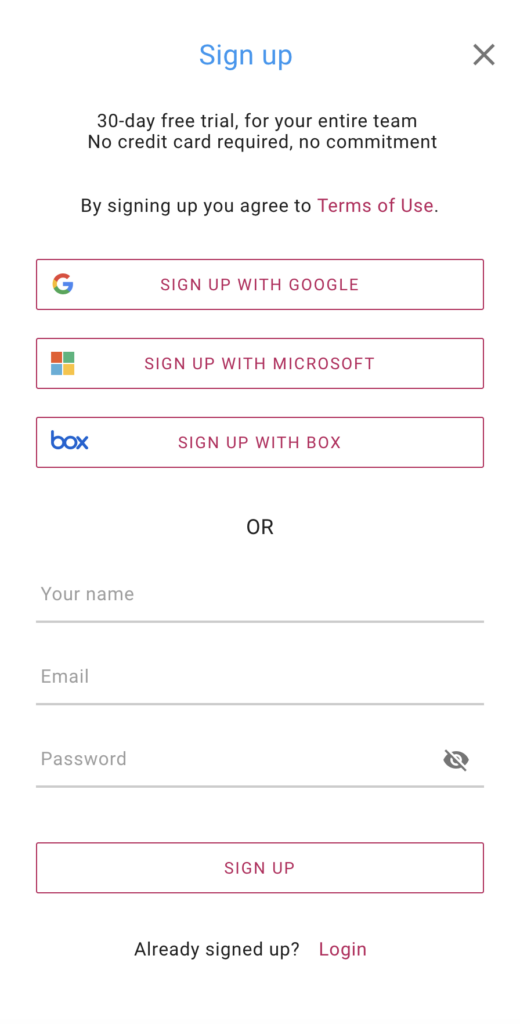
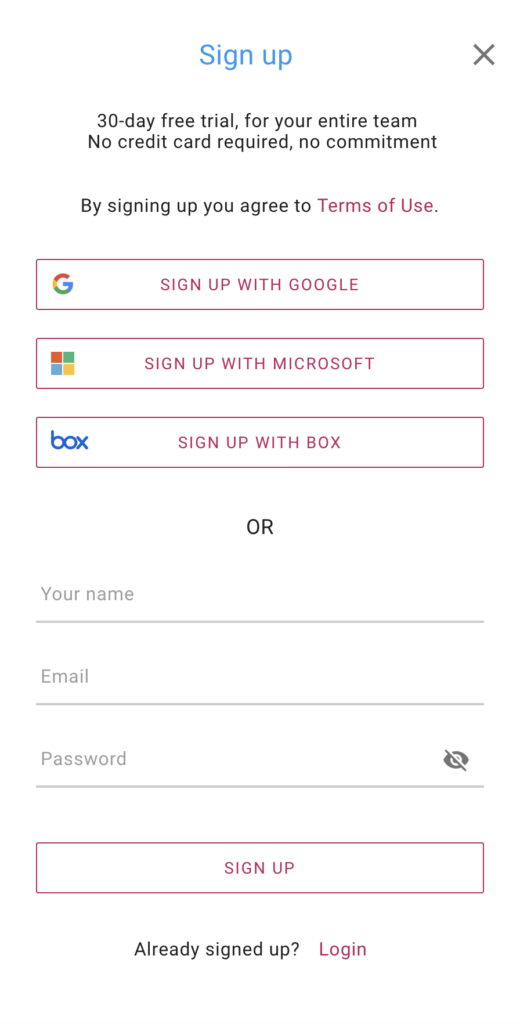
Kerika+Microsoft works the same was as Kerika+Google and Kerika+Box: you can use your existing Microsoft account to sign up and login to Kerika; there’s no need to create and remember a new password:
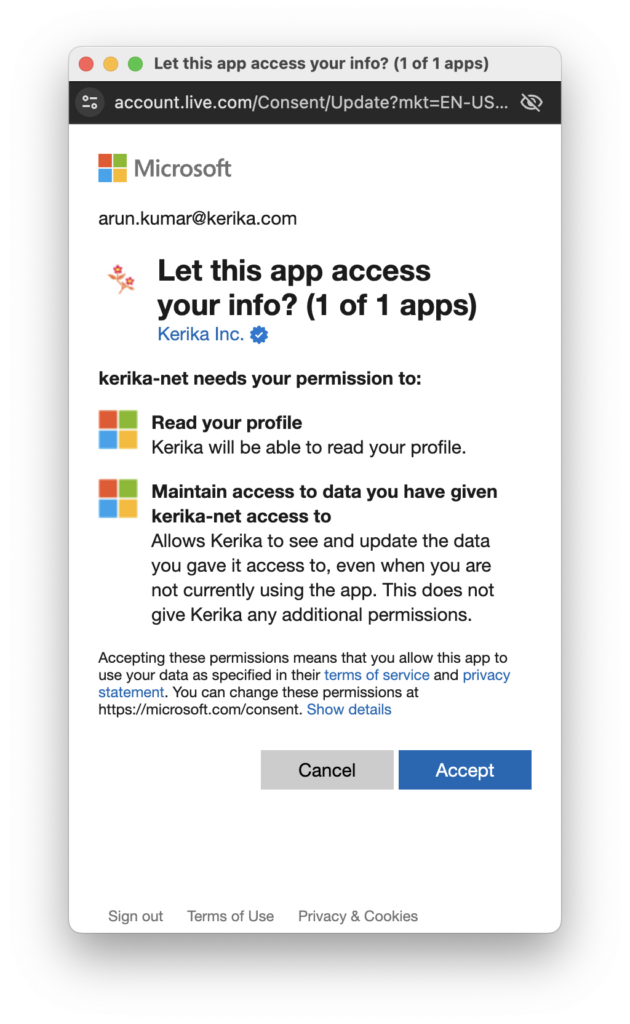
When you upload files to your board for the first time, you will be asked to choose a preferred cloud storage: if it’s Microsoft, then you will be asked to give Kerika access to a single folder in your Microsoft OneDrive:
Microsoft Authorization
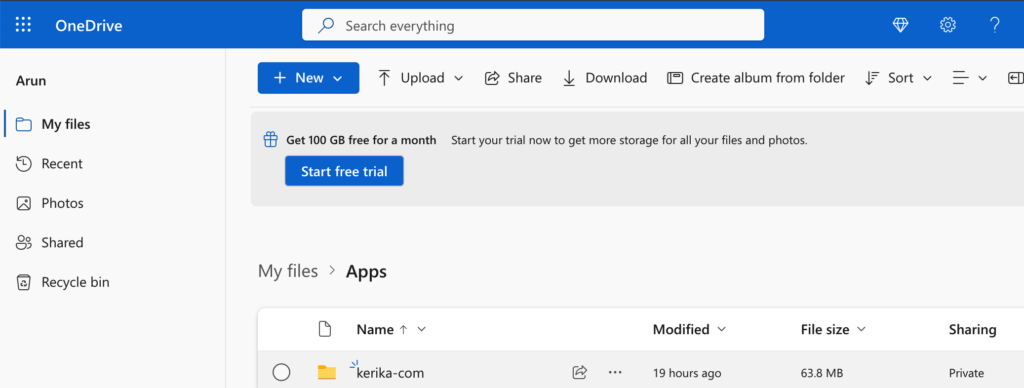
After you allow Kerika access to your OneDrive, Kerika will create a single folder in your OneDrive that it will use for all of your Kerika-related files:
Kerika in OneDrive
That one top-level folder is all that Kerika will ever use: inside there Kerika will automatically manage all the subfolders you need to sort your different Kerika accounts (yes, some folks have more than one Kerika account!) and your board.
Kerika doesn’t go snooping around or altering any other part of your OneDrive!
As folks join or leave your board team, access to all the files on that board will be automatically managed by Kerika, freeing you up from all the admin work that other tools make you do.
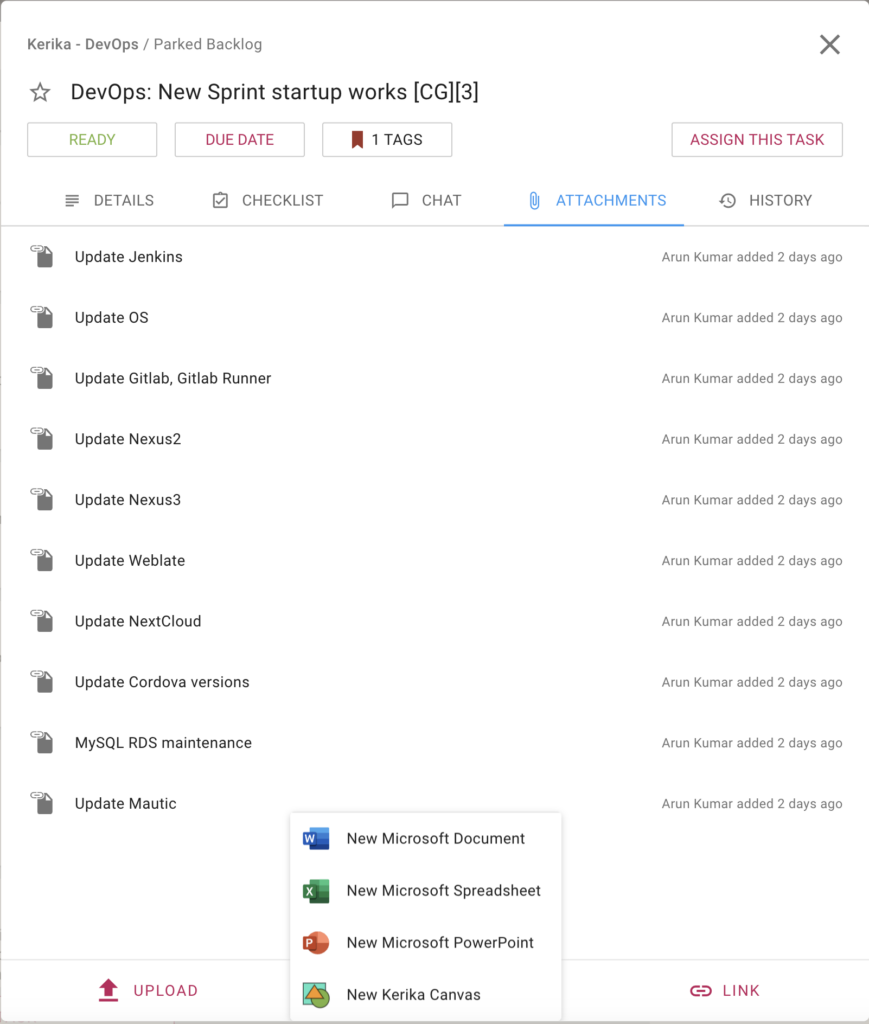
You can even create new Office 365 documents from inside Kerika, and have them shared automatically with your board team:
Create New Microsoft Documents
And we have always had the ability to sync your Kerika due dates with your Outlook calendar, so that completes everything you need to get the most of Kerika+Microsoft!
When we started, we made a big strategic decision to integration with the Google Apps platform: letting users sign in with their Google IDs — which meant they didn’t need to remember a password just for Kerika — and, more importantly, letting users store their files in their own Google Drive, where they remained under their own control.
This proved particularly popular with the IT departments of our users, because it meant that any corporate policies the IT folks were implementing on content management worked great on everything the users did with Kerika as well.
The ability to control how files were to be shared (e.g. not with anyone outside the domain), and how long files were to be retained (important for regulated industries) is super important to IT departments who are charged with guarding the corporate assets, and Kerika is the only task management tool that works seamlessly with a user’s existing Google Workspace.
We then implemented the same functionality for users of the Box platform: people could sign up with their Box IDs, and have their files stored in their own Box accounts. Once again, this means that the content management policies that their IT departments were implemented would remain respected thanks to Kerika being the only task management tool that works so well with Box.
To complete the range of options for our users, we now have Kerika+Microsoft as an option: you can sign up with your Microsoft ID and have your files stored in your own OneDrive account.
Sign Up Options
But we didn’t stop there: we recognize that there are some folks out there who would prefer to use a cloud service that’s different from the one they originally signed up with: for example, someone who signed up using a Google ID, or signed up directly using an email address, might want to switch to using Microsoft OneDrive.
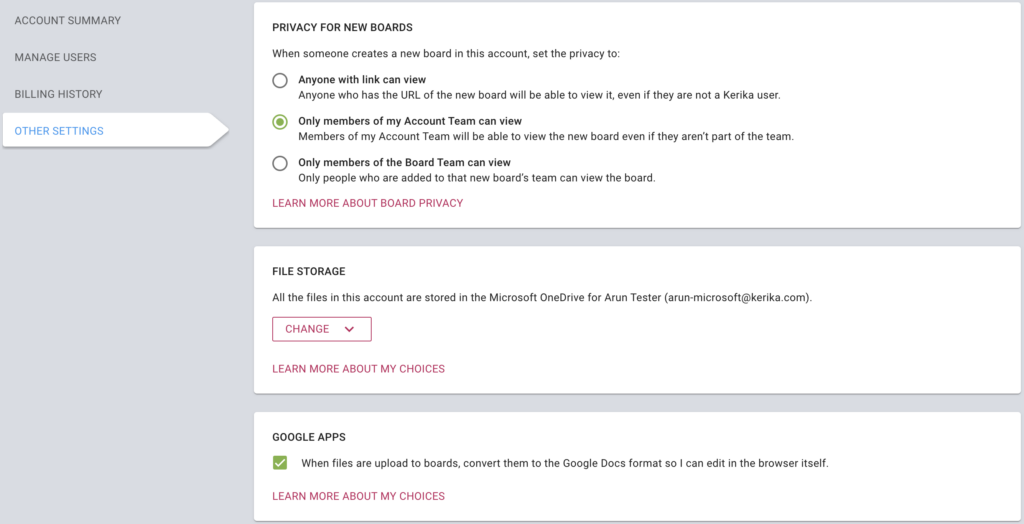
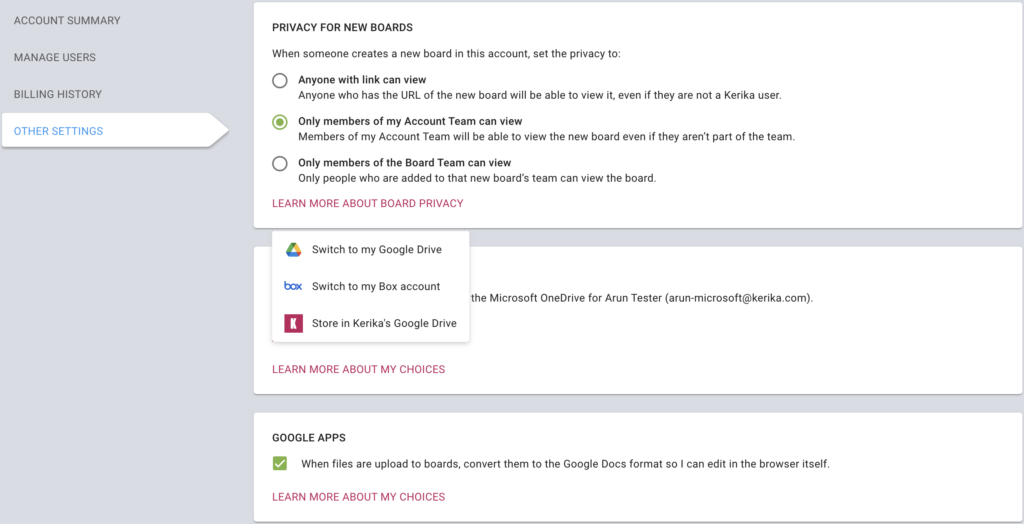
That’s easy, free, and painless: go to your Manage Account page from inside the Kerika app on your desktop, and select the OTHER SETTINGS tab:
Manage Account Other Settings
Click on the CHANGE button and you will see your storage options:
Storage Options
The above example shows the options available for a Kerika+Microsoft user: she can choose to have her files stored in her own Google Drive, in her own Box account, or use Kerika’s Google Drive.
Once you initiate this process it can take some time to complete, depending upon how many files you have in your account, and how large they are. There’s a file size limit of 200MB that’s imposed by the cloud service providers.
If you need help making a decision, or in making a switch, feel free to schedule a call with us.
CEO Today Magazine featured Kerika’s CEO, Arun Kumar, in the December issue. From the article:
“From the beginning we have believed in the concept of ‘eating your own dog food’ and we used the Kerika app to run our entire business, effectively using Kerika to build Kerika!”
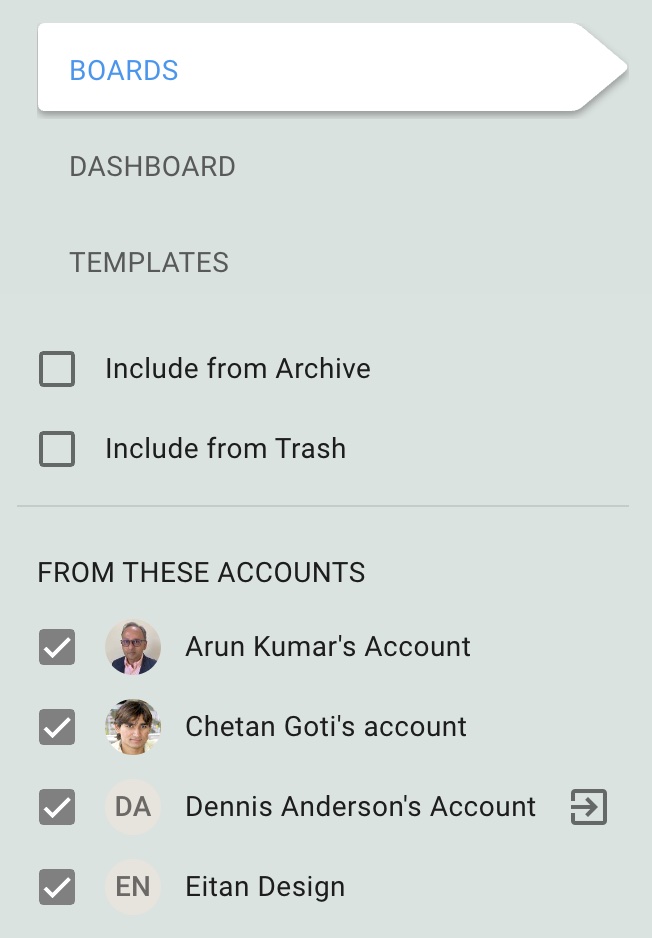
This is a problem that affects our student users a lot: as they work with different teams on different boards, they get added to a bunch of accounts. After the school year ends, some of these accounts are no longer relevant, but it wasn’t easy to leave an account that you were no longer interested in.
(It was always easy for an Account Owner to kick you off their account if they wanted you to leave.)
We have made it easy for anyone to leave an account in which they are no longer active: go to your Home, and (on your desktop) hover your mouse over the account that you are no longer interested in. A “leave account” button will appear, like this:
To make sure you don’t do this accidentally, there’s a confirmation step where you are asked to type the word YES in all caps:
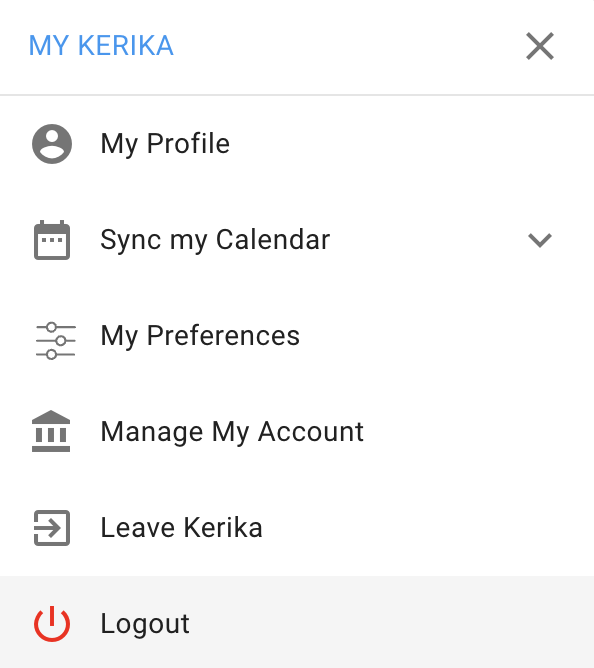
We have always made it easy (we thought!) to leave Kerika, which means closing all your accounts and deleting all the associated data: there was a button for this in the Manage Account screen, but we occasionally would get emails from folks asking us to close their accounts. We concluded that not everyone was finding our old button easy to find, so we moved it right up to the main profile menu:
If you choose this action, Kerika will email you a code that you need to enter to confirm your action, since closing an account is a one-way street: there’s no way to get it back after it’s gone!