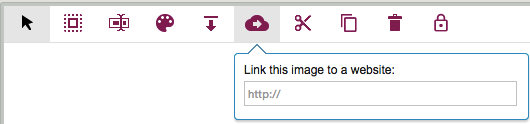
One little-known feature of Kerika’s Whiteboards: if you have an image (picture) on a canvas, you can also add a link to a Website, so that anyone clicking on the picture would be taken straight to that website.
(It’s one of several little-known features that we hope will become well-known, with our recent redesign of the Canvas toolbar; we have built too many really cool features that not enough people are aware of!)
One common use of this feature is to create an external-facing page that includes a logo: you can add the logo’s image to your canvas, and then point that logo to your company’s website.
It’s simple: just select the image, and then click on the “Link to website” button on the Canvas toolbar.
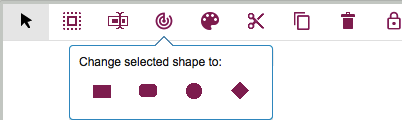
We finally got around to adding a feature to the Canvas that we have wanted for a while, but somehow never got around to building: now, with a single click, you can change a shape on a canvas, whether it is in a Whiteboard project or attached to a card on a Task Board or Scrum Board:
Change Shape
Here’s why you might need this: often when you are first creating a process flow diagram, you might use shapes — rectangles, ellipses, diamonds — in an arbitrary or careless way, which is just fine because at that time you are trying to be creative rather than meticulous.
But, as the canvas takes shape and matures, you might want to go back and standard the use of particular shapes (even if you don’t strictly follow the old conventions for drawing flowcharts, which we don’t either).
This new function makes it easy for you to select a bunch of shapes and change them all to a new shape. Previously, you had to create a new shape and put it in place to replace the old shape, which was pretty inconvenient when you had a bunch of nested canvases and a bunch of curved lines connecting all the shapes.
When you add files to your Kerika+Box projects, either as attachments to cards on Task Boards or Scrum Boards, or on canvases and Whiteboards, these get stored in your Box account.
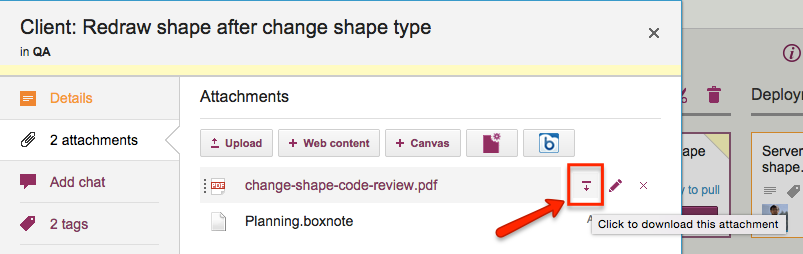
If you have a premium (enterprise) version of Box, you can directly download these attachments, instead of having to go through Box’s preview display first: just hover over an attached file, and you will see a “download” button appear:
Directly downloading files from Box
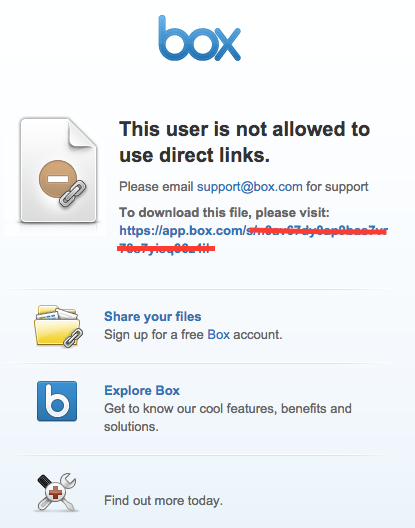
This works fine for enterprise users of Box, but if you are using the free version of Box, you will see a Box error page, like this:
We are starting to realize that a card’s status, e.g. “Ready for Review,” “Needs rework,” etc. is pretty important not just in terms of what they show about a card’s current state, but also in terms of its history.
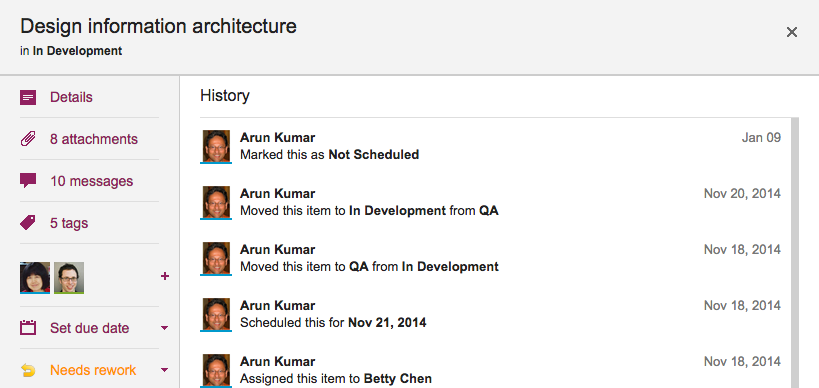
Previously, we weren’t tracking changes to a card’s status as part of the card’s history; without our latest release, that’s now a feature, so if you are wondering who put a card “On Hold”, you can just open the card’s History and Kerika will tell you:
Did you know that any Kerika canvas, whether on a standalone Whiteboard or attached to a card on a Task Board or Scrum Board, can be viewed as a regular Web page by folks who have been given access to the board?
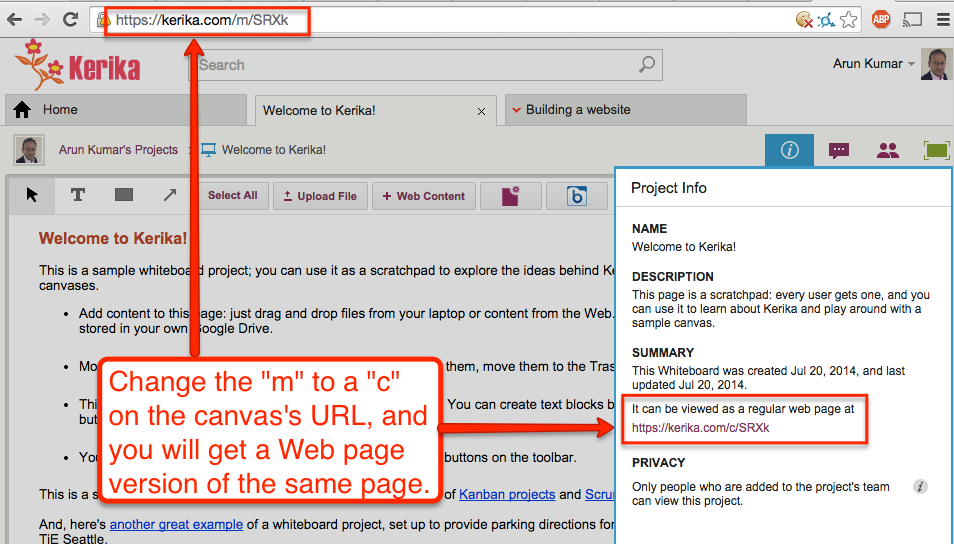
Kerika automatically creates a version of your canvas that can be viewed without the Kerika application: you can get this version by using the Project Info dialog, or, more simply, by just changing the “m” in the canvas’s URL to a “c”:
Web page version of Canvas
Every Kerika page has a URL of the form “https://kerika.com/m/…”
The URLs are randomly generated and unique: every card, every canvas, every board has a unique URL.
The first part of the URL is always of the form kerika.com/m/… There’s no special reason for using the “m”; it’s just part of Kerika’s history.
But if you change the “m” to a “c”, like in the example above where “https://kerika.com/m/SRXk” becomes “https://kerika.com/c/SRXk”, then you can view the Web page version of the canvas.
In the Web page version there are no buttons or other indications of the Kerika software: it looks and works just like a regular Web page.
Of course, security is not compromised: you cannot view the Web page version of a canvas if you aren’t permitted to access the Kerika canvas itself.
When you copy or cut an item on a Kerika board — a set of cards, or may be some things sitting on a Canvas — these objects are placed in a special Clipboard that sits on the Kerika server, not in your browser.
This is important to note for several reasons:
Because the Clipboard is on the server, you won’t lose the items if your network connection breaks before you have a chance to paste whatever you cut.
The Clipboard will hold on to the items for 20 minutes, to give you time to think about where you want to put them. (And, to recover from any network problems you may have experienced.)
If you don’t paste something that you had previously cut, the Clipboard “releases” it back to where it was originally, after waiting 20 minutes to go by while you ponder. But, if you are impatient, you can reverse your cut action sooner simply by clicking on the cut items, which continue to appear in a faded (greyed-out) appearance on your board.
Because the Clipboard is on the Kerika Server, other team members won’t see the change until you actually do the paste. So, for example, if you have cut some cards from a Task Board or Scrum Board and haven’t pasted them yet, your project team members will continue to see the items on the old board until you complete the paste.
And, finally, here’s a great feature, thanks to the Server Clipboard: one of your team members can be making changes to a card while you are in the process of cutting-and-pasting it, and those changes aren’t lost. That’s because the object is stored on the server rather than your browser, making it possible for your team members to make changes even as you are in the process of doing a cut-and-paste.
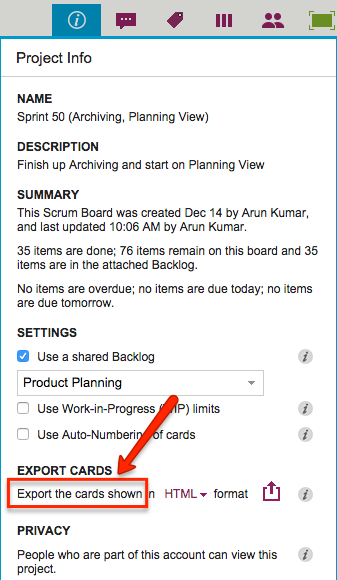
A tiny change in labeling in our latest version will, we hope, make it clear that Kerika’s Export feature is actually pretty smart about managing the amount of data that you export from a board:
Exporting subset of board
What used to say “Export cards” now says “Export the cards shown”.
“Cards shown” means just what it says: if you are hiding some columns from view, or filtering your view of the board to show just those cards that match particular colors or tags, then only the cards currently shown are going to be exported.
This makes it really easy for you to manage what information goes into an export: if you don’t want the Backlog of a Scrum Board to be included, for example, just hide the Backlog from view before clicking on the Export button.
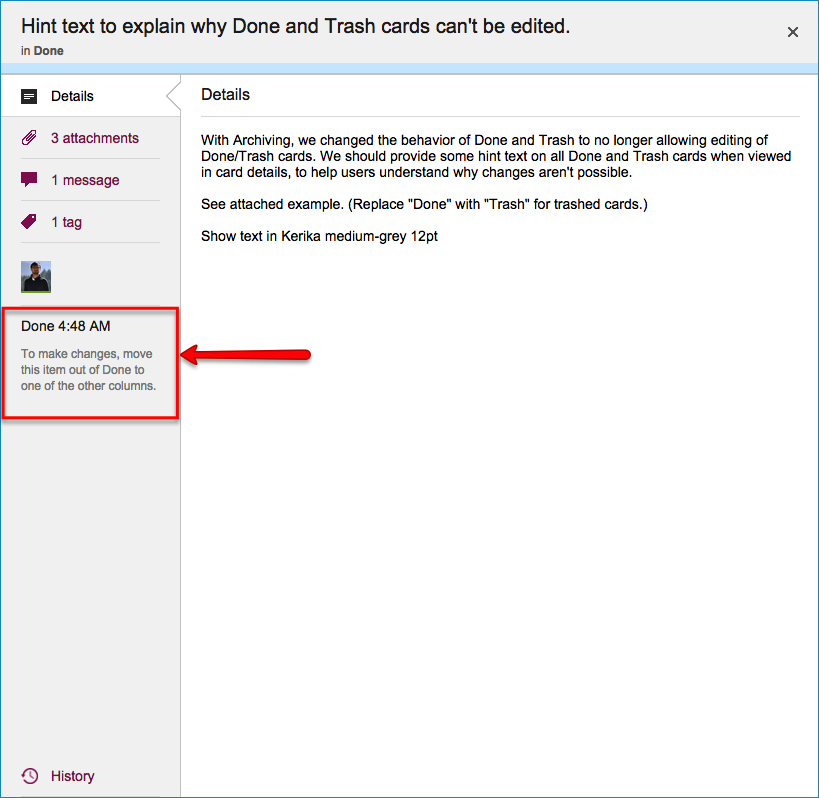
Cards in the Done or Trash column, of a Task Board or Scrum Board, cannot be modified without first moving them out of Done or Trash: this is different from how boards worked before, and we made this change as part of our recent update where we introduced the concept of Archives.
Done cards
There are a couple of reasons why we did this:
It seems like common-sense: if you have deleted a card, or marked it as Done, why would you be making changes to it? If the card needs changes, or someone wants to do chat or any other updates, that card isn’t really deleted or done, is it?
It matches the behavior of Archived Projects: when you move a project into the Archive in your account, that project is frozen in its current state, and remains frozen while it is in the Archive.For symmetry and ease of understanding of the concepts of “Done” and “Archive”, it made sense that Done cards should also be frozen.
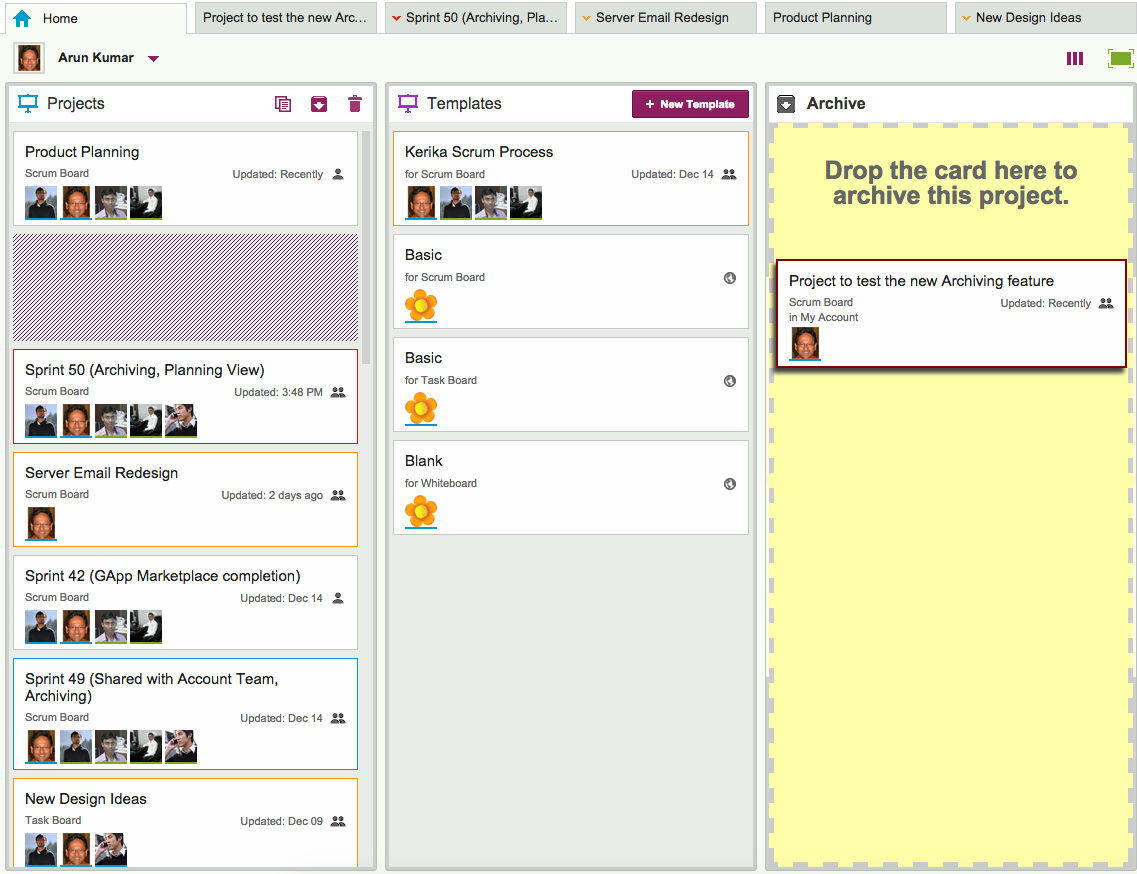
Here’s another new feature with our latest update: when a project is done, you can drag it to the Archive column on your Home page.
Archiving Projects
Archiving a project freezes it: no one can make any changes to it while it is in the Archive, so if you change your mind and want to make some changes to an archived project, you need to drag it back out of the Archive and into your Projects column.
All the documents attached to an Archived Project are frozen: the goal here is to preserve the final/completed state of a project and all its assets, so that later on if you need to investigate a problem — or deal with a FOIA request or some other legal disclosure requirement — you can do so with confidence.
All dates, status, chat and teams are also frozen: if someone was part of an Archived Project’s team at the time the project was moved to the Archive, they will continue to show up on that project team.
If a task had a due date and hadn’t yet been completed (i.e. the card hadn’t yet been moved to the Done column), that due date stays intact.
If the project was a Scrum Board, it will continue to stay attached to the Backlog it was using at the time the board got archived: when you view an archived Scrum Board, it will show that Backlog in it’s current state. This makes it easy to archive Scrum Boards that represent different Sprints that work off the same shared Backlog!
You can change your mind: If you need to work again on a previously archived project, just drag it out of the Archive column and drop it into the Projects column on your Home Page, and that will “un-archive” (restore) your project.
You can create templates from archived projects: if you drag an archived project and drop it into the Templates column on your Home Page, that will create a template based upon that project, while leaving the project in your Archive.