Our introduction of lazy loading, as part of our recent redesign, was originally limited to just three columns: Backlog (for Scrum Boards), Done, and Trash.
We figured that these columns were most likely to be very long, and would therefore benefit the most from implementing lazy loading.
This worked well; so well, in fact, that we have expanded our use of lazy loading to work with all columns, across all Task Boards and Scrum Boards.
The practical effect of this should be to reduce the time needed by the browser to load large boards, for all users, on all kinds of computers.
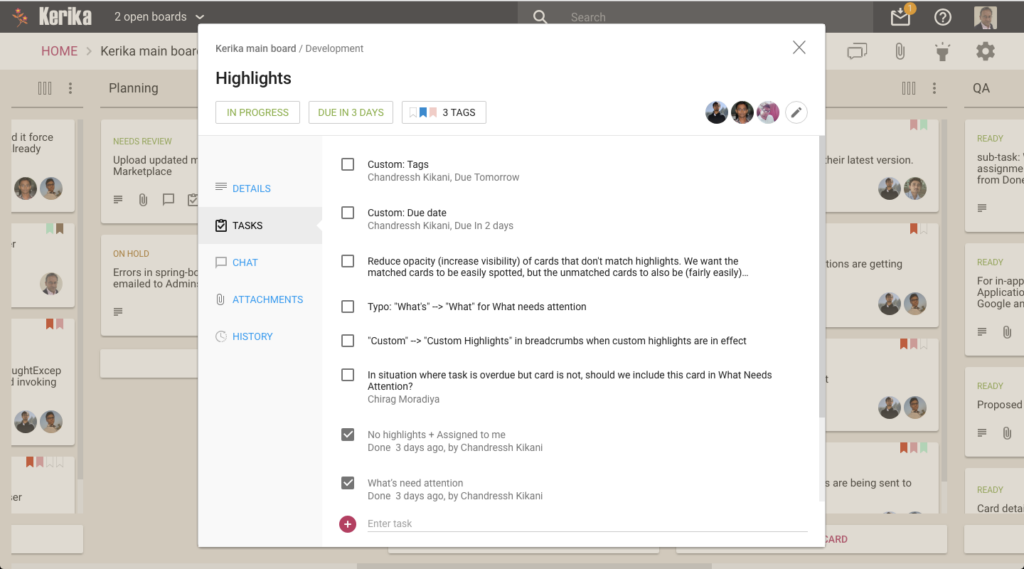
We have added a new feature to our Task Boards and Scrum Boards: you can now manage a list of tasks for each card on a board, like this:
Example of tasks in a card
Every card can have as many tasks as you like, organized in a simple, smart checklist.
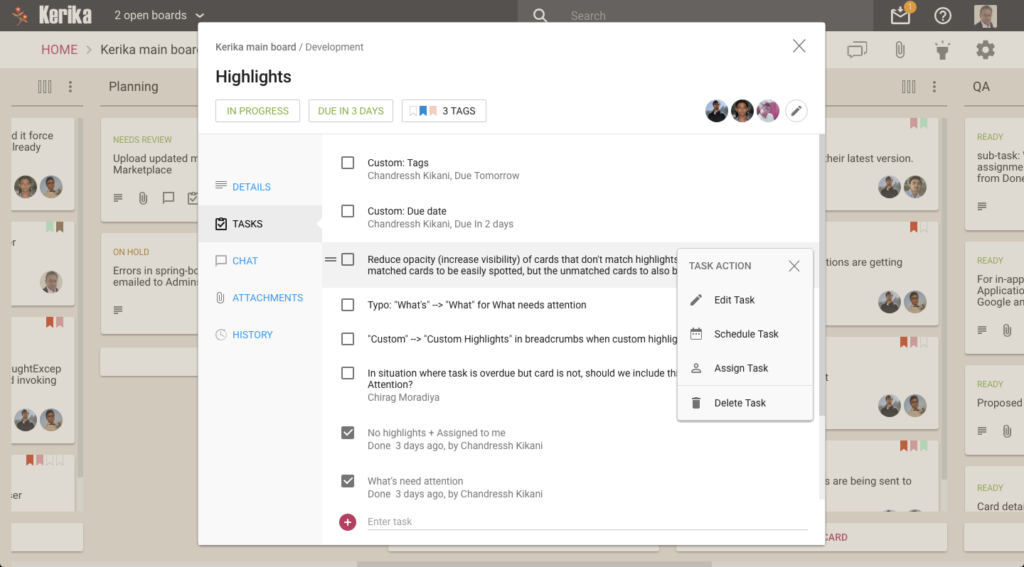
Individual tasks can be assigned (to one person at a time) and scheduled, and Kerika is smart about rolling up these assignments and due dates to reflect them on the card as well:
Managing tasks in a card
As you mark off tasks as Done, they slide to the bottom of the list to make it easy to see what remains to be done.
Another great new feature: if you upload a file on any card, canvas or board with the same name as a file that’s already attached to that particular card, canvas or board, Kerika will automatically keep track of these as being different versions of the same file. This makes it even easier to organize all your Kerika project files.
There’s no limit to the number of files you add, nor any limit on the size of these files.
When you add a file, to a card, board or canvas, Kerika automatically uploads that file and shares that with everyone who is part of your board’s team. You don’t have to do anything: Kerika makes sure that all the Team Members have read+write permission, and all the Visitors have read-only permission.
These files are stored in your Google Drive, if you are using Kerika+Google, or in your Box account, if you are using Kerika+Box, or with Kerika if you have signed up directly with an email address.
That’s how Kerika has always worked; what we have added is an automatic versioning feature that checks when you add a new file to see if has the same name, and type, as a file that’s already attached to that particular card, canvas or board.
If the file name and file type match something that you have already added, Kerika automatically treats that new file as a new version of the old file, rather than as a completely different file. This makes it really easy to manage your Kerika project files.
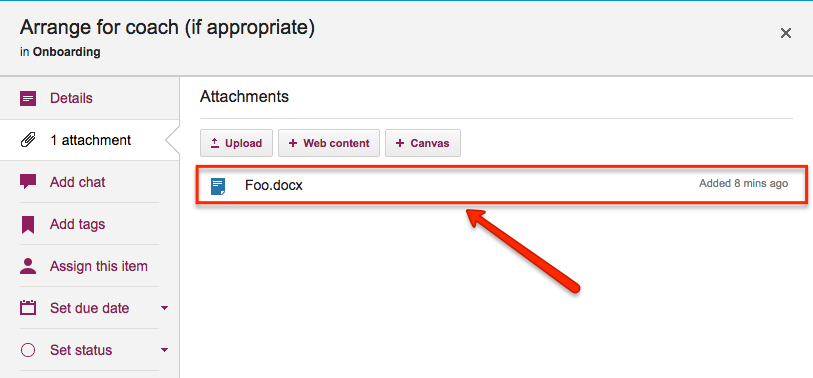
Here’s an example: this card has a file attached to it called “Foo.docx”.
File attached to a card
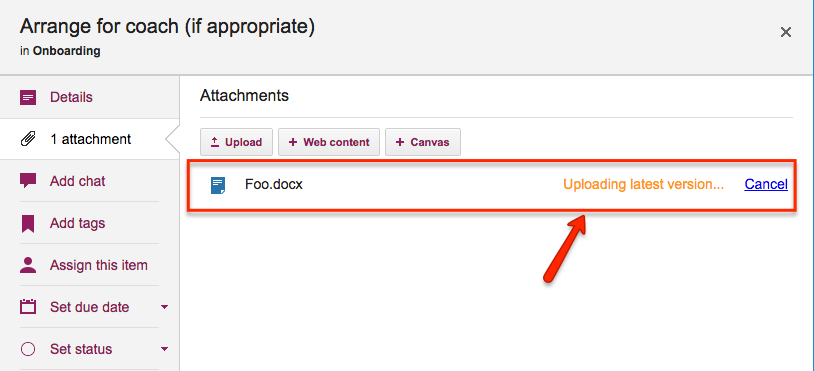
If a Team Member adds another file to this same card, also called “Foo.docx”, Kerika will treat that new file as a different version of the same Foo.docx, rather than as a completely different file:
Uploading a new version
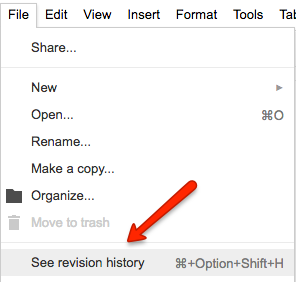
Accessing these older versions is easy: if your Kerika files are in being stored in your Google Drive, you can get the older versions using the Google Docs File menu:
Google revision history
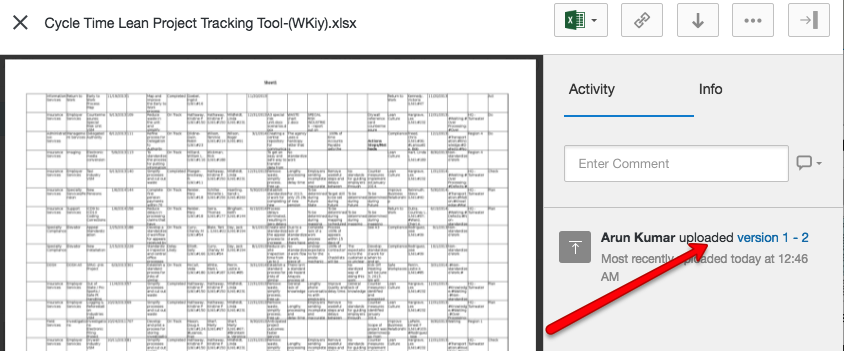
If your files are being stored in your Box account, you can access the older versions from the menu on the right side of Box’s preview window:
Box version history
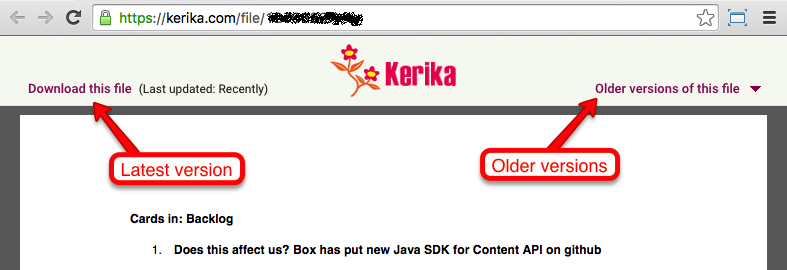
If you signed up directly with Kerika, you can access the older versions from within Kerika’s file preview:
File preview
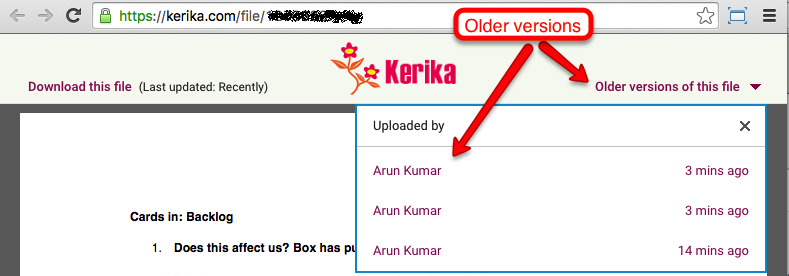
Clicking on the Older versions of this file link on the top right of this preview will give you a list of all the old versions of this file that Kerika has:
Older versions
So, that’s it: simple, easy, automatic tracking of multiple versions of your project files! Brought to you by Kerika, of course.
Thanks to Steven Thompson, a consultant working with some of our users at the City of Kent, for pointing this out to us:
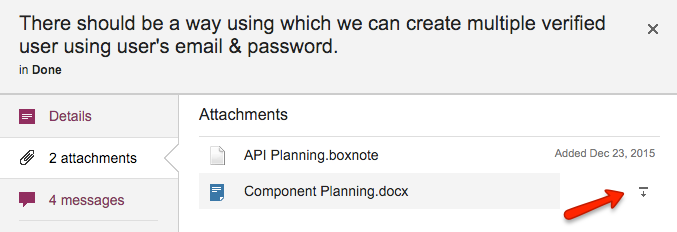
If a card is moved to Done, it preserves all its attachments, of course, but it is a little inconvenient to download these attachments directly from within Kerika itself: you would have to open that file in preview mode, and then download it.
We have simplified that process: now, if you hover over an attachment for a card that’s in Done, a “download” button will appear that will make it easier to download the attachment, without having to preview it first:
We used to refer to “Projects” and “Boards” somewhat interchangeably on our website, our blog and in the Kerika app itself.
There was no special reason for this: in our mind, a Project was clearly a Board, and vice-versa, and it never occurred to us that this might prove a source of confusion to anyone.
Well, we were wrong about that.
In the real world, people are very cautious about “starting a new project”, because this might involve getting formal administrative approval, budget allocation, staff changes, etc.
In other words, in the real world a “project” is a big deal.
Unlike so many other collaboration tools that make it difficult for you to create as many boards as you like, Kerika was always designed to make it very easy for you to redesign your work as needed: start new boards, move cards or canvases from one board to another (using Cut, Copy and Paste), and to move ideas and content from one context to another.
Many of our competitors don’t offer this kind of flexibility: either the software makes it hard, or their billing model actively discourages you from creating multiple boards.
That will never be the case with Kerika: we will always support flexibility in how you organize and manage your boards.
Still, our interchangeable use of “projects” and “boards” was definitely causing some confusion, which we have fixed with our latest release by using the term “Board” consistently and avoiding use of the term “Project”.
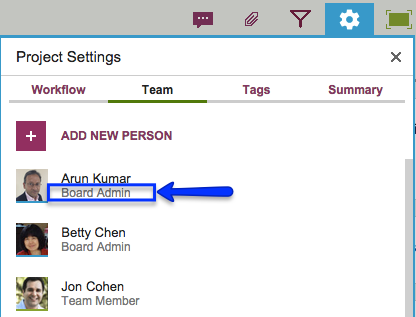
So, if you were a Project Leader previously, you are now a Board Admin on that board. Your rights and privileges remain the same, it’s just your title that changed.
Board Admin
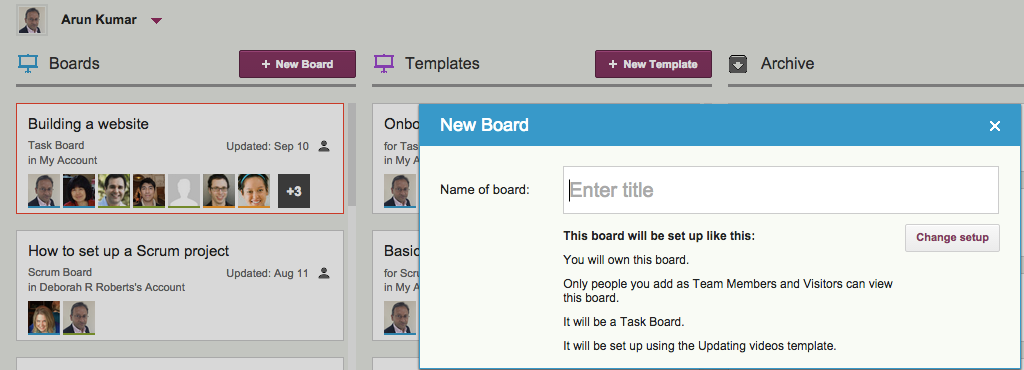
When you start a new board, what used to be called “New Project” is now labeled “New Board” to make it clear what you are doing:
If you are the only Project Leader on a Task Board, Scrum Board or Whiteboard, you will know when someone joins a board — after all, you would have approved their invitation in the first place.
But, if there are several Project Leaders for a board, it might be one of the others who added somebody to your board, and they might not have discussed this with you…
So, Kerika makes sure you know whenever the project team on any board has changed in any way:
If someone has joined,
If someone’s role has changed,
If someone has left.
(After all, someone could have left the team on their own, without telling you!)
Whenever there is a change in the project team, the Board Settings button on the top-right of the board will appear in orange.
Board Settings is highlighted
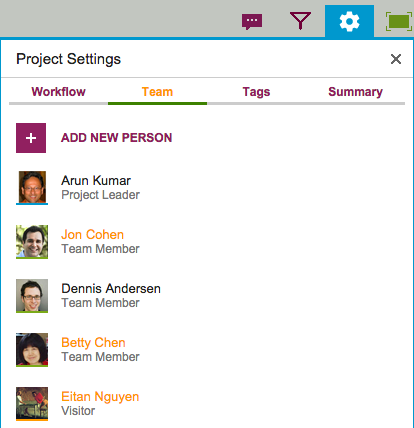
Click on the Board Settings button, and you will see the Team tab is highlighted: this is Kerika’s way of drawing your attention to this particular tab within the Board Settings display.
Team tab is highlighted
When you go over to the Team tab, you will see that the new person’s name is highlighted in orange, for a few seconds. It’s a discrete yet very effective notification from Kerika, drawing your attention to the presence of someone new on the team.
Changed roles are highlighted
The same kind of notification is used when someone’s role on the team is changed, e.g. from Team Member to Visitor.
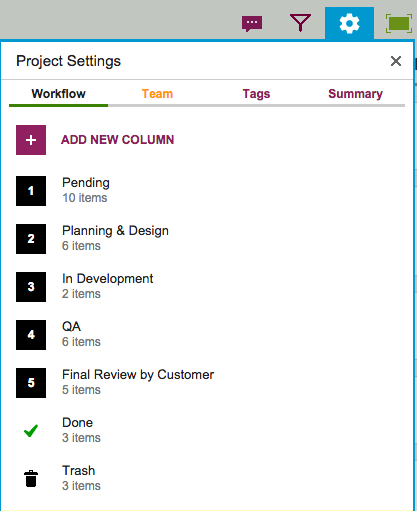
Kerika also tries to let you know when someone has left the team, by highlighting the Project Settings button in orange, and the Team tab within the Project Settings in orange as well.
Smart notifications, from Kerika — the only work management system that’s designed specially for distributed Lean and Agile teams :-)
We have added a new feature that should prove handy for a lot of folks: you can now add content — files from your laptop, images from your mobile or tablet, Web links from your Intranet or the Internet, or canvases — to a Task Board or Scrum Board itself.
If this sounds like something that was always there, maybe we need to say that differently: you used to have the ability to add content to a card, now you can add it to the board itself.
There are many situations we have encountered where we want to share content or a canvas with a team, but there wasn’t any obvious place to still it — no single card on the board that seemed like the right place to attach that content.
And that’s because the content we wanted to add was applicable across the entire board, not just relevant to a single card.
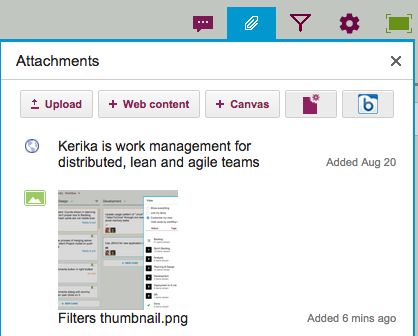
This was getting frustrating, so we decided to scratch our itch: a new button on the top-right area of your Kerika app will let you add files, Web links and canvases to the board itself:
Board Attachments
This should make some of you as happy as it has made us!
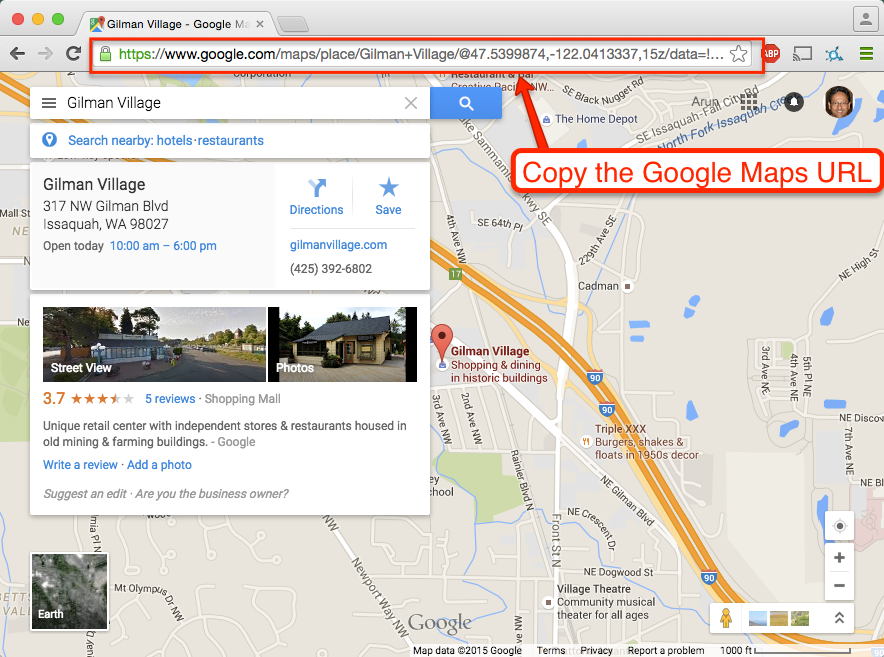
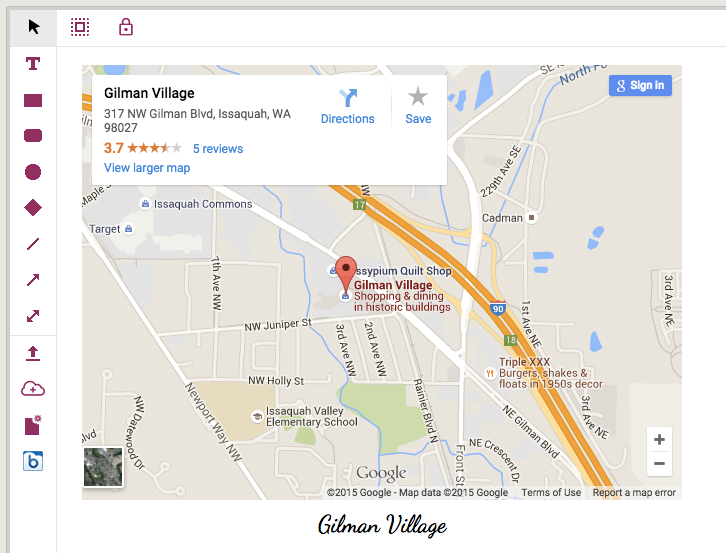
Did you know that you can embed a Google Map in your Kerika Whiteboards? It’s easy: just copy the Google Map’s URL:
Adding a Google Map to Canvas
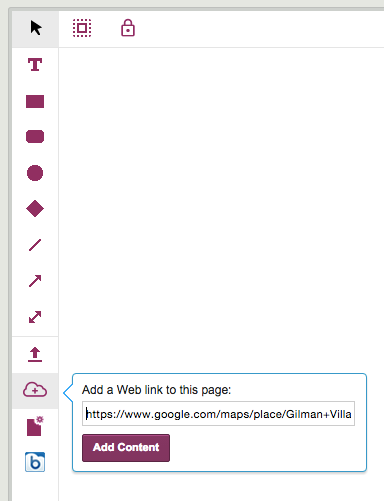
And paste it into the dialog box that appears when you click on the “Add Web Content” button on your canvas toolbar:
Add Web Content
Kerika automatically figures out the URL refers to a Google Map, and shows you an embedded map on your canvas:
Example of embedded Google Map
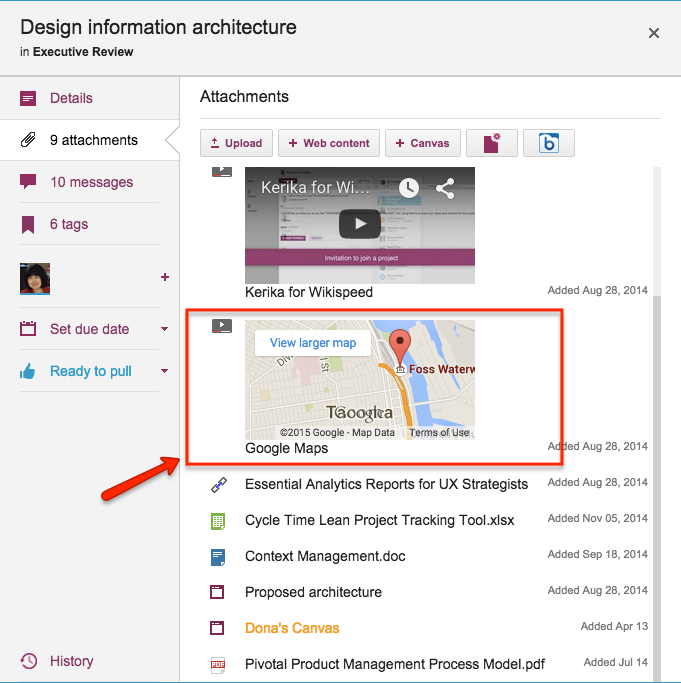
You can do the same thing with card attachments, for your Task Boards and Scrum Boards: Kerika shows a small thumbnail of the map in the list of attachments on your card:
It used to be that when you added content to a card — files from your laptop or Web content from your Intranet or the Internet, or a canvas — the newest content was added at the top of the list.
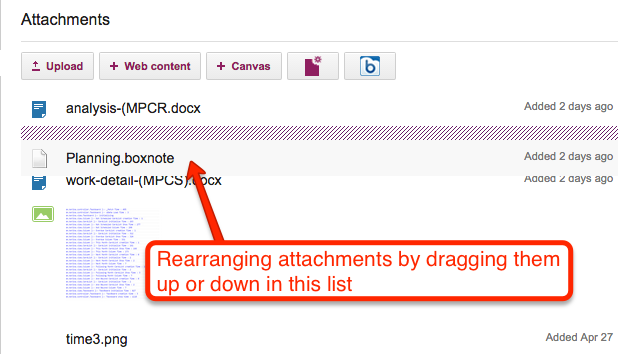
Of course, you could always rearrange them, by grabbing and dragging them up or down the list, but this it not a feature that many users discovered on their own :-(
Rearranging attachments on a card
Well, for greater consistency with how the chat and history are shown within a card’s details, we are now going to show attachments in chronological order as well — the latest files and URLs that you added to a card will appear at the bottom of the list, and the view of these will be automatically scrolled to show the latest items: